Microsoft Edge browser offers the option to sign in with a Microsoft account, which automatically connects and syncs browsing data on different devices. You can use the sync settings option to configure the data that you want to sync.
Sign in with the same Microsoft account on different devices to use the data sync feature.
In this guide, I have shared written instruction about:
Sign in and Sync Data from Edge on a Computer
You can create a personal Microsoft account for free if you do not have one. Or use your Microsoft 365 work or school account.
Sign in to the Edge browser and enable the data sync options based on your preferences. The data sync is a bi-directional process, i.e., you can sync the data from computer to mobile and vice-versa.
Step 1: Signing in to the Edge browser
- Launch the Microsoft Edge browser on your PC.
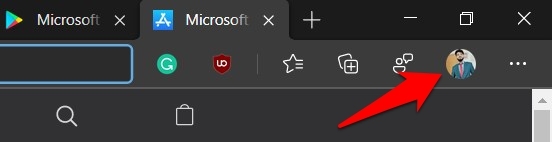
- Click on the Profile icon situated at the top right.
- Hit on the button.
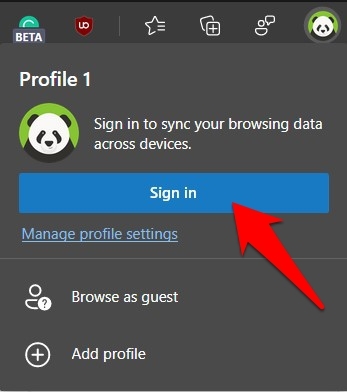

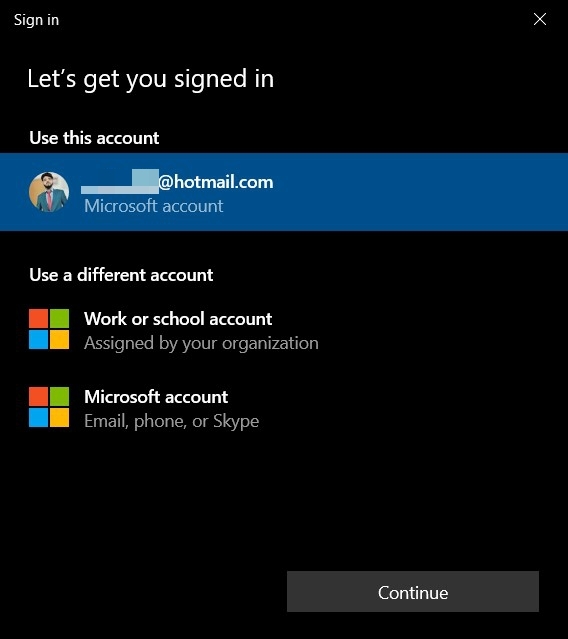
- Click the Microsoft Account option, type in your credentials, and confirm.
If you’re already signed in with a Microsoft account on Windows PC, you can directly use that account.
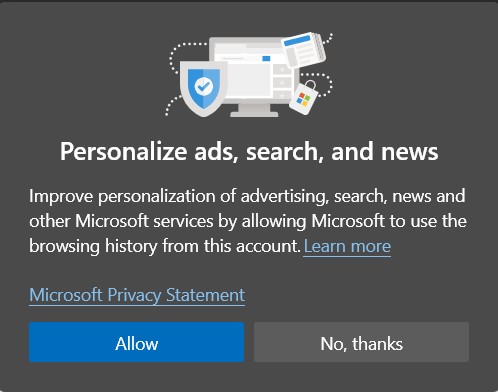
 You shall be getting a few pop-ups and personalized settings.
 - Click on the or button per your preferences.

- Complete the Sign-in process.
That’s it. Your account is now added. You can verify the same by clicking on your profile icon at the top right.
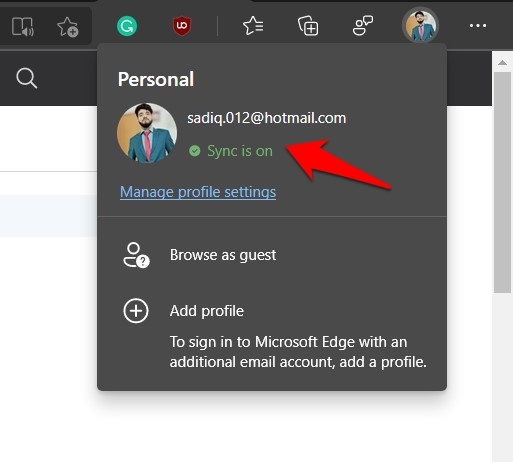
You will be signed in to your Microsoft Edge account using your Microsoft account.
Steps 2: Customizing Data Sync Settings
When you add your account, Microsoft Edge automatically enables the sync functionality. Your history, passwords, favorites, settings, addresses, and Collections will be synced across all the signed-in devices by default.
That said, you could easily tweak the sync settings and enable or disable the required ones as per your requirements.
- Launch the Microsoft Edge browser.
- Click on your Profile avatar situated at the top right.

- Click on the Manage Profile Settings link under Sync is on status.
- Select and navigate to the Sync section.
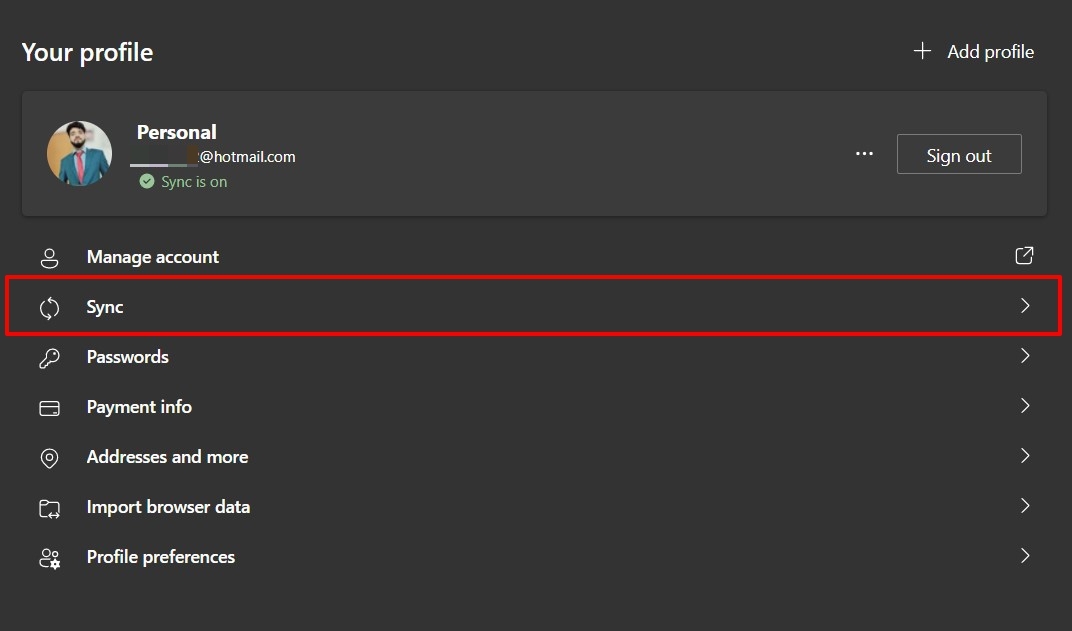
 It will display the list of sync services enabled or disabled.
 - Turn ON or OFF the toggle next to the desired option to enable/disable the sync service.
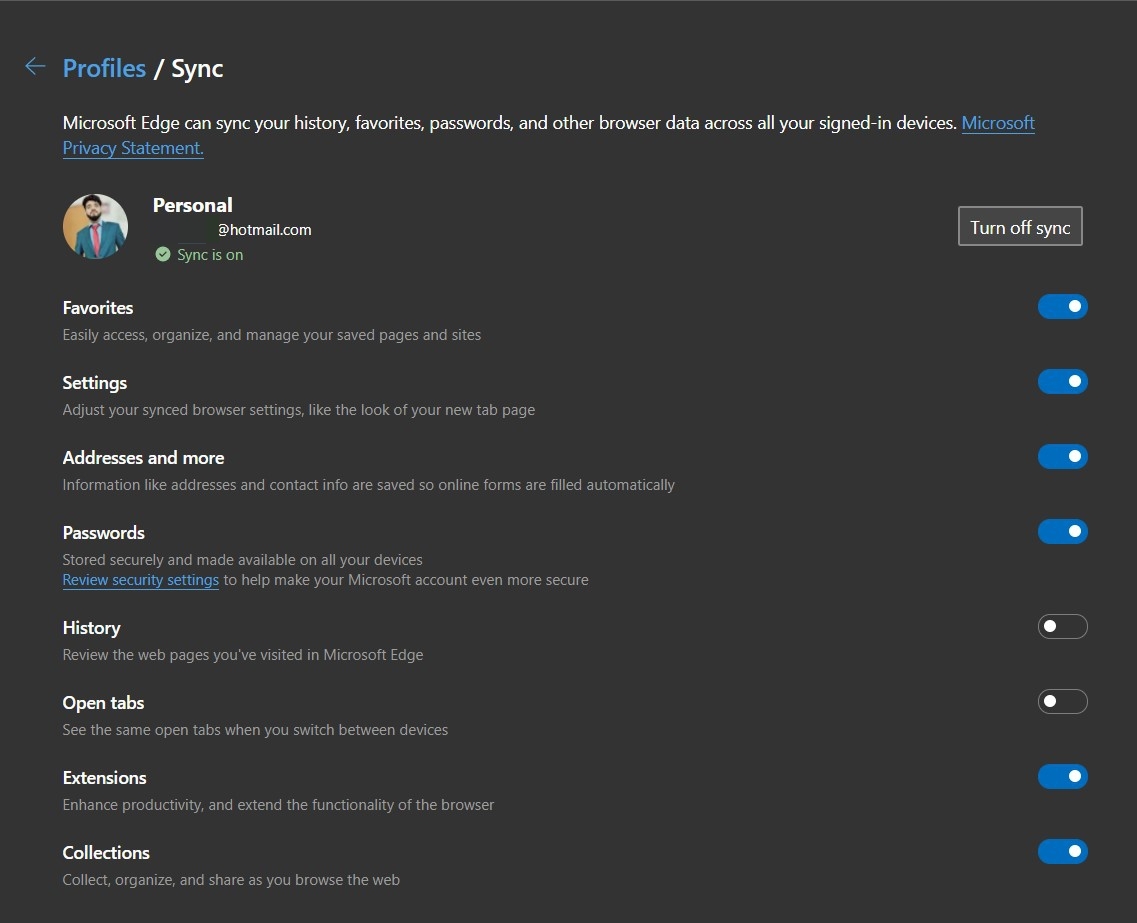

If you disable any service, the data will be stored within the browser but won’t be synced.
Sign in and Sync Data from Edge on Android
Now that we have finished setting up the Edge on the computer, we can similarly configure the Edge on Android. It is also available for iPhone or iPad.
Step 1: Signing in to Edge app
- Launch the Edge app on your mobile device.
- Tap on the user avatar icon situated at the top left.
- Hit on the Sign in with a Microsoft Account button.
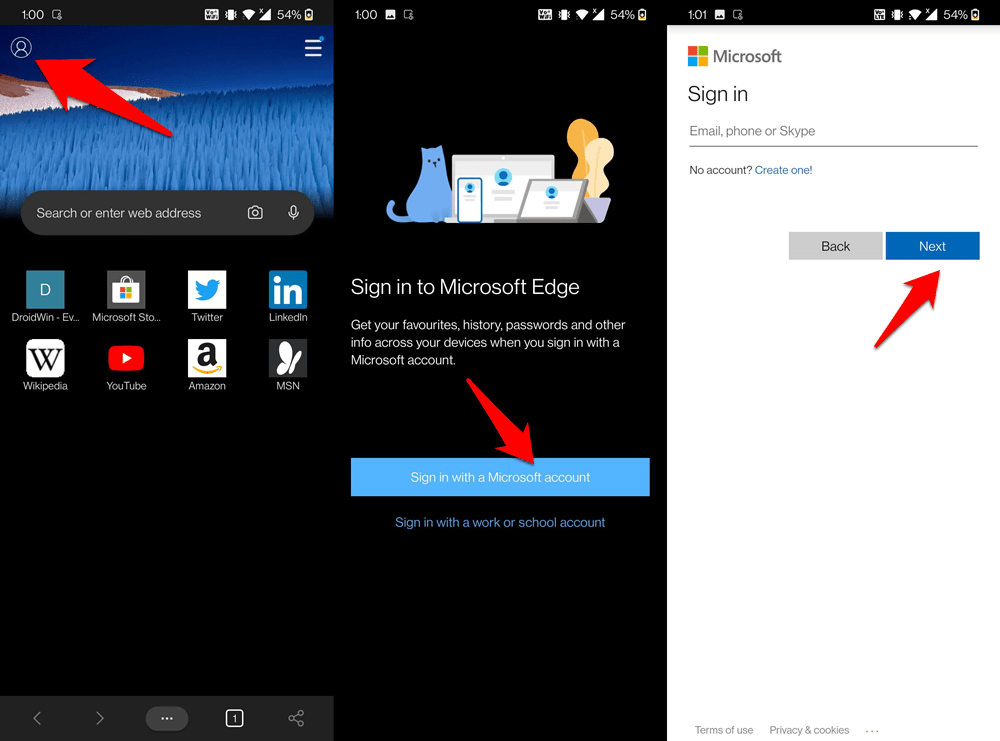

- Type in your Microsoft account credentials and complete the on-screen Sign-in process.
Your account will now be added.
As soon as that happens, you will be greeted with the Sync dialog box; tap on the button.
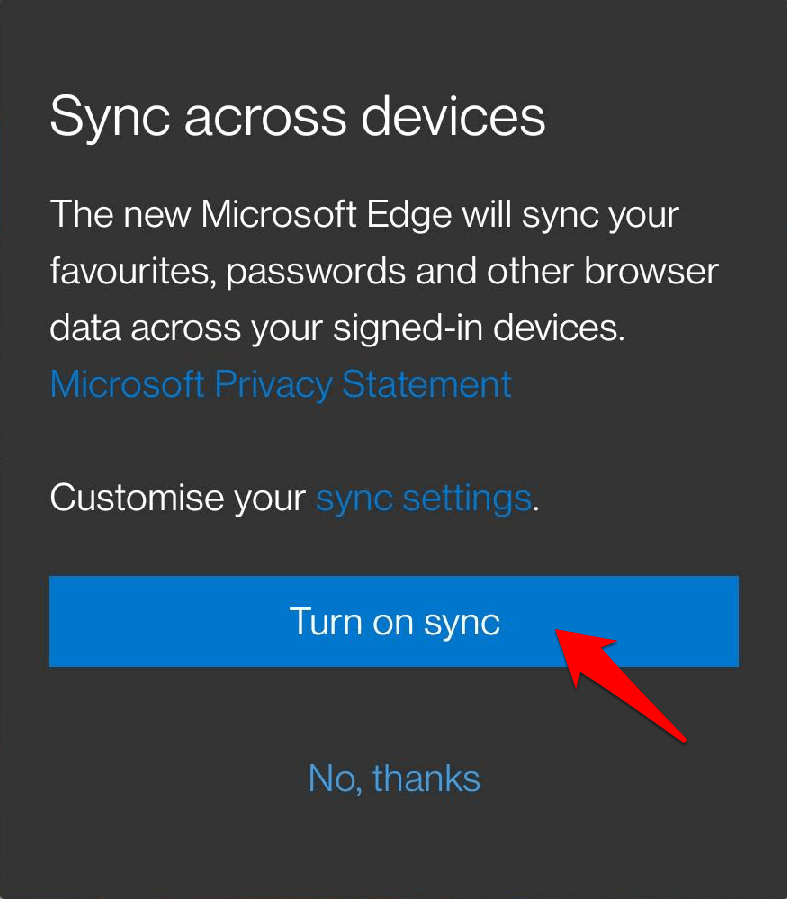
That’s it. Your profile is now added, and the sync process will automatically start.
Step 2: Customizing the Sync Settings
Like its PC counterpart, the browser’s mobile variant allows you to customize the sync settings. Here are the steps to customize sync settings:
- Launch the Microsoft Edge browser on Android.
- Tap on the profile icon situated at the top left.
- Select the Account Settings link from the menu that appears.

- Choose the Sync menu.
It will open the Sync settings menu with all the available services. - Enable or disable the checkbox for the desired data items you want to sync.
Based on your sync settings, the data will be synced between two or more devices signed in with the same Microsoft account.
Bottom Line
With the browser sync feature, we can seamlessly switch devices without the need to transfer data manually. The sync will happen only for the data types that were selected on the sync settings tab.
If you use the Edge at your work, then signing in with a Microsoft 365 account is suggested as that will keep your account in sync with Office documents.
Lastly, if you've any thoughts or feedback, then feel free to drop in below comment box. You can also report the outdated information.