You share your phone and don't want others seeing what you searched. Or Brave feels sluggish and you've heard clearing history might help. Here's how to delete your search history, step by step.
You'll also learn how to set Brave to auto-clear your data every time you exit, so you never have to remember.
In this guide, I have covered:
Contents
Clear Your Browsing History

ALERT: After removing the browsing history, you cannot open the Recently closed tabs.
When you clear browsing history, Brave removes the list of sites you’ve visited and the searches you’ve typed. This is useful if you share your phone or just want a fresh start.
- Launch the Brave app on your phone.
- Tap the
 icon.
icon. - Select History and tap on Clear Browsing Data.
- Set the Time Range to All time.
- Select the checkbox next to Browsing History.
- Tap .
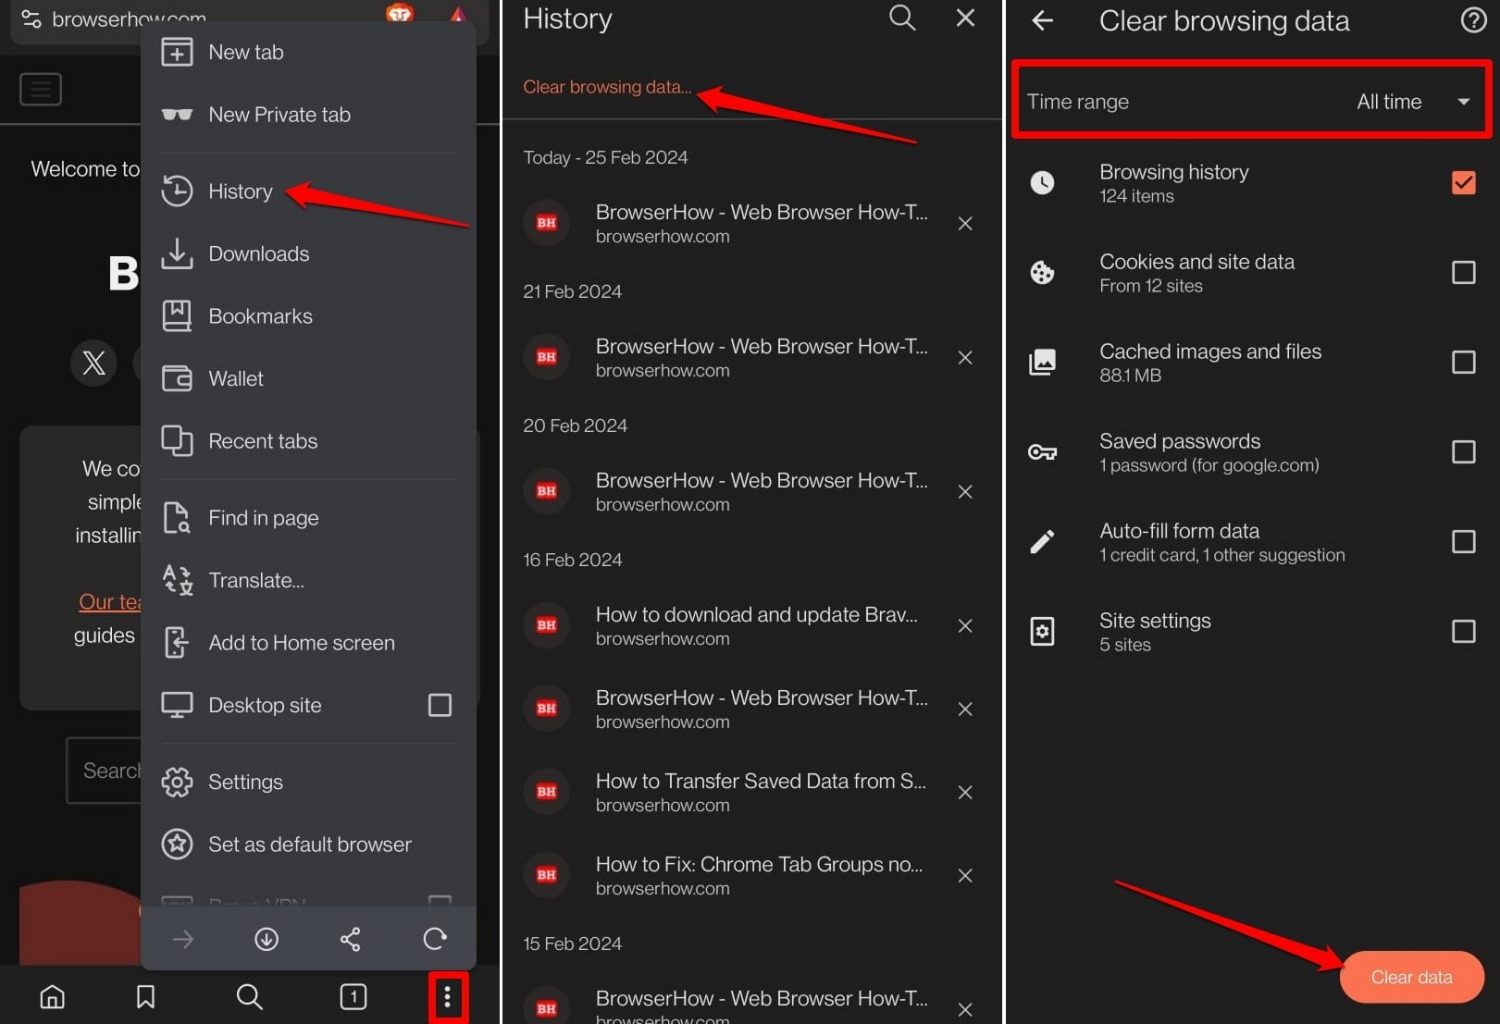

You may also select Cookies and Site Data and Cached Images and Files.
You’ll know it worked when you open History and see an empty list.
Clearing Browsing Data on Exiting a Session
If you’d rather not remember to clear history manually, set Brave to wipe it automatically every time you close the app.
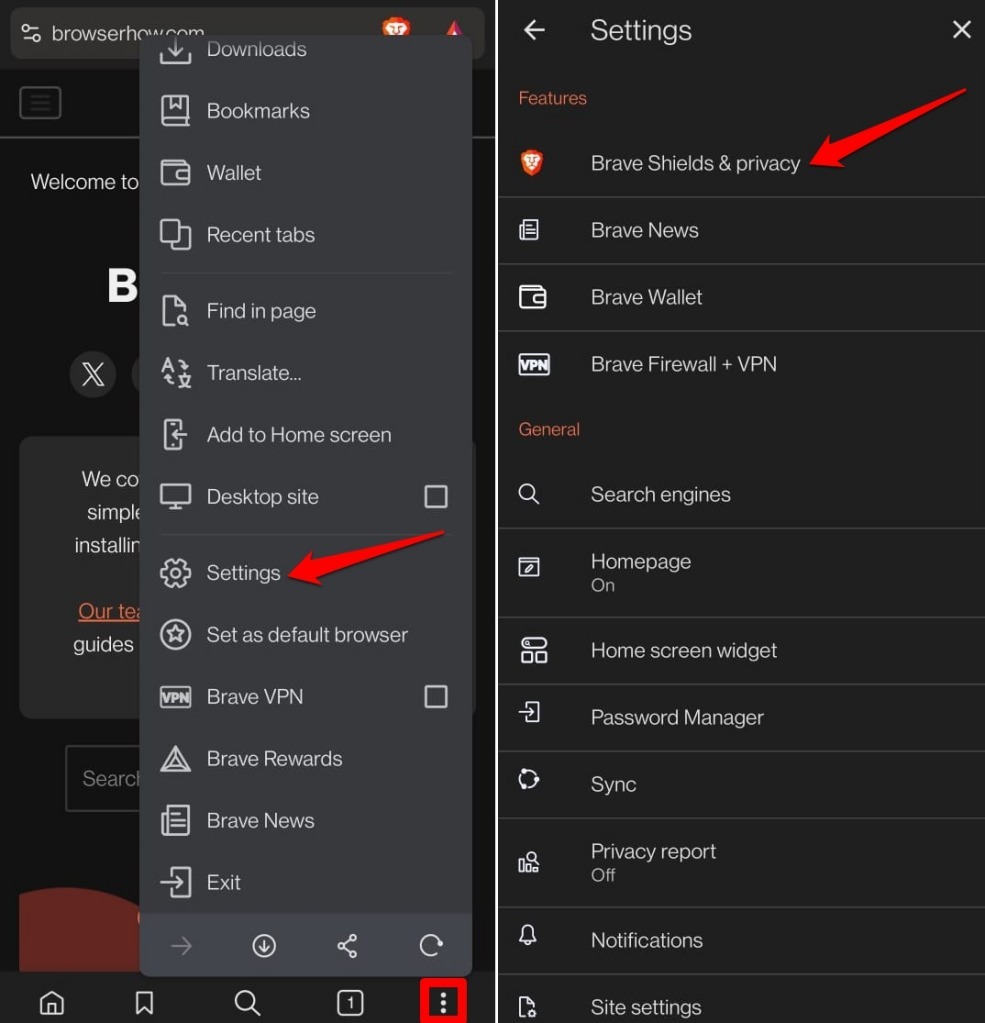
- Launch Brave browser.
- Tap the icon and select Settings.
- Access Brave Shields & Privacy.
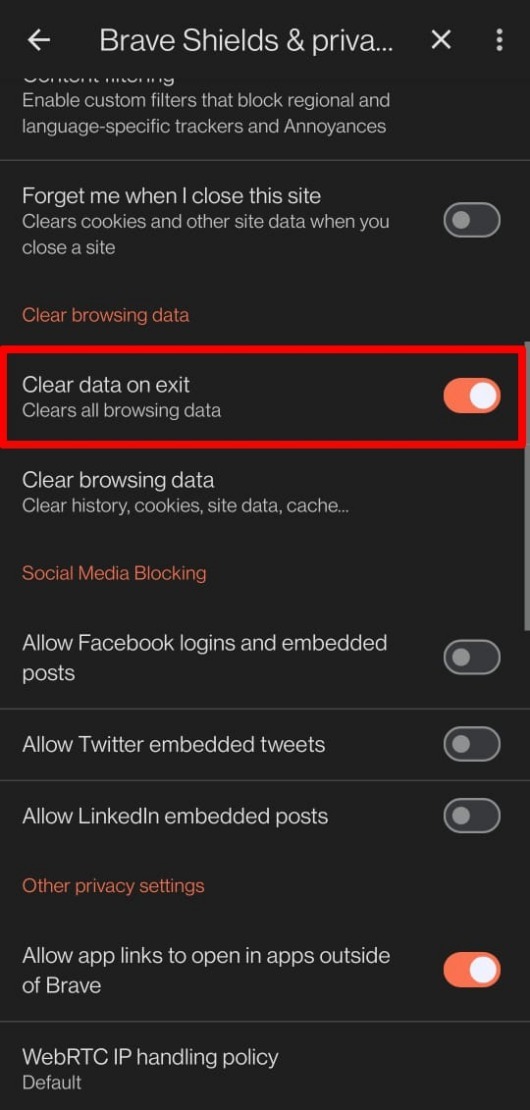
- Scroll to the section Clear Browsing Data.
- Tap the toggle next to Clear Data on Exit.
Bottom Line
Now your search history is gone, or will be automatically cleared. If Brave was acting up, clearing history often fixes unresponsive tabs or odd behavior. You’ll know it worked when the browser feels snappy again.