The Edge browser stores the IP addresses of websites visited in the built-in DNS cache feature. This feature is designed to reduce lookup times for frequently visited sites. However, an outdated or corrupt cache can cause errors, hence the need for a cache flush.
You can navigate to “edge://net-internals/#dns” and select “Clear host cache” to clear the DNS cache from Edge on a computer or Android. However, for iPhone or iPad, you can use Airplane Mode, Reboot device, or Reset Network Settings.
Note: Web browsers like Chrome, Edge, etc., have built-in DNS host and cache. You should clear your device’s DNS cache if you have a network-related problem within your system or any other application.
In this guide, I have shared written instruction about:
Flush the DNS Cache in Edge on a Computer
The site you visit in your Edge browser records the domain address and rendered IP address in the DNS cache. If the IP address of a web server changes, your browser might refer to the cached records and still try to connect to the old IP address, which results in errors. Hence, flushing the DNS cache will resolve the connectivity issue. Here are the steps to follow:
- Launch the Edge browser on your computer device.
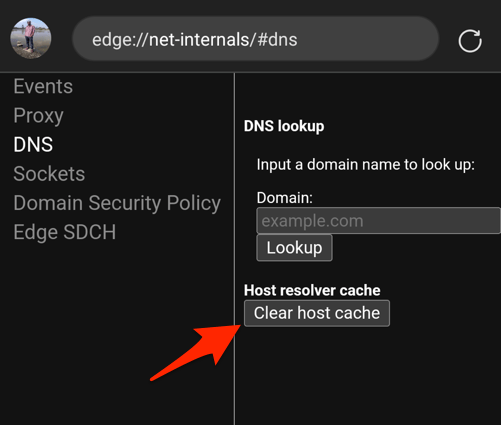
- Type edge://net-internals/#dns in the address bar and hit key.
It will open the DNS lookup page within Edge. - Click the button for the Host resolver cache option.
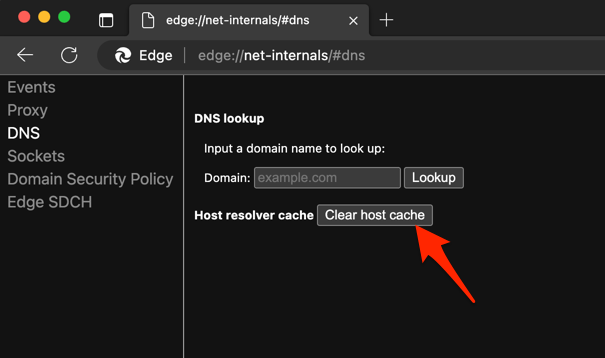

After clearing the host cache, you can check the URL to see if it resolves to the correct IP address and open the website without issue. You can also use the Domain Lookup service available on the same page.
Note: Clearing the DNS cache won’t impact saved browsing data, stored passwords, or bookmarks. It will only reset the DNS cache of the websites you visited.
Clear DNS Host Cache in Edge on Android
Like a computer browser, Edge for Android uses built-in DNS instead of relying on Android’s DNS. Hence, clearing the Android DNS cache will not affect the browser DNS cache.
If you have page loading issues, you should clear the Edge DNS host cache to resolve the same.
- Launch the Microsoft Edge on your Android Phone.
- Type edge://net-internals/#dns in the address bar.
- Click the button in the right pane for the Host resolver cache option.

You can look up the domain name (browserhow.com) in the Domain field to verify the IP address before and after clearing the host cache. If the site with the issue has changed its resolving IP address, the lookup results will display the same.
Clear DNS Cache in Edge on iPhone and iPad
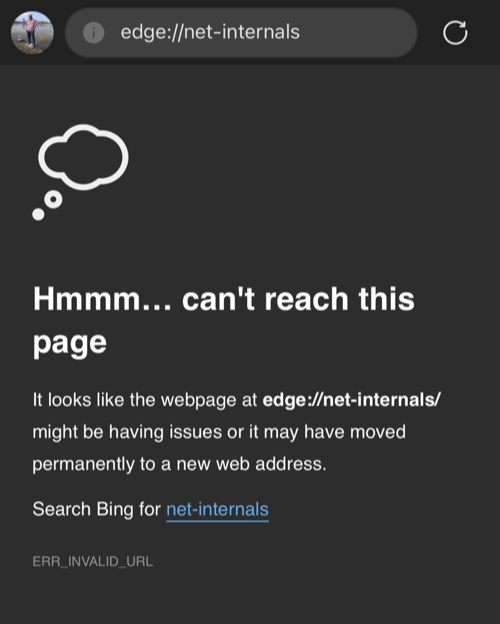
Unfortunately, like most browsers (Chrome, Safari, etc.) running on iOS or iPadOS, the Edge browser for iPhone or iPad does not support DNS cache. If you visit the edge://net-internals/#dns in the address bar, it will result in an ERR_INVALID_URL error.
The iPhone or iPad does not have any option to flush only the DNS cache, even on the Network Settings page. However, Airplane mode is the easy way to clear the DNS cache on iPhone or iPad.
Using Airplane Mode
When you Turn On, and Off the Airplane mode, the iOS or iPadOS automatically reset the network settings along with the stored DNS cache. Here are the steps to follow:
- Slide down to open the Control Center on your device.
- Tap on the Airplane mode button to Turn On.
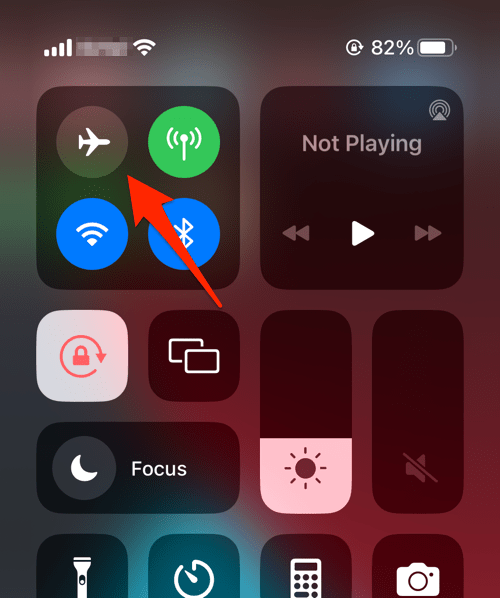

- Wait for a few seconds and then Turn Off the Airplane mode.
The saved network details will be flushed, and new settings and DNS records will be recorded. Alternatively, Rebooting the iPhone or iPad device also helps to flush the DNS cache.
Reset Network Settings
A more complex way to clear the Edge DNS cache is by using the Reset Network settings option. Here are the steps to follow:
- Open the Device Settings app on your iPhone or iPad.
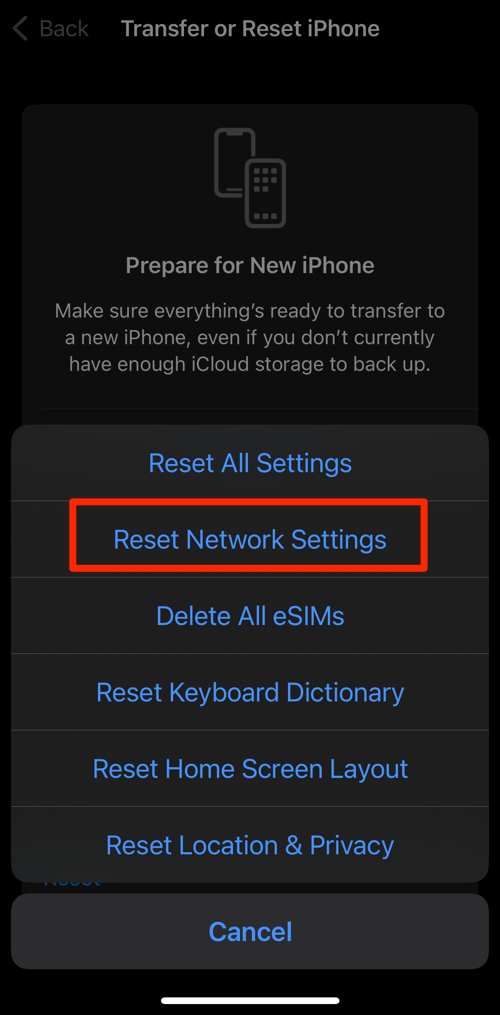
- Tap the General settings, and scroll to the bottom to select the Transfer or Reset iPhone option.
- Tap on the Reset command and select the Reset Network Settings option.

While the Reset Network Settings option is not recommended unless you have a major network-related issue, you can use the Airplane mode instead to reset the DNS cache on Edge for iPhone or iPad.
Bottom Line
The Edge browser has a dedicated DNS host storage independent of your system DNS. The DNS resolver caching is available in computer and Android browsers. However, you need to rely on the iPhone or iPad airplane mode or network settings page for flushing the same.
If the network or loading issue isn’t resolved, you can also consider clearing the Edge browser cache and cookies and later clearing the DNS cache for better results.
A similar feature is also available on other browsers like Google Chrome and Apple Safari, clearing the DNS cache on any devices.
Lastly, if you've any thoughts or feedback, then feel free to drop in below comment box. You can also report the outdated information.