The internet needs the DNS to resolve the domain name into the server IP address, which shall load the correct website in our web browser.
If the IP address of the domain is changed, DNS will not be able to connect the IP address, resulting in errors. Hence, clearing the cached DNS records will help fetch the new addresses.
Web browsers have their own DNS host and cache, independent of system DNS. If you have a network-related problem with the browser, say, Chrome, you should flush Chrome’s DNS cache and so on.
In this guide, I have shared written instruction about:
Clear the Network DNS Cache of Windows PC
The command prompt is one of the easiest ways to clear the DNS cache from Windows. You only need to execute two simple code words to flush the stored DNS cache.
- Click on the Start menu from the taskbar and search for Command Prompt in the search bar.
- Select the Run as administrator option.
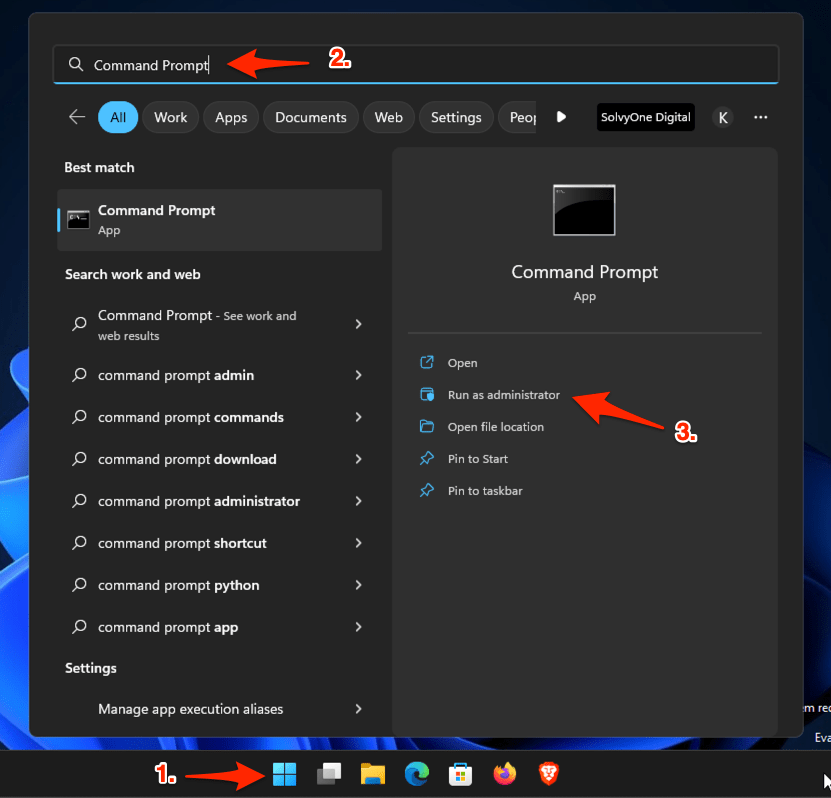
 It will launch the command prompt window with administrator permissions.
 - Type the command ipconfig /flushdns and press key.
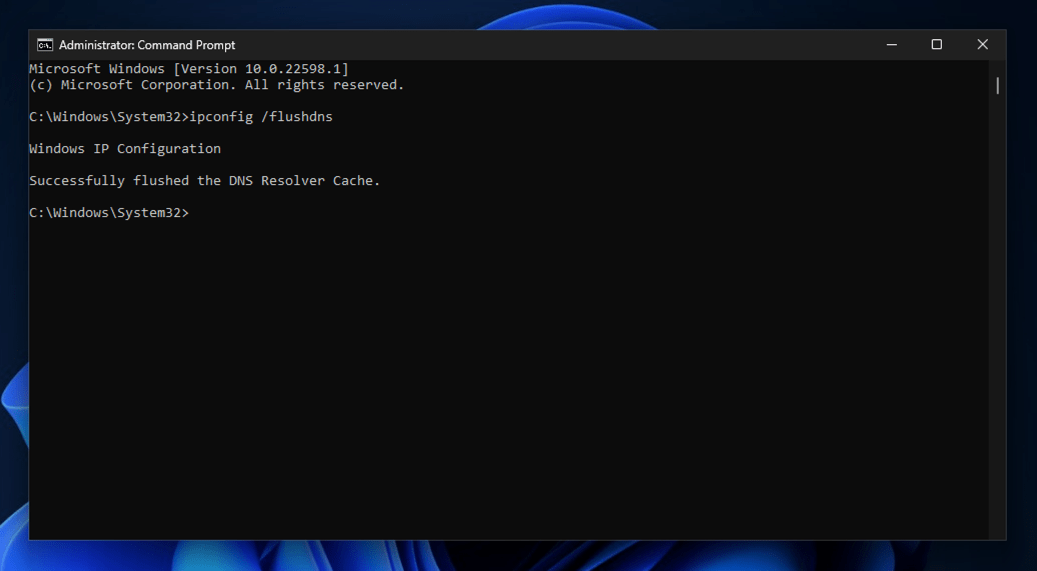

- You should see a message: Windows IP Configuration Successfully flushed the DNS Resolver Cache.
The DNS cache of the Windows PC has been cleared. If you revisit a domain name, the fresh IP address will be fetched and assigned to the domain name.
Flush the DNS Cache of the Mac
Like the Windows PC, you can use the Terminal app on macOS to clear the cache stored in the network settings. Here are the steps to clear the DNS cache on macOS:
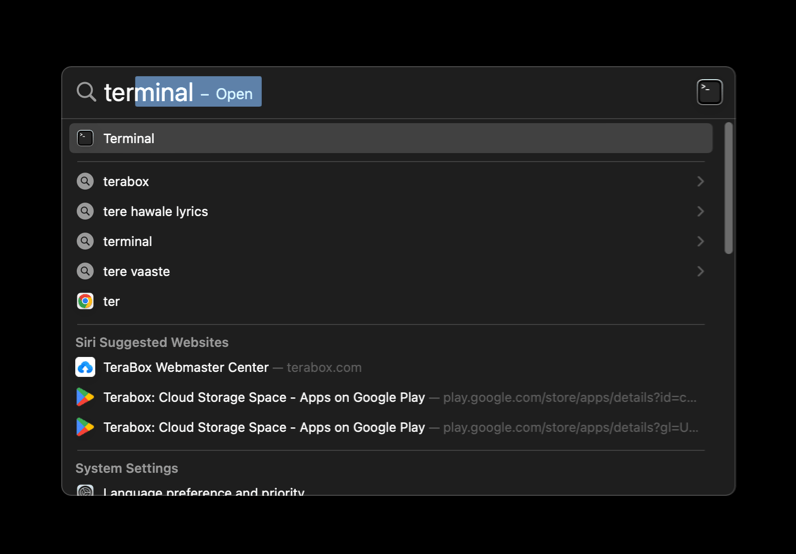
- Invoke Spotlight Search using + keys on your macOS.
- Search and open the Terminal app.

- Type the following command and press key:
sudo killall -HUP mDNSResponder && sudo dscacheutil -flushcache
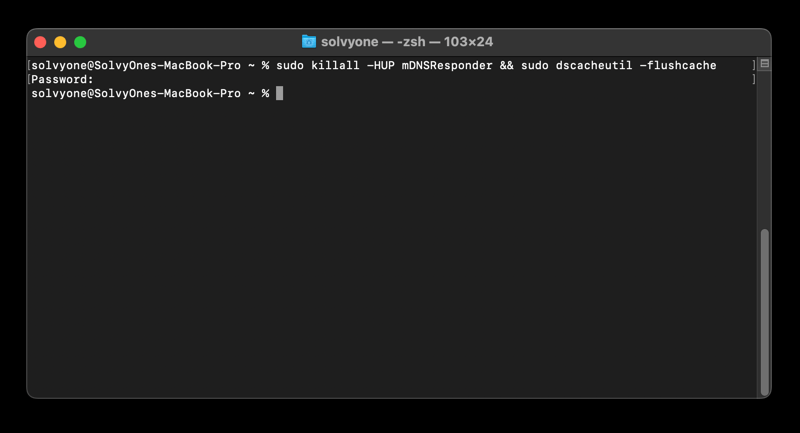

It might prompt you to enter your user password to execute the sudo user command. That’s it; DNS records are flushed and cleared from the macOS system.
Clear the Network DNS Cache of Android Devices
Flushing the DNS cache on Android smartphones is tricky. It doesn’t have a dedicated DNS cache-clearing option. However, if required, it does have a DNS Settings page, which helps configure the DNS addresses (like Google DNS, CloudFlare DNS, etc.).
The only way to clear the DNS cache is by using the Reset Network Settings option from the Internet settings page. Here are the steps to follow:
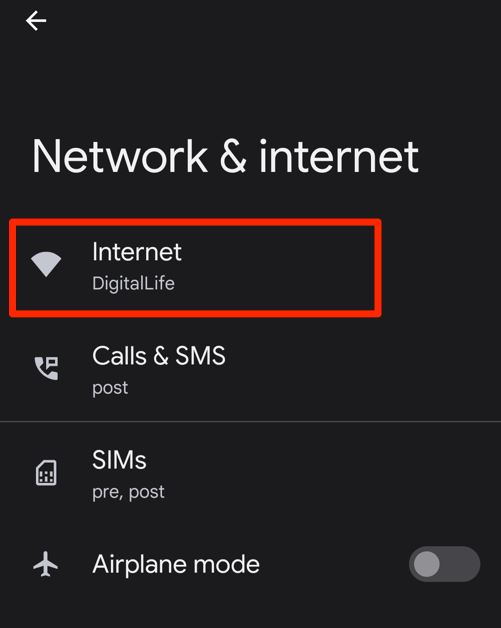
- Open the Settings app on your Android Phone.
- Select Network & Internet settings and open the Internet menu.

- Tap the Reset Internet Settings command button from the top-right corner.
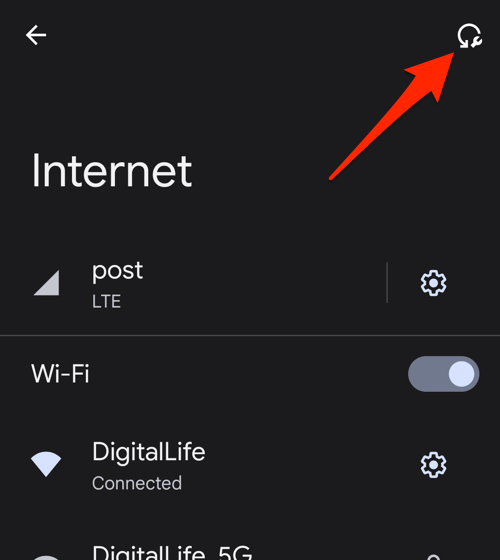

It will immediately reset the connected network settings and clear the DNS cache stored in the Android phone. You will have to reconnect with your Wi-Fi network after resetting.
Reset Network Settings in Android phones will not clear the saved Wi-Fi password.
To yield better results, you can also consider combining Airplane Mode and Reset Network Settings for a complete DNS cache wipeout.
Reset the DNS Cache of iPhone or iPad
Like the Android phone, even the iPhone or iPad does not have the DNS cache clearing option. We have to rely on the network connection option to reset. One of the easiest ways is using the Airplane mode, which will disconnect and reconnect the network connection while performing the DNS flush.
Follow these steps to clear the DNS cache using the Airplane mode on your iPhone or iPad:
- Slide down to open the Control Center on your device.
- Tap on the Airplane mode button to Turn it On.


- Wait for a few seconds and then Turn Off the Airplane mode.
It will disable and enable the active network connection and clear the stored DNS cache.
Alternatively, there is an advanced but more complex way to clear the DNS cache using the Reset Network settings option under the Settings app > General > Transfer or Reset iPhone > Reset.
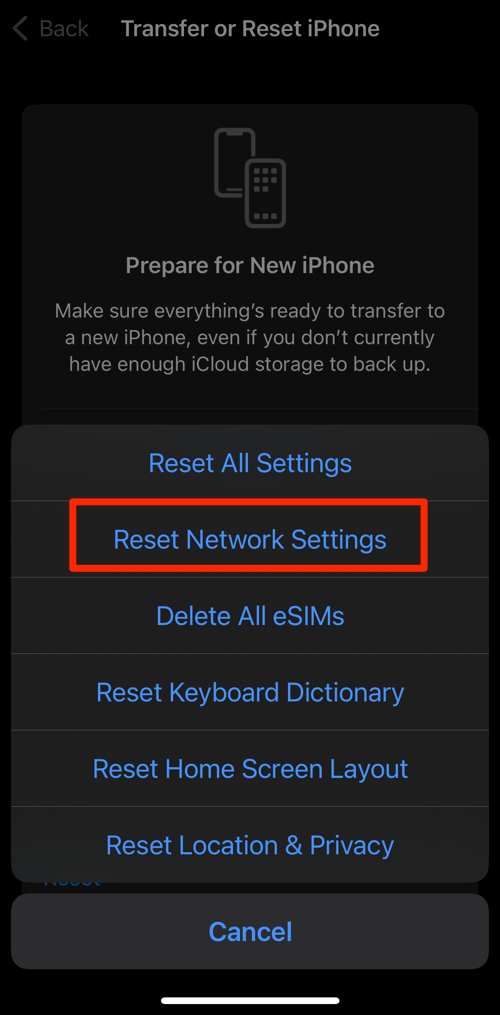
It will flush the DNS cache along with all your settings on your iPhone or iPad device.
Bottom Line
DNS is the backbone of networks and connections for the internet. It helps identify and resolve the domain name with a correct IP address to load the site in split seconds.
The cached DNS settings improve the speed but occasionally result in errors due to outdated records. Clearing or flushing the DNS cache can help update outdated records and resolve network-related issues.
While most systems do have an automated way to clear the DNS cache, it works in a fixed time interval like an hour, a week, etc., which the webmaster sets within the domain registrar console. Hence, manually clearing the DNS cache will help to fix the immediate site loading problems.
Lastly, if you've any thoughts or feedback, then feel free to drop in below comment box. You can also report the outdated information.