Constant pop-ups, auto-play videos, and banner ads that obscure the content aren't just annoying. They slow down page loads and eat through your mobile data. Brave browser blocks most of them by default, but you can switch to aggressive ad blocking when a site still serves intrusive ads.
If you ever need to allow ads on a trusted site, you can disable Shields for that page in a few taps. We'll show you how to do both, so you can browse without distractions and still support sites you trust.
In this guide, I have covered:
Contents
Block Ads in Brave app
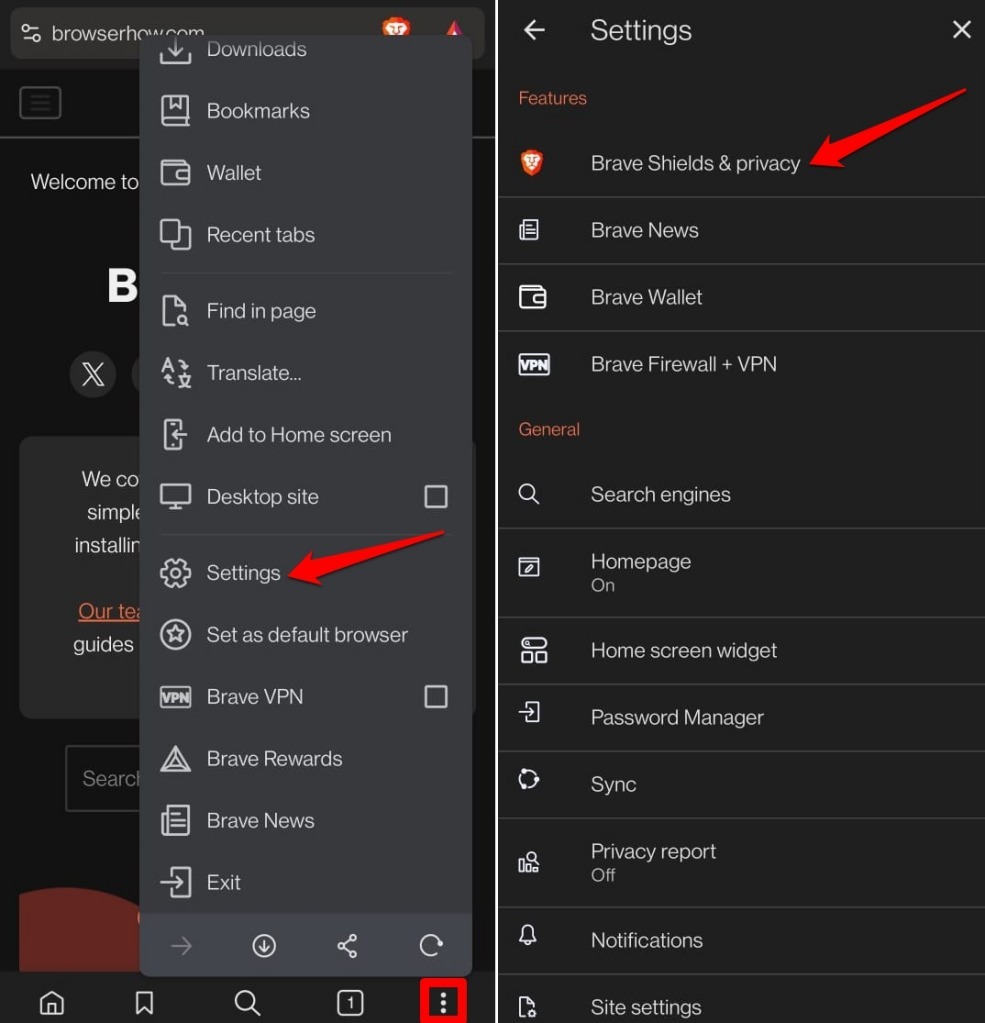
- Open Brave on your phone.
- Tap the
 icon and select Settings.
 - Under Features, tap Brave Shields & Privacy.
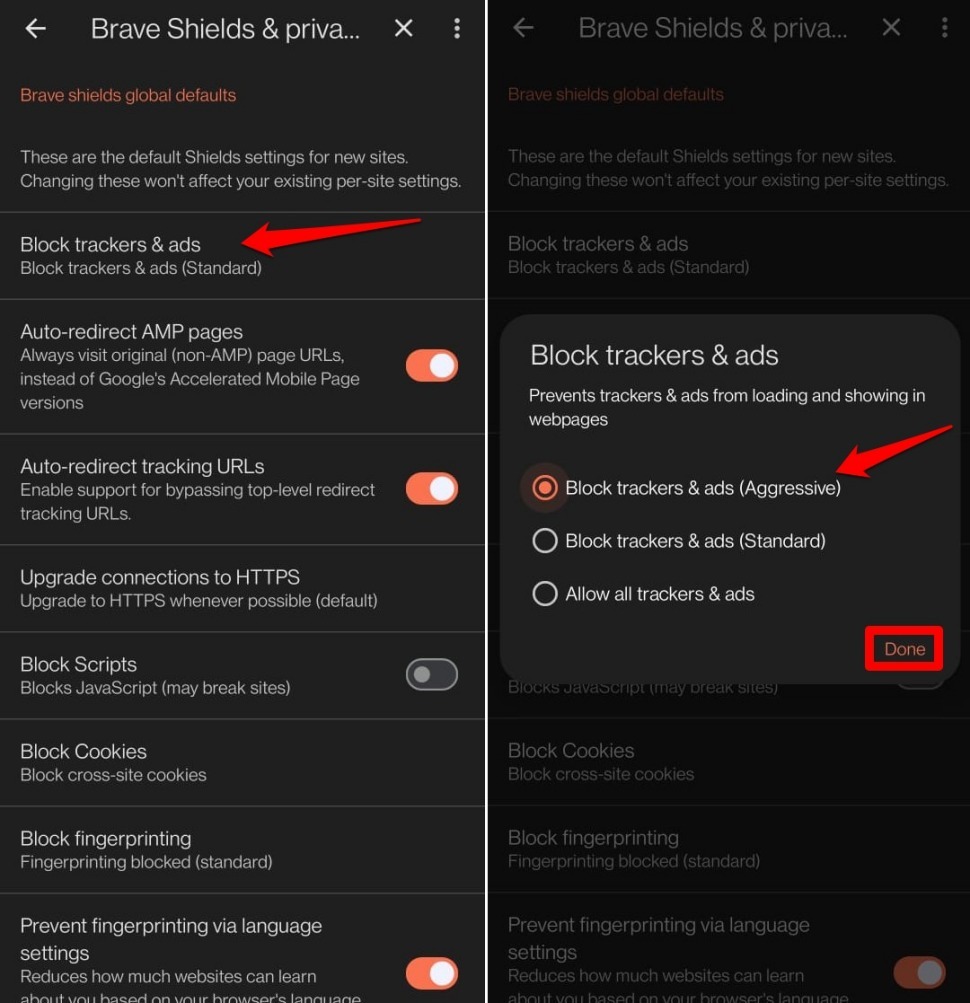
- Select Trackers & ads blocking.
- Choose Aggressive to block the most ads, or Standard for default protection.
- Tap the back arrow. Your change is saved automatically.

Some sites may block you entirely and ask you to disable your ad blocker. If you see a message like that, you can quickly allow ads for that site using the steps in the next section.
Allow Ads on a Site in Brave app
- Open Brave.
- Tap the icon and select Settings.
- Under Features, tap Brave Shields & Privacy.
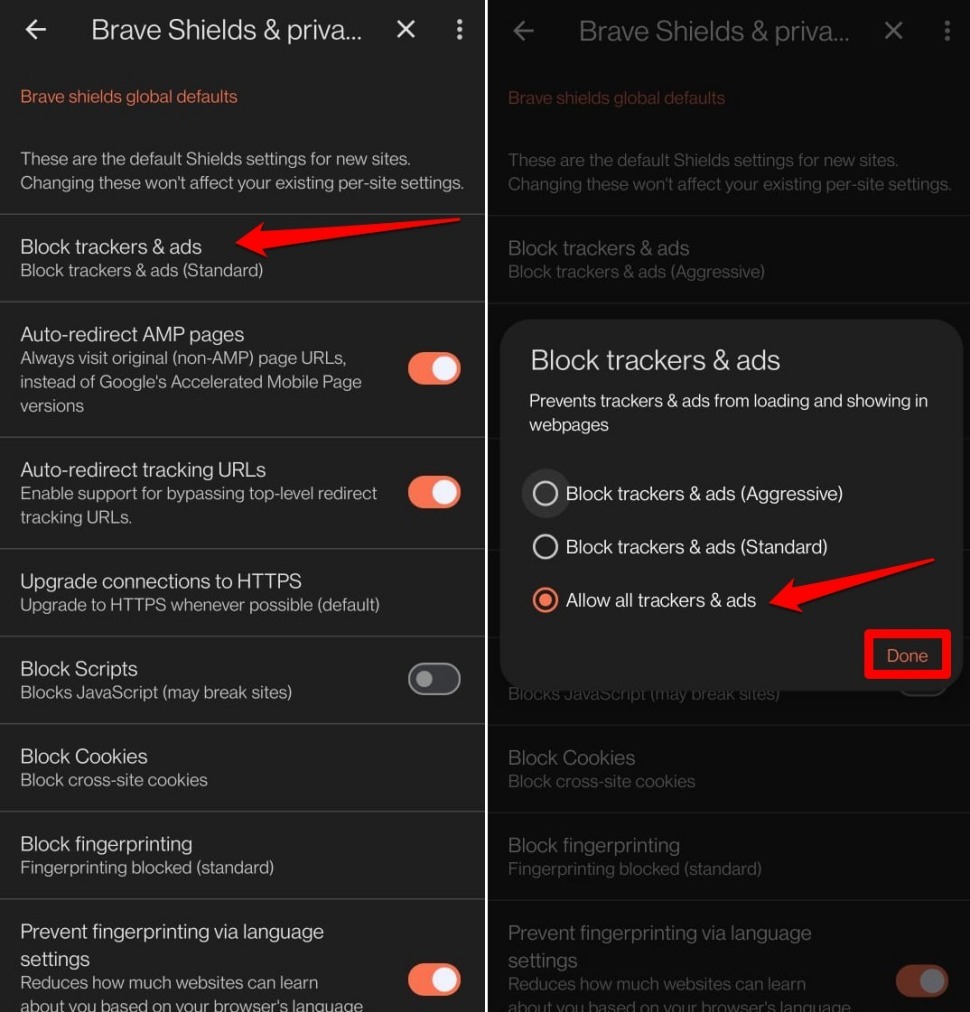
- Select Trackers & ads blocking.
- Choose Disabled to allow all trackers and ads.
- Tap the back arrow. Your selection is saved.
Bottom Line
Websites rely on ad revenue to cover costs. But when ads get in the way of reading, blare sound, or spread malware, you’re better off blocking them. Brave’s aggressive blocking strips out almost everything, so you can read without distractions. If a site you trust asks you to turn off the blocker, the steps above let you do that quickly.