
Safari is a pre-installed browser on Apple devices. It’s not easy to uninstall or remove the browser; this also applies to downgrading to previous or older versions.
The downgrade is technically challenging but doable if we have all the required re-installation or migration assistant support setups.
Note: it’s recommended to proceed cautiously and ensure you’ve prerequisite and read through before starting the rollback.
In this guide, I have shared written instruction about:
Pre-requisite: Stopping Automatic System Updates on Mac
If you don’t disable the auto-update feature, the OS will again install the latest Safari version, making the entire process futile.
So head over to ![]()
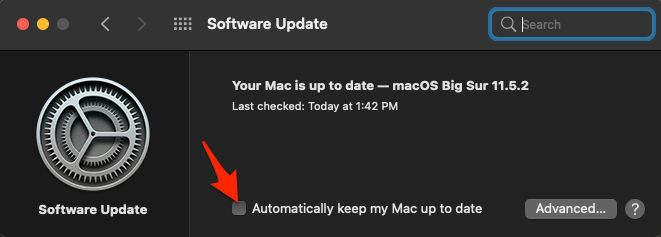
![]() > System Preferences > Software Update, and disable the Automatically keep my Mac up to date option. Once that is done, you may proceed with the below steps to downgrade Safari to an older version.
> System Preferences > Software Update, and disable the Automatically keep my Mac up to date option. Once that is done, you may proceed with the below steps to downgrade Safari to an older version.
Method 1: Restore with Time Machine Backup
If you took a Time Machine backup before Safari automatically updated, you shouldn’t give it any second thought and restore that backup immediately.
For the unaware, The Time Machine progressively restores the data. It will only restore those data unchanged since the last snapshot.
- Head over to the Applications folder and select Utilities.
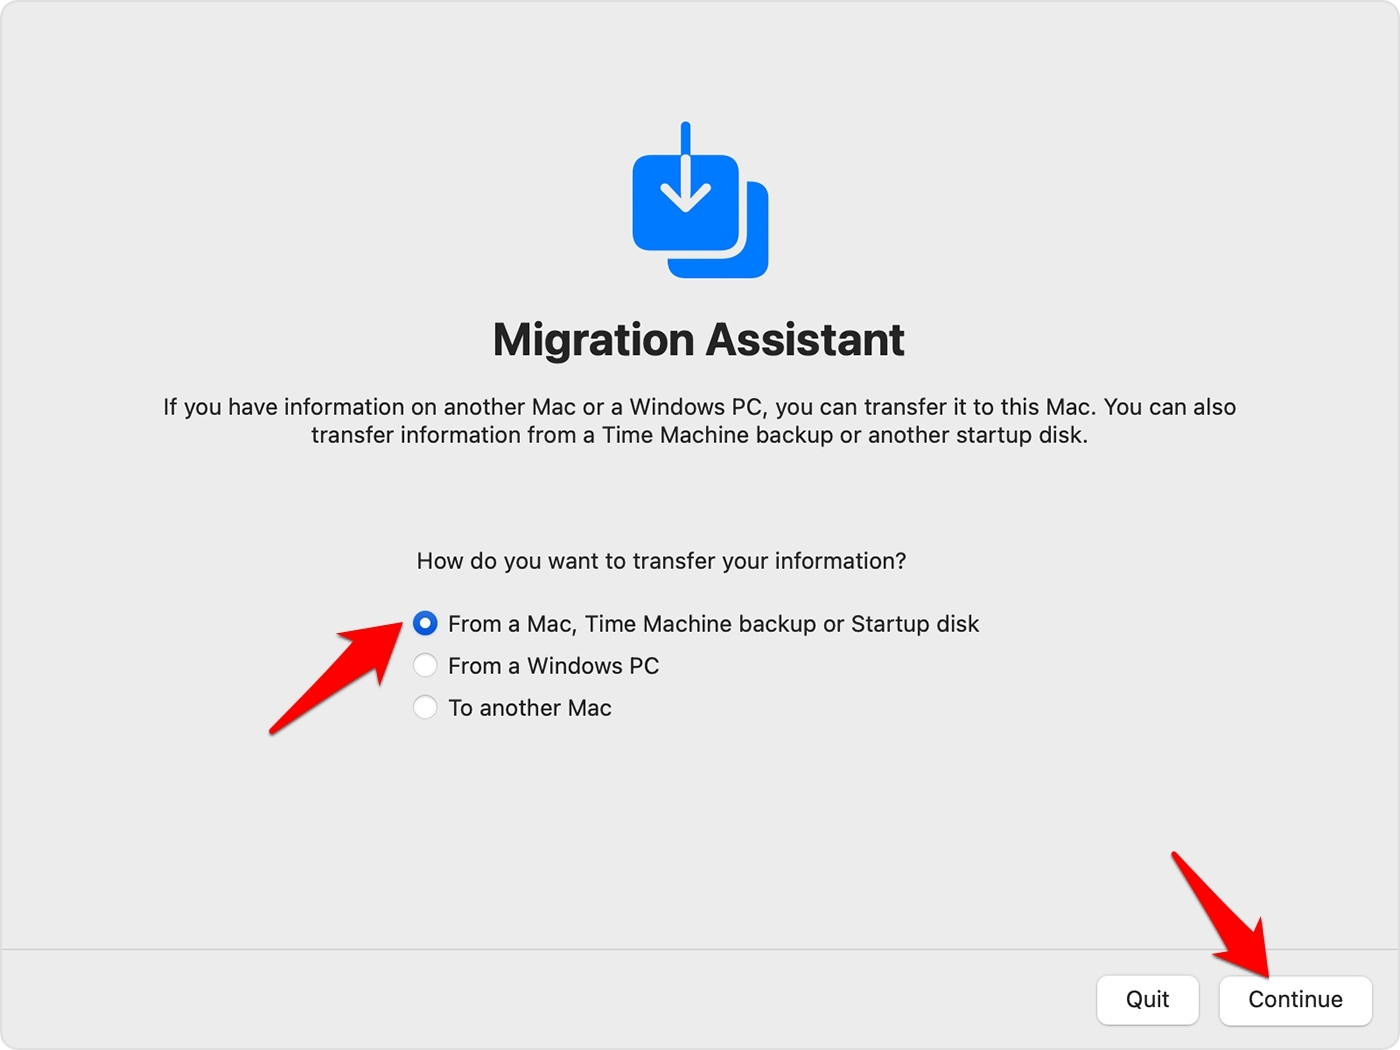
- Select the Migration Assistant app.
- Select From a Mac, Time Machine backup, or startup disk
- Hit on the button.

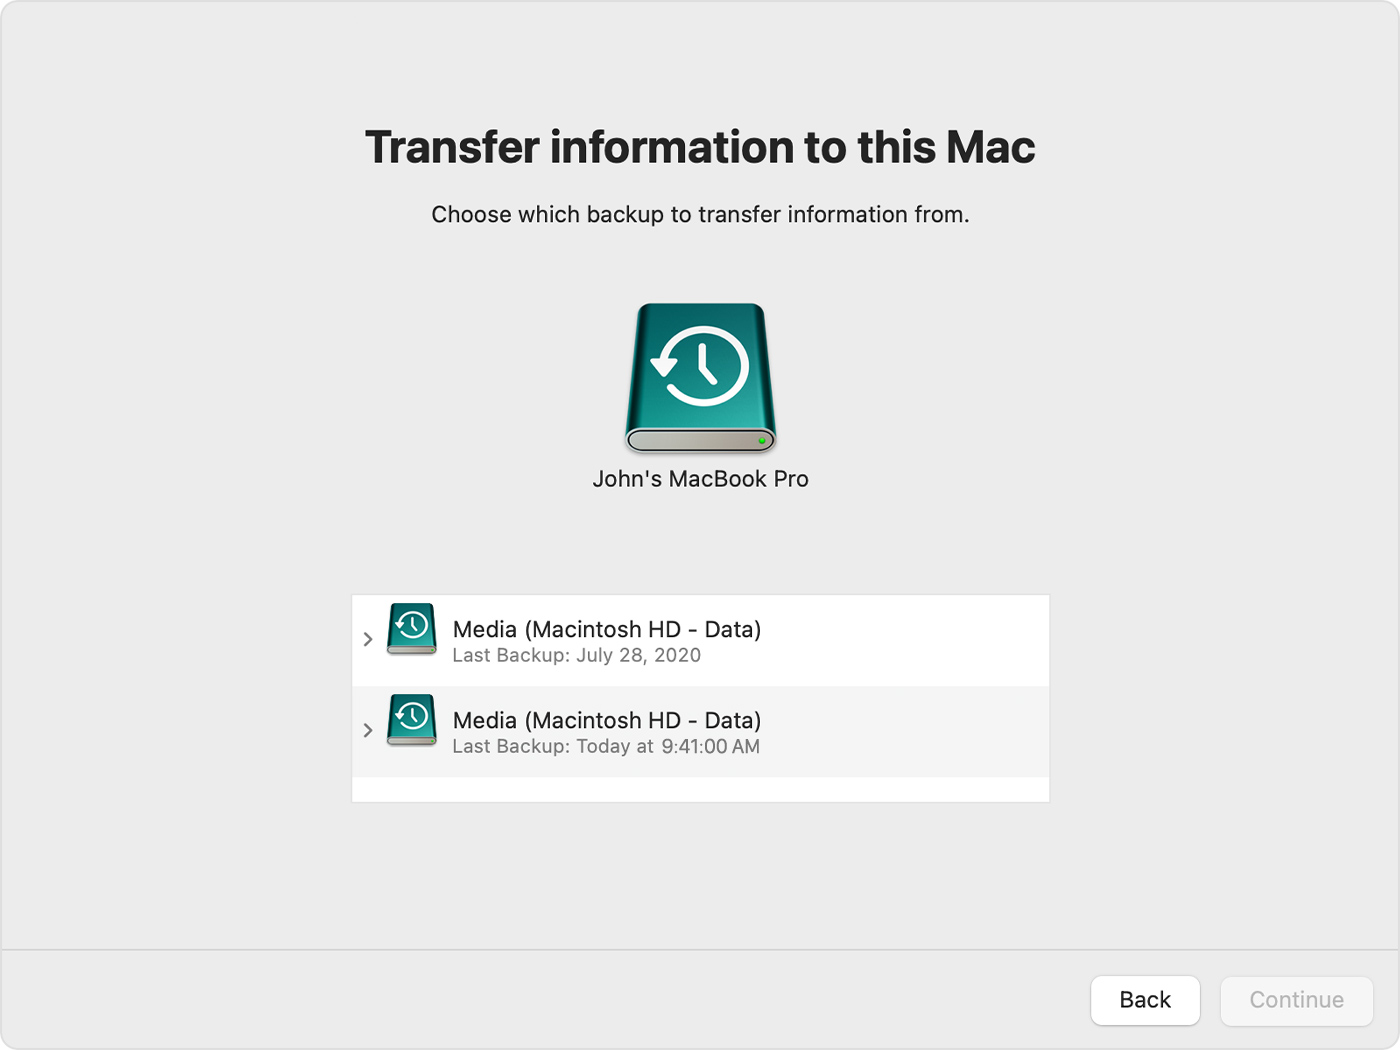
- Select the Time Machine backup made before the Safari update, and click the button.
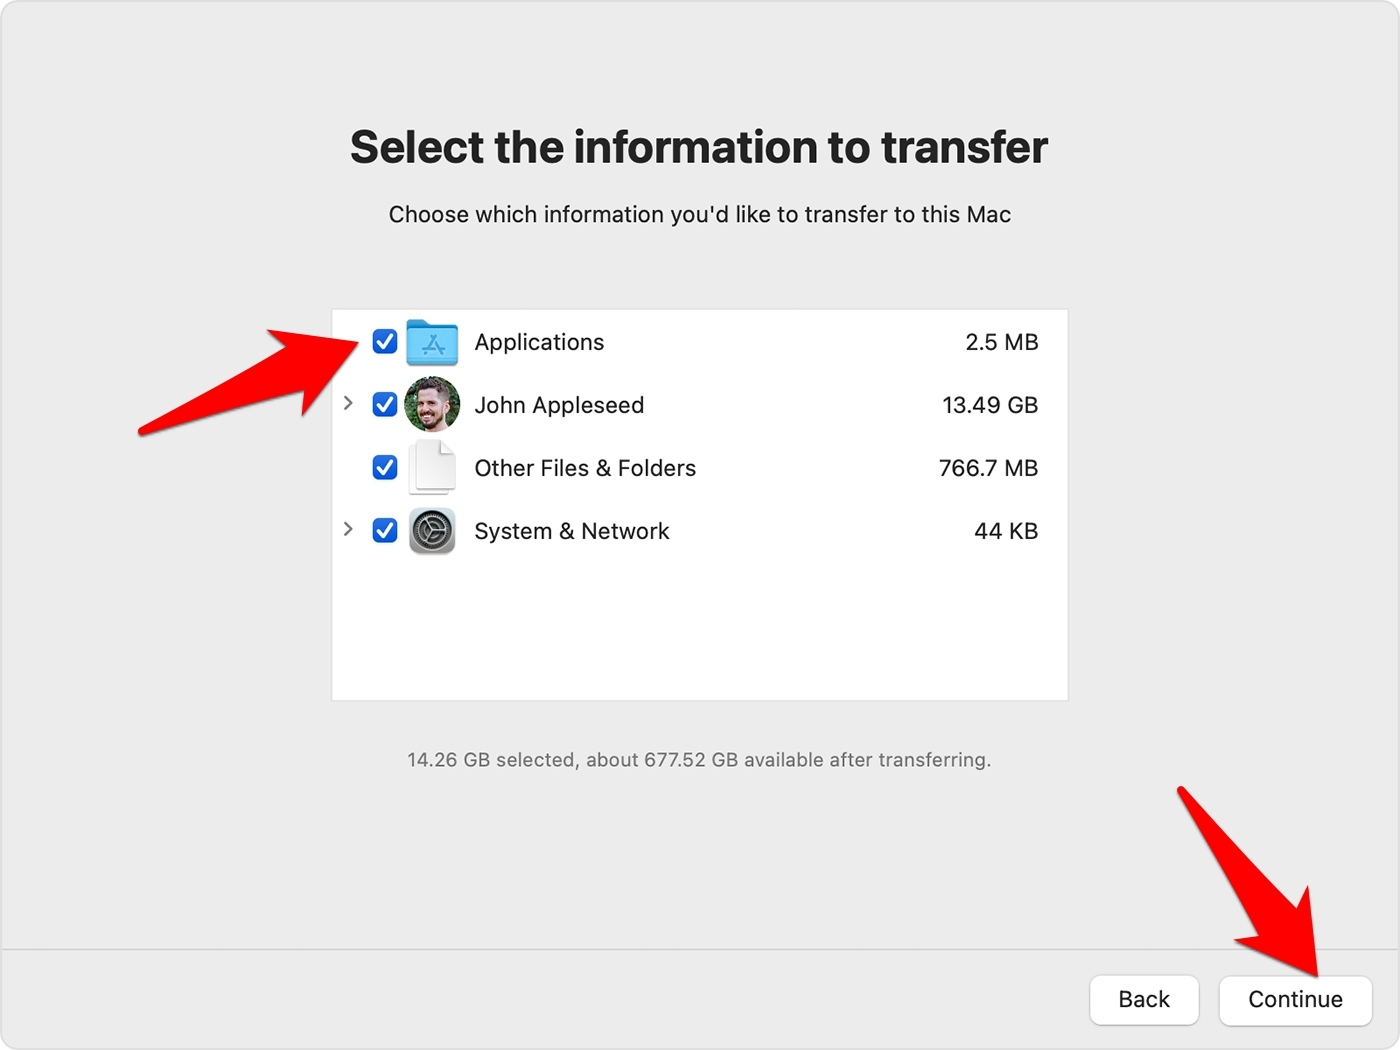
- Select the Applications checkbox under the Information to transfer dialog box, and hit the button.
The restoration process shall now begin and could take a few minutes to an hour, depending on the backup size.
Once done, you will have successfully downgraded to an older Safari version. To be safer, re-verify that the Auto-updates feature is still disabled after the restoration.
Note: The Time Machine method is straightforward; there’s a caveat involved. It would help if you created a Time machine snapshot before the Safari browser was updated.
However, many users wouldn’t have such a backup satisfying this requirement.
Method 2: Downgrade the macOS on the computer
In this process, we will downgrade macOS to the earlier build that initially shipped with your device. It will then automatically downgrade all the pre-installed apps to their earlier versions. However, the process will wipe off all the data, so backup beforehand. Here are the steps to downgrade:
- Keypress the + to boot your Mac to Recovery mode.
- Select Reinstall macOS <version-name> from the Utilities menu.
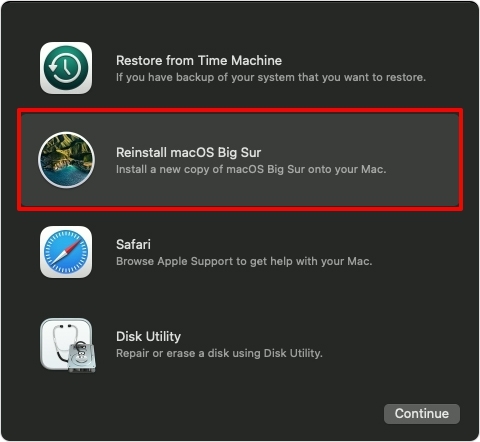

- Proceed with the on-screen instructions to complete the installation.
Moreover, if it asks whether you want to install Macintosh HD or Macintosh HD – Data, choose Macintosh HD.
When the installation is complete, disable the auto-update feature under System Preferences. It will ensure that Safari isn’t automatically updated to the latest build. At the same time, don’t forget to install all the other updates manually.
Note: The reinstall process is a more time-consuming method than previously and would wipe off all your Mac’s data. So only proceed with this approach if you don’t have a Time Machine backup.
Bottom Line
Making changes to the operating system just to downgrade to an earlier app build is risky. Apple should have provided a more straightforward approach to carrying out a rollback.
Talking about more accessible approaches, a couple of third-party apps claim to do this job. However, they tend to give varying degrees of success.
Lastly, if you've any thoughts or feedback, then feel free to drop in below comment box. You can also report the outdated information.


“Apple should have provided a more straightforward approach to carrying out a rollback.” I couldn’t possibly agree more heartily. I was a PC use for many years and got so fed up with update problems and security issues that I bought a mac because “it is much more stable and secure” to quote about a million users. Now I’m fighting with poorly tested OS and Safari updates! Apple MUST provide an acceptable way to rollback to previous versions that even we non-techies can initiate.
I can’t even view my current telephone bill! I can log in but trying to download the statement takes about 5 minutes and then it is only partial – then I get “must reload due to signicant memory usage” arggggghhhh! I finally had to use Chrome – thanks Apple!
Hi Gary, I firmly believe that every browser should have option to rollback (just like Update feature). Given the fast development releases for each version upgrades, the developers are releasing the hastily tested browser that often causing the breakdown. That’s when the users actually look out for other alternatives.