
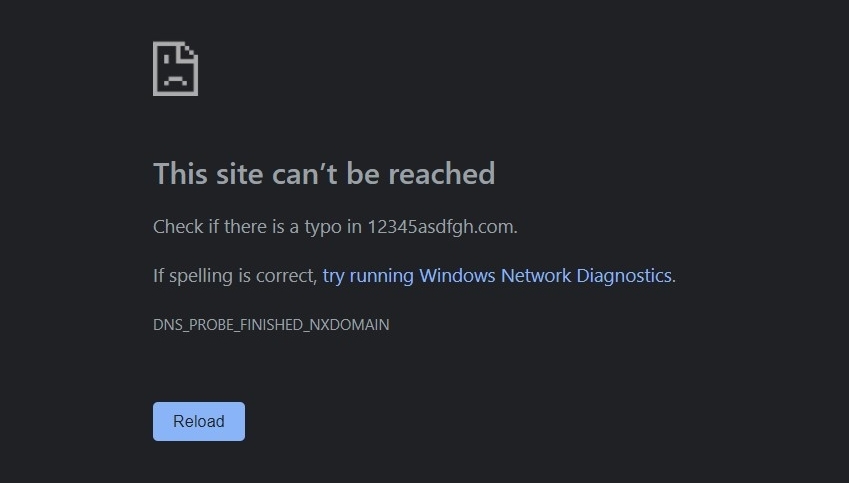
The web browser needs the correct site address to resolve the IP address and load a webpage; if it doesn’t, it results in a DNS error.
In such instances, you should re-check the entered site address, turn off the experimental flags, check the host file, change to Public DNS server, refresh the system IP address, and reset the network socket to resolve the DNS issue in the browser.
In this guide, I have shared written instruction about:
Method 1: Re-check the URL in Address bar
If you have entered an incorrect URL, then the DNS couldn’t retrieve web server’s IP Address and would display the error. Therefore, reverify that there’s no typing error in the site address.
Method 2: Release and Renew Network IP Address
Issues with the IP Address could also be the reason behind this DNS error. In this regard, you could release your current IP Address, delete all the cache left behind, and then ask for a new IP Address from DHCP to be assigned to your system.
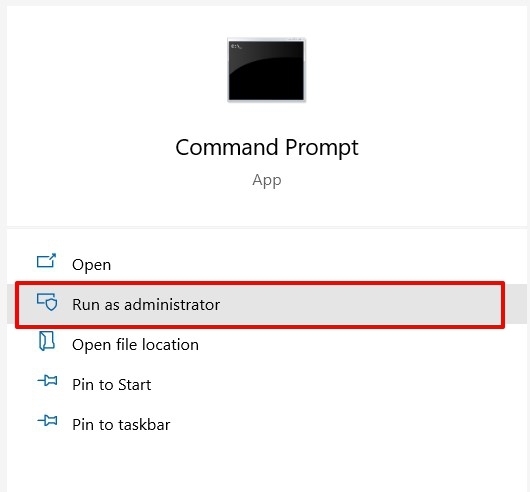
- Head over to the Start menu,
- Search for cmd, and launch it as an Administrator.

- Execute the following three commands, one after the other:
ipconfig/release
ipconfig/flushdns
ipconfig/renew
The first command will release the currently assigned IP; the second one will flush the DNS Cache of that address; the third and final command will replace it with a new IP Address.
Once all three commands are executed, restart your PC and see if it gives favorable results.
Method 3: Reset Winsock using Command Prompt
Windows Socket is a term given to the data stored on your PC to establish a successful connection between an app/software and the network.
Sometimes, you might have encountered issues when the WiFi is running well, but a particular device can still not access the internet. In such cases, the issue is usually with the Winsock; the best bet is resetting it.
- Launch Command Prompt as an Administrator.
- Type in the below command in the prompt window:
netsh winsock reset
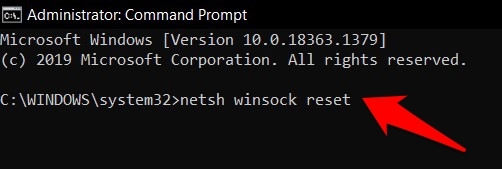

- Hit on keyboard button.
There isn’t any major issue with resetting Winsock, but make sure you don’t make it a habit of fixing network issues via this tweak. If this need arises regularly, there might be some other (major) issues with your PC’s Network Adapter that need troubleshooting.
Method 4: Change DNS Server Address
Your Internet Service Providers assign the DNS servers that you are currently using. However, they aren’t fixed, and you could also redirect them to other servers.
In this regard, Google DNS and Cloudflare DNS are usually the two preferred choices as free public DNS provider.
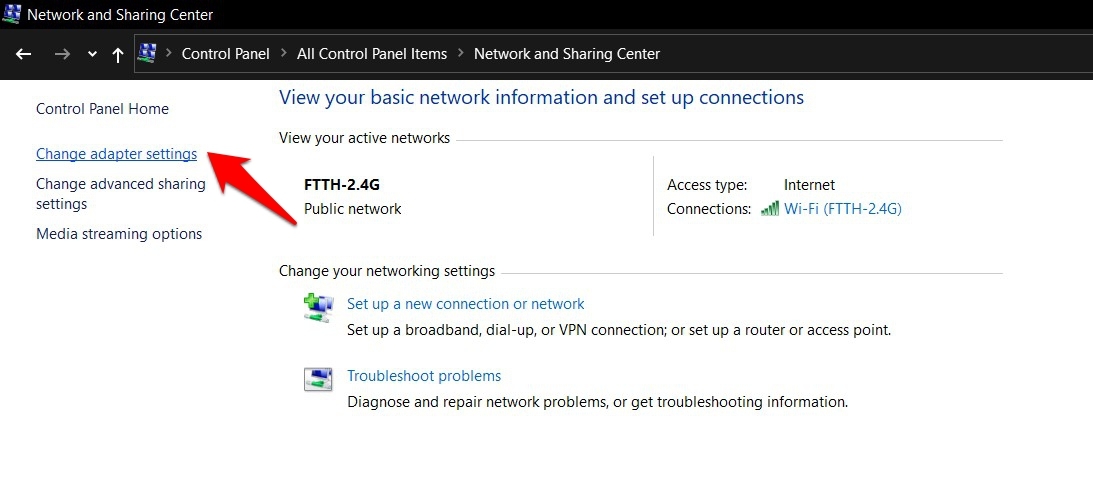
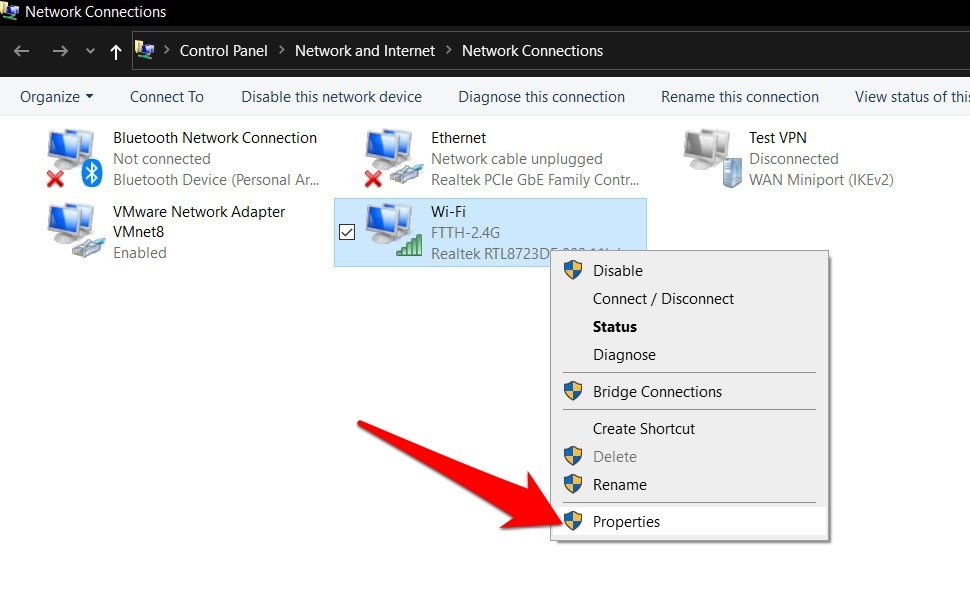
- Launch the Control Panel from the Start menu.
- Open the Network and Sharing Center.
- Click on Change Adapter Settings from the left menu bar.

- Right-click on the network you are currently connected to, and select Properties.

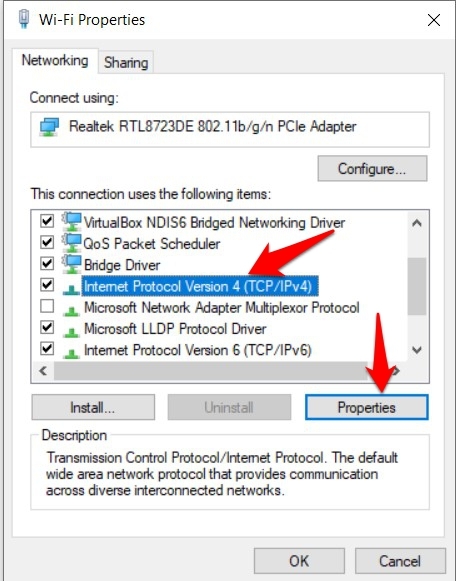
- Scroll and select Internet Protocol Version 4 (TPC/IPv4), and click the button.

- Select Use the following DNS server addresses radio button.
- Enter follow Google DNS addresses:
Preferred DNS server: 8.8.8.8
Alternative DNS Server: 8.8.4.4
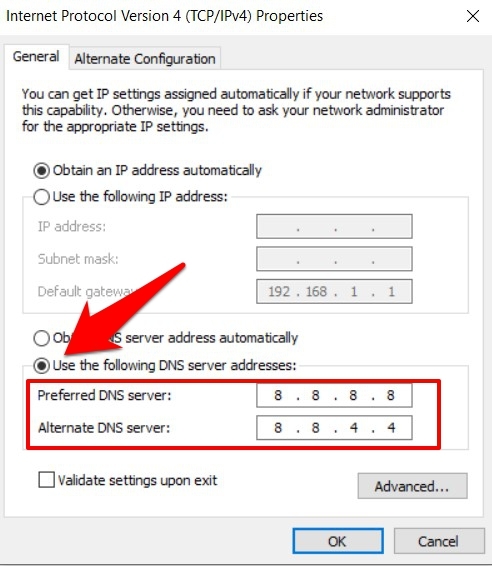

- Hit on to save the changes.
Now try accessing the website and check whether the DNS issue has been rectified.
If you instead prefer to go for Cloudflare DNS, then replace the Preferred and Alternate DNS with 1.1.1.1 and 1.0.0.1, respectively.
Method 5: Check the Host File for Site Block
A Host file maps a connection between the web address and its IP Address. However, it could also block a specific website from being accessed.
This is usually done by assigning it a loopback IP address (such as 127.0.0.1). So you should check the host file and verify that the concerned site is not blacked out.
- Launch the File Explorer, and head over to the below location:
C:\Windows\System32\drivers\etc
- You should find a host file and open it using the Notepad app.
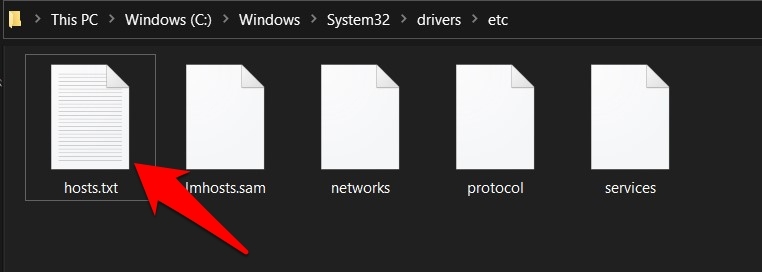

- Scroll to the end and check if there is a mention of your site and the localhost address – 127.0.0.1.
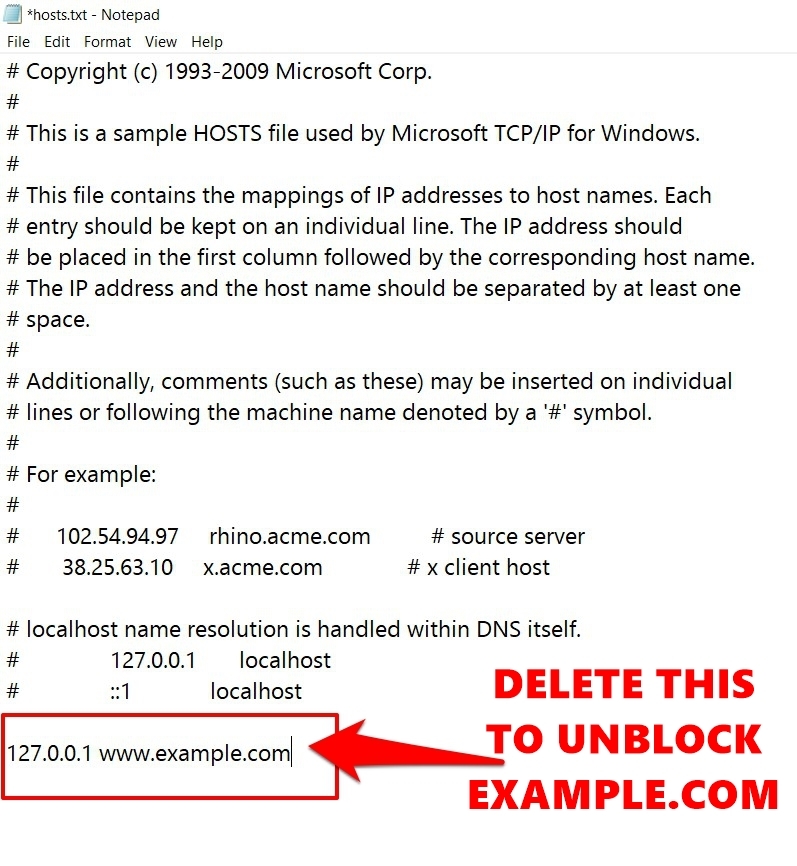

- Delete any blocking entries, and save the file with + keypress.
Try accessing the site; the issue should have been fixed after unblocking the URL.
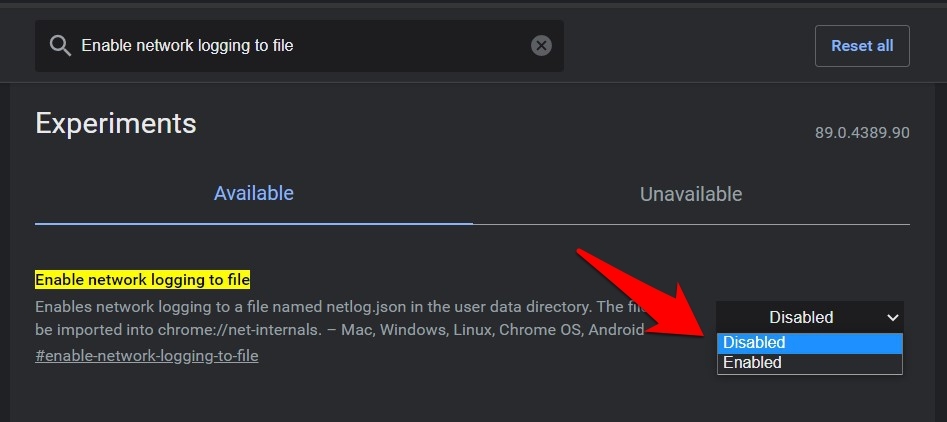
Method 6: Disable Chrome Flags
Chrome Flags are experimental and are used to test beta features before their final release. These flags encompass a broad domain; some are directed exclusively toward the network.
So, if you have enabled any such network-related flag, try reverting them to their original state from the chrome://flags page. Most probably keep them in the Default status.
Bottom Line
In my case, flushing the DNS did the trick. Over time, a lot of temporary data related to my current IP address had accrued, so deleting them and then letting the DHCP assign a new IP address worked.
You should ensure the site is accessible on other devices or browsers before changing system settings. If the site itself is inaccessible, no troubleshooting will work to fix the issue.
Lastly, if you've any thoughts or feedback, then feel free to drop in below comment box. You can also report the outdated information.


This was a phenomenal guide and helped me eliminate the DNS issue I encountered. Thank you for the great details and step-by-step flow of this.