The Google Chrome browser can save the address details we fill in the application or registration form. The saved address can be reused to auto-fill the upcoming forms.
We can easily manage the address and modify it when required. The address is synced across the device when we sign in with the same Google account.
In this guide, I have shared the video tutorial and written instructions about:
Watch the Video Guide
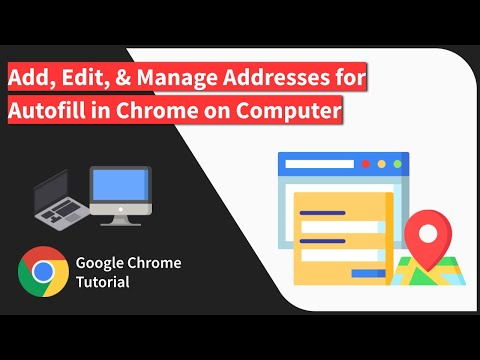
Find the video guide helpful? Please consider subscribing to our YouTube channel for more such videos.
Add an Address for Autofill
If you are filling out the form for the first time, then Chrome displays a pop-up asking to store the address for future form fills. If you allow it, it will store the address in browser storage.
Alternatively, you can manually add the address into addresses and more sections. Here are the steps to add an address:
- Launch Google Chrome for computers.
- Click on the More

 menu for options.
 - Select the Settings menu from the list of options.
- Scroll down to the Auto-fill section within the Settings tab.
- Select the Addresses and more menu options.
- Click the Add command button, and a pop-up dialog box will appear.
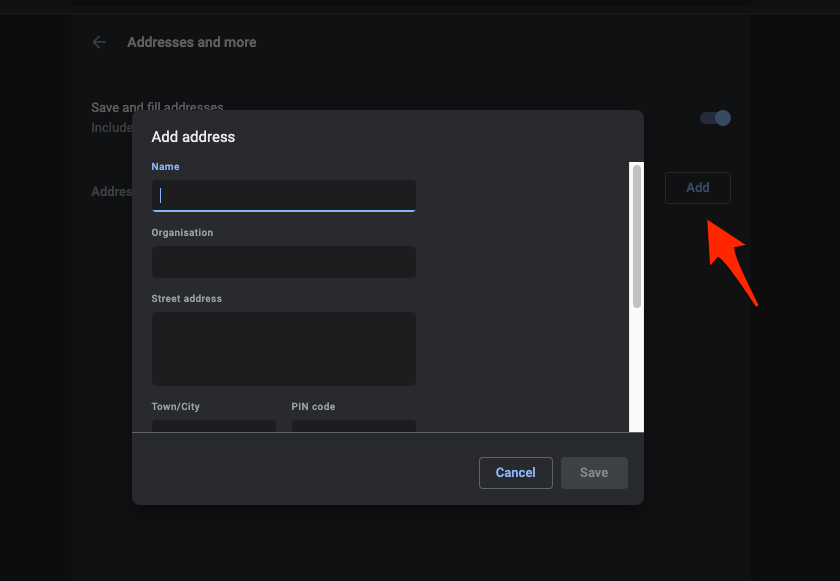

- Enter the Address details and hit on the Save button.
It will create a record of the address automatically populated when filling out a form or registering on a new website. The address is auto-sync into your Google account and is available across all your managed devices.
Edit a Saved Address
If there are any mistakes in your added address, or recently if you have shifted to any other location, you can edit the saved address in chrome autofill. Here are the steps to edit the address for autofill:
- Launch the Chrome app on a computer.
- Click on the More menu for options.
- Select the Settings menu from the list of options.
- Scroll down to the Auto-fill section within the Settings tab.
- Select the Addresses and more menu options.
- Hit on the menu on the saved address for more options.
- Select the Edit option makes the desired changes to the address in the pop-up dialog box.
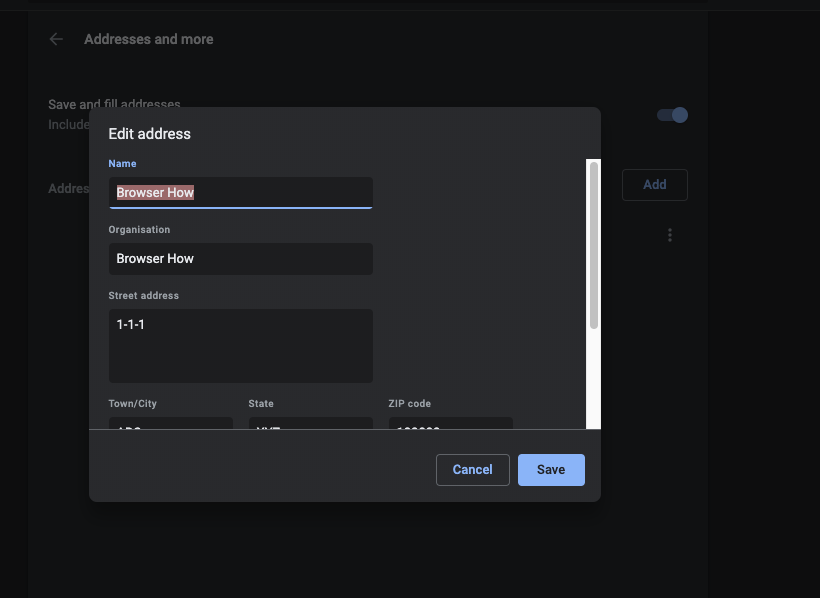

- Hit on the Save button to commit the changes.
It will edit and save the modified details in the Chrome browser. The changes are automatically synced on all the devices managed by the same Google account.
Delete Saved Addresses
If an address populated in the form fills is no longer applicable or you have permanently moved away, you should consider deleting it. The option to delete the address is available under the Auto-fill section. Here are the steps to delete an address:
- Launch Google Chrome on a computer.
- Click on the More menu for options.
- Select the Settings menu from the list of options.
- Scroll down to the Auto-fill section within the Settings tab.
- Select the Addresses and more menu options.
- Hit on the menu on the saved address for more options.
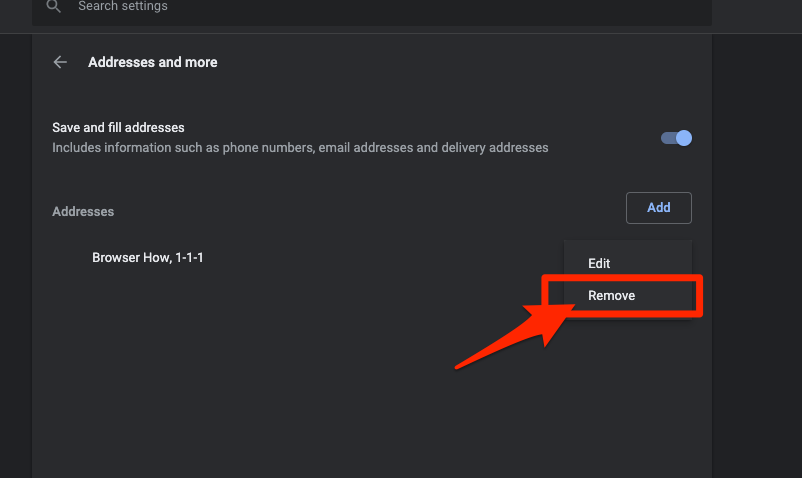

- Select the Remove option to delete the saved address.
This will erase the address details and remove them from the browser storage. If there is any other record of address, Google Chrome will automatically start to populate the alternate address instead.
Any address field or deletion changes will be automatically synced across the device managed with the same Google account.
Bottom Line
Chrome offers a great feature to save the address into local storage and helps auto-fill the forms next time. If you’ve more than one address, you can choose from all the available options from the autofill drop-down.
Similarly, you can add and manage the addresses in Chrome on Android. The address will synced and used for auto-filling the forms and registration pages.
Lastly, if you've any thoughts or feedback, then feel free to drop in below comment box. You can also report the outdated information.