
Chrome browser allows us to store location information in the Settings menu and syncs the details across connected devices signed in with the same Google account.
We can add, save, and manage addresses or location details that can be used to autofill any forms and registrations pages that require our information.
In this guide, I have shared written (and video) instructions about:
Watch the Video Tutorial
Find the video guide helpful? Please consider subscribing to our YouTube channel for more such videos.
Add Address for Autofill
You can add a contact address to auto-fill the forms and details within the Chrome browser. It will reduce the effort to enter complete details as data is already pre-populated within the correct form fields.
- Launch the Chrome app on Android devices.
- Tap on the More

 menu and select Settings from the options list.
 - Tap on Addresses and More options.
- Hit on + Add Address command.
- Fill in the address details (* marked are mandatory fields).
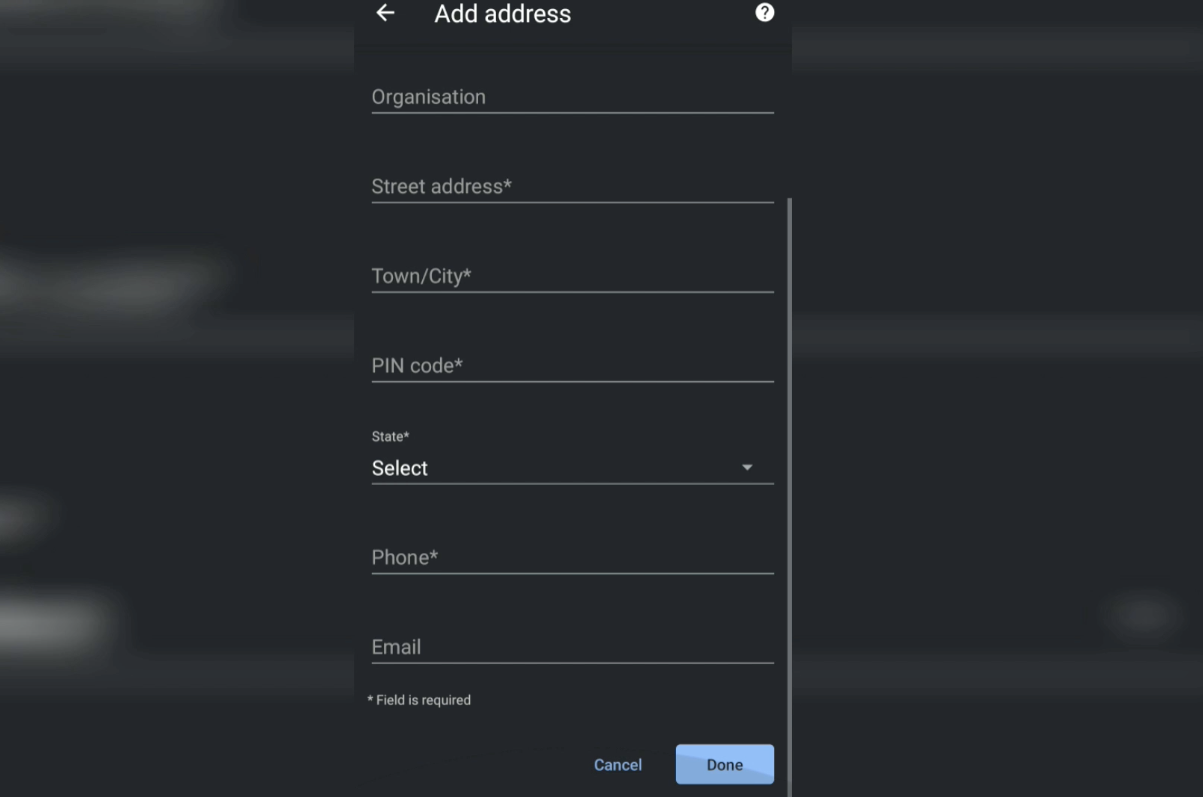

- Finally, hit on the Done button command to save the address.
Edit a Saved Address
If the entered autofill address is incorrect or changed, you can edit the address saved within the Chrome browser. The edit option will help in modifying the saved addresses and managing them. Here are the steps to edit the saved address:
- Launch the Chrome app on Android.
- Tap on the More menu and select Settings from the options list.
- Tap on Addresses and more options.
- Select an existing address that you need to edit.
- Alter the changes on the address details page.
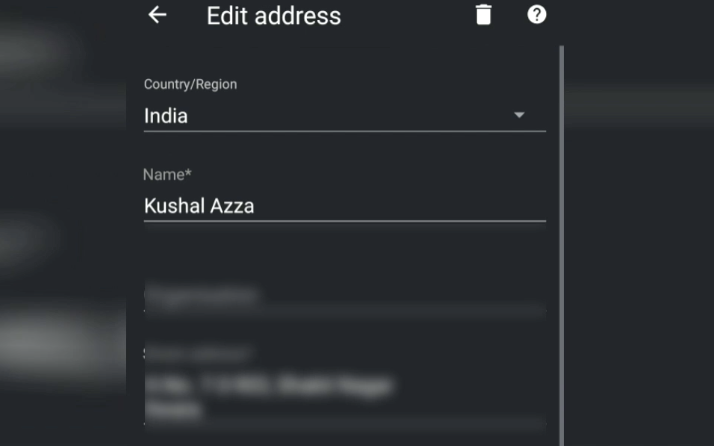

- Hit on the Done button command to commit the changes.
Delete a Saved Address
If there is a saved address that you no longer use, then it’s recommended to delete it. This helps to protect your privacy and keeps you secure. Here are the steps to delete:
- Launch Chrome browser on Android.
- Tap on the More menu and select Settings from the list.
- Tap on Addresses and More options.
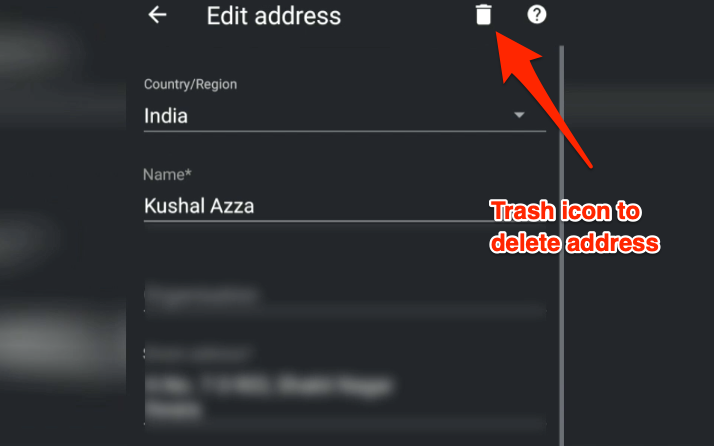
- Select an existing address that you need to delete.
- Tap on the Trash icon at the upper right corner of the address details page.
 The address will be removed from Chrome Android.
This way, you can manage the address and more in the browser. As mentioned, these addresses are auto-populated when filling in an address on any online webpage.
Bottom Line
Chrome address autofill feature helps in improving overall productivity and efficiency.
You can have multiple addresses stored and retrieved while filling out any form. You need to enter the initials to retrieve the data from storage. The saved addresses will be displayed then.
Similarly, you can:
- Add, Edit, and Manage Addresses for Autofill in Chrome on the Computer
- Add, Edit, and Manage Addresses for Autofill in Chrome on iPhone & iPad
Lastly, if you've any thoughts or feedback, then feel free to drop in below comment box. You can also report the outdated information.


In the chrome settings I go to “Addresses and more” and click on “Save and fill addresses “. There is no add button there and the edit button is greyed out. Please help me with this
I guess you’ve turned off the feature. You must turn on the toggle button for the ‘Save and fill addresses’ option. It will enable the adding and editing of addresses.