
Tab Group helps manage open tabs to segregate and categorize them according to our needs. We can create a tab group and add multiple tabs to the group. You can also add or remove any tabs from a group.
Once we finish using all the tabs in a group, we can close the group, and it will automatically close all the tabs within that group.
In this guide, I have shared written instruction about:
Create a New Group Tab
There are two ways to create a new tab group within the browser app.
Creating a Tab Group using the ‘Group tabs’ Option
- Tap on the Tabs

 icon situated next to Omnibox.
You should see the open tabs in a grid layout. - Tap on More
 for the options list, and select Group tabs.
 - Select the tabs that you want to add to a group.
- Hit on the command option.
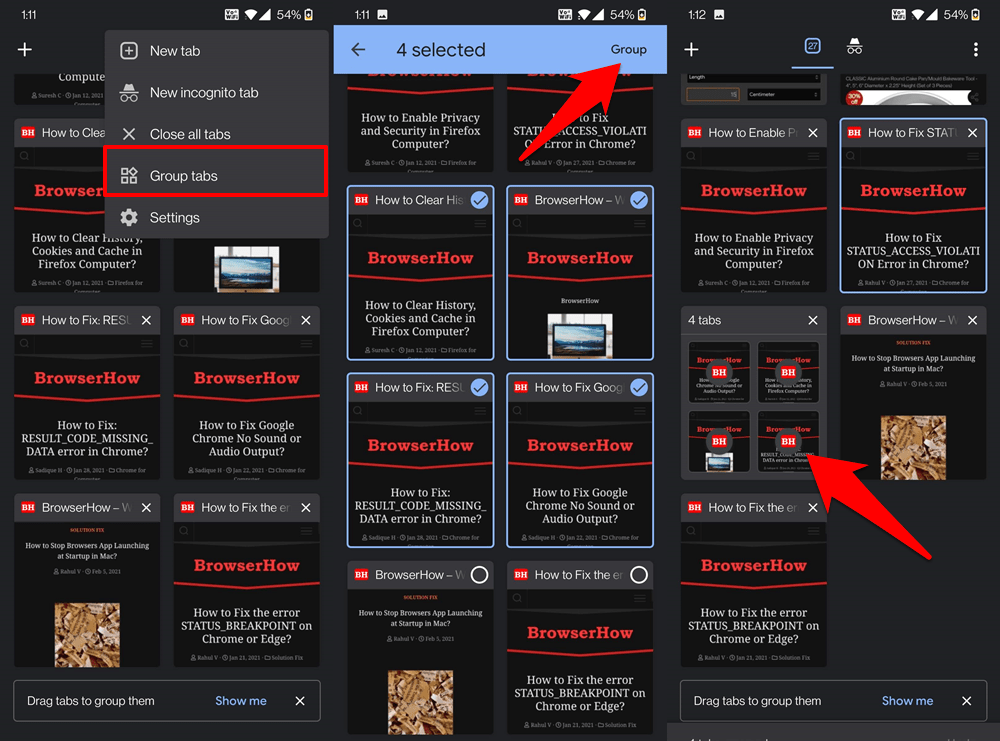

A new group tab will be created with the selected tabs. As the screenshot shows, we have created a group of four tabs.
Manually Creating Group Tabs in Chrome app
- Tap on the Tabs icon situated next to Omnibox.
It will display the open tabs in a grid layout. - Touch and long-press an open tab for a couple of seconds until it gets highlighted/squeezed.
- Drag and drop the selected tab onto another tab that needs to be part of a group.
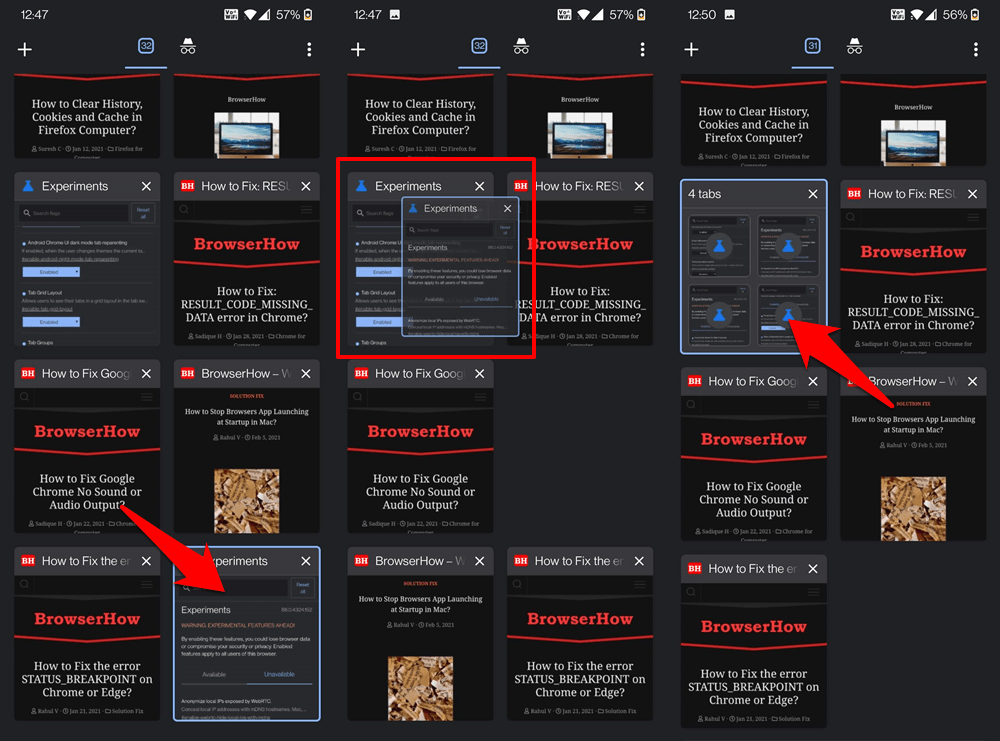
Once you do so, the browser will create a new group indicating the total number of tabs. You can drag and drop as many tabs as you want in the group and organize them based on categories or favorites; it’s up to you.
Manage a Tab Group
We can manage and organize a group tab within browser interface. We can create unlimited groups and add unlimited tabs into a group as long as Chrome doesn’t run out of memory.
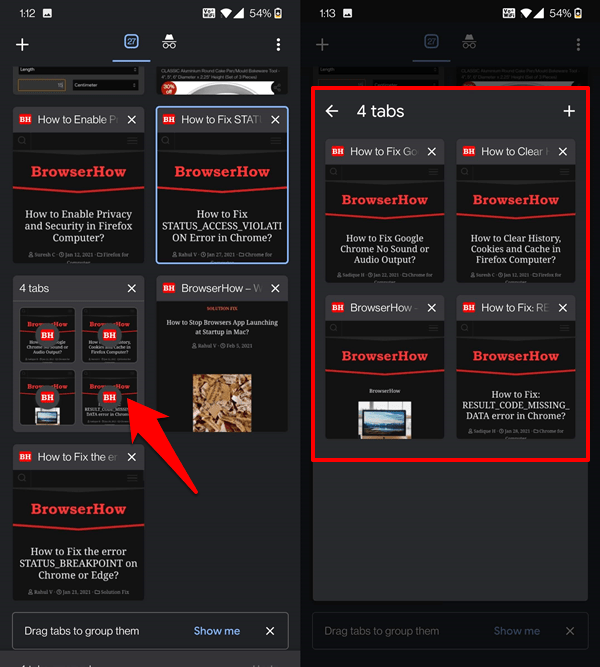
Accessing a Tab within the Group
Just tap on its associated group, and Chrome will enlarge the group and display all tabs belonging to that group. We can also scroll within a group and choose to open tabs from a larger group size.
Adding a Tab to the Group
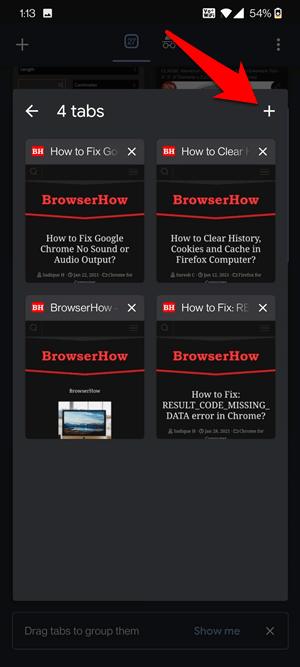
If you wish to add a new tab to an existing group, tap on the Plus ![]()
![]() at the top right. This will display the URL field, enter the desired site URL, and the site will be added to this group.
at the top right. This will display the URL field, enter the desired site URL, and the site will be added to this group.
The other straightforward approach will be to open a tab as usual and drag it to this group.
Removing a Tab from the Group
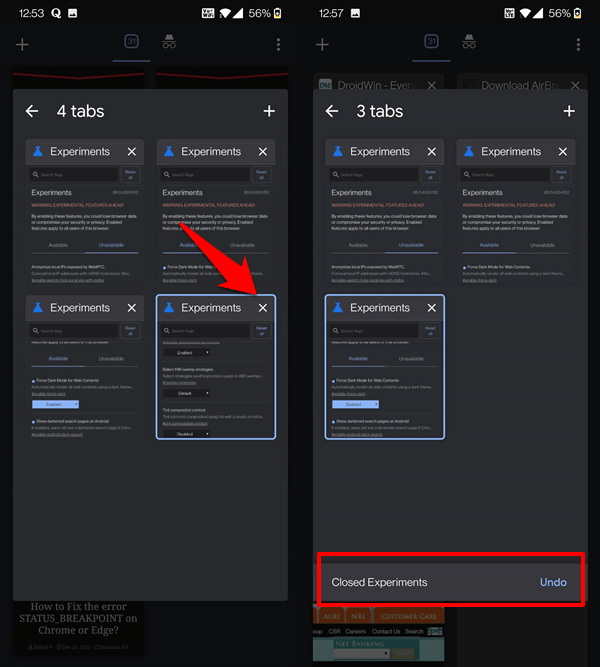
You can remove tabs from a group. Head to that tab inside the group you want to remove and tap on the .
Chrome will then notify you about the tab being removed. It will also give you a five-second window to return it via the button.
Closing a Group Tab
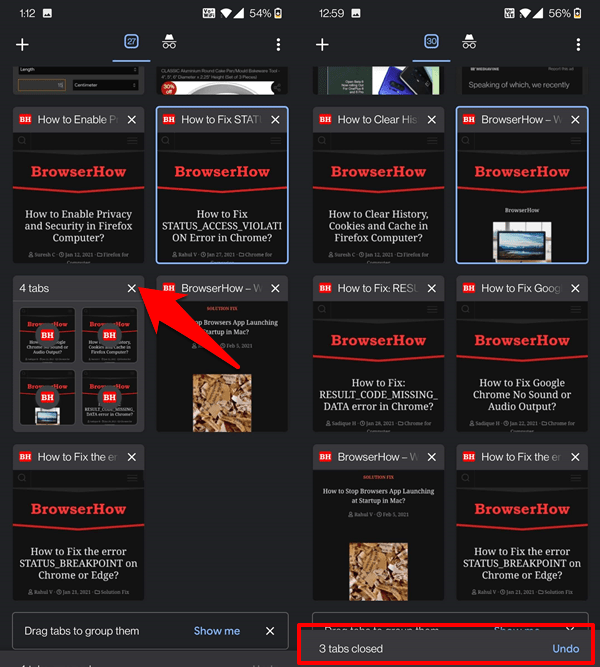
If you wish to close the entire group, head over to the tabs grid section and hit the to the group.
You may bring back the closed group tabs via the option.
Bottom Line
With the tag groups we can group similar tabs or segregate tabs based on the need.
The Chrome app offers easy to use tab group management. We can add, remove and even close the tab group that no longer needed.
Similarly, we can also create and manage the tab groups in Chrome on computer. It also have the feature to choose the color and pin the group.
Lastly, if you've any thoughts or feedback, then feel free to drop in below comment box. You can also report the outdated information.


I love tab groups, but we used to be able to name them, instead of having it just say how many tabs are in that group. Now we can’t! WHY? Do you know?
Hello Trenton, I don’t remember the renaming feature for tab groups in Chrome Android. But, latest update in the Chrome browser for Android has do not have the ability to name the tab group. However, the option to name a group is available on the desktop browser.