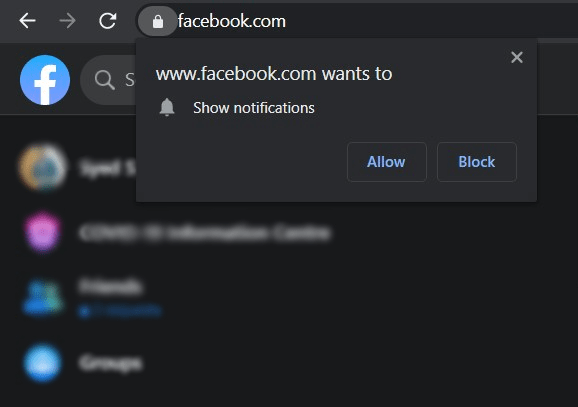
Google Chrome allows users to shut the requests pop-ups made for access to the notifications. If you also want to eliminate such requests, you can customize it under the Chrome setting’s Notifications Permissions page.
It can allow or block the sites based on the requirement under the Allow and Block list section.
In this guide, I have shared written instruction about:
Stop ‘Show Notifications’ Requests
The instructions that we have shared below would act as a blanket ban. That is, you wouldn’t get the notification prompts from any site. This way, you are guaranteed a disruption-free browsing experience.
- Launch Google Chrome on your PC.
- Click on More

 for the menu list and choose the Settings option.
 - Switch to the Privacy and Security section and click on the Site Settings tab.
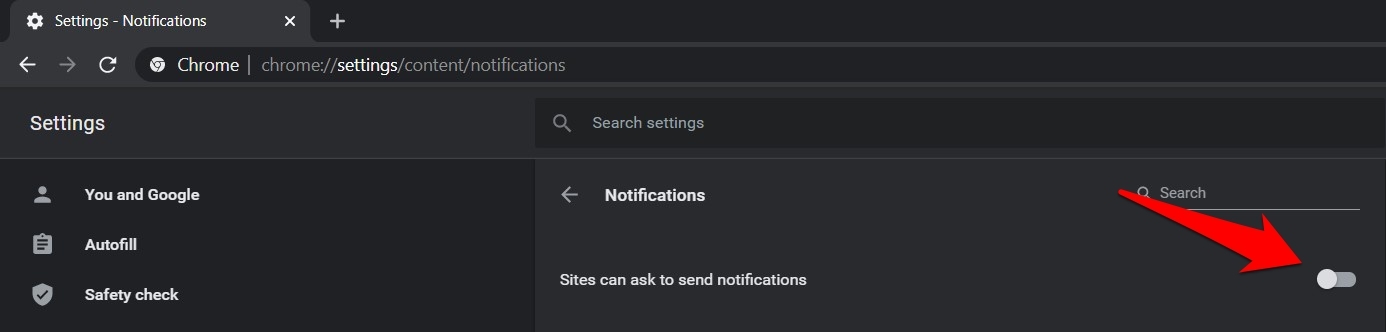
- Scroll down to the Permissions section and click on Notifications.
- Finally, disabling the Sites can ask to send notifications toggle.

The biggest drawback of this option is that you might miss out on important notifications. Fortunately, there is a handy out: you could whitelist the valuable sites and add them to the exclusion list. So let’s turn our attention toward this method now.
Get Granular Controls over Site Notifications
If you prefer to keep on getting important notifications from sites like Gmail but wish to stop all the other intrusive ones, then Chrome has an option for that as well. There are two different methods for the same, as mentioned below.
Manually Add Sites to the Block List
In this method, you could re-enable the notification prompt that you had earlier disabled. Then add the sites sending those pesky notifications to the block list. This way, you would get notifications from all the valuable sites except for one part of the Block list.
Here are the steps to manually add sites to the notification block list:
- Launch Google Chrome on the computer.
- Enter the below location in the address bar, and hit the key:
chrome://settings/content/notifications
It will open the Sites Notification section.
- Re-enable the Sites can ask to send notifications toggle option.
- Scroll a little bit down and you to the Block section.
- Click the button on the right.
- Type in the URL of the sites whose notification needs to be blocked.
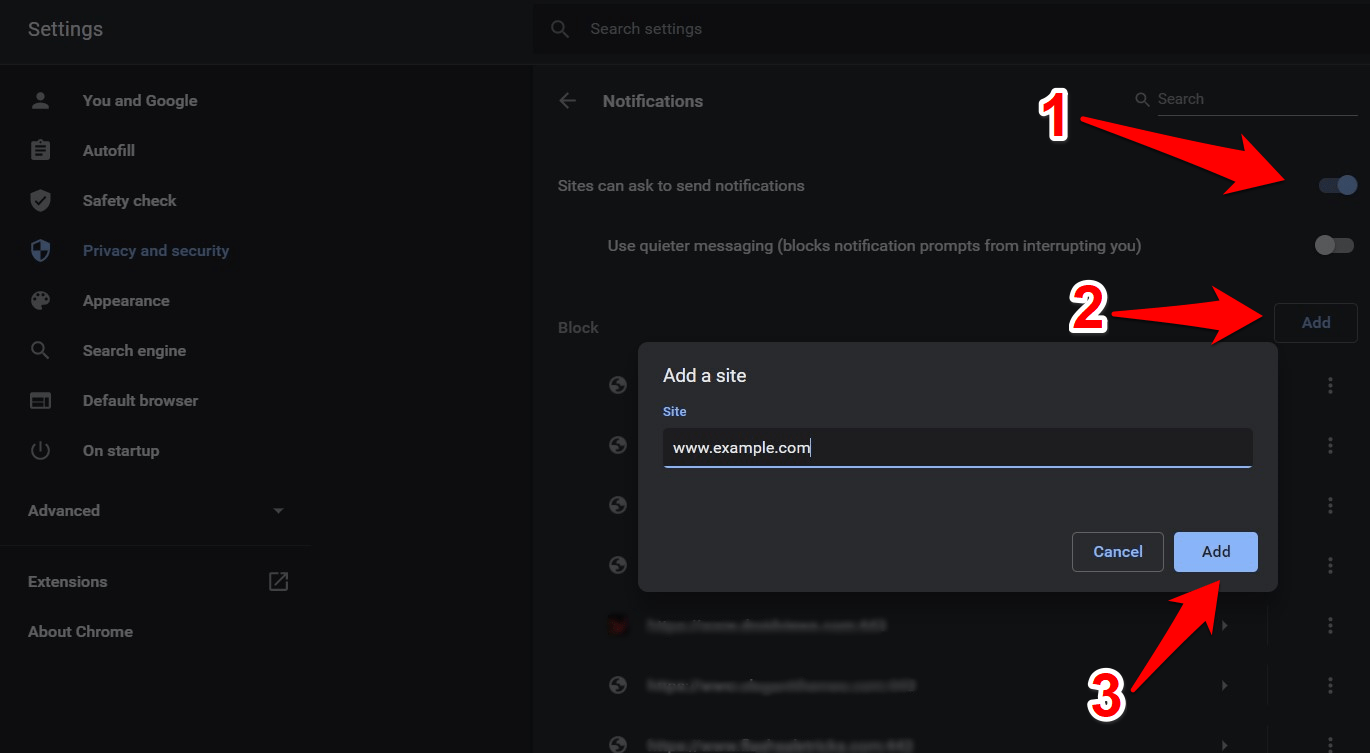

- Hit on the button.
While it is quite a nifty technique for stopping Show Notifications requests in Chrome, it also has its fair share of limitations. The biggest of which involves manually adding the sites to the block sites each time you encounter such websites. To overcome this constraint, there is again a handy method that deserves your attention.
Whitelist Only Important Sites
Rather than blocking all the less-important sites, a much more straightforward approach will be to let Chrome block notification prompts from all the sites and manually add the useful ones to the exclusion list.
This method outdoes the former in that we usually have only a handful of sites from which we would like to receive notifications. So manually adding a few sites to the whitelist calls for fewer efforts than adding tons of intrusive sites to the blacklist.
Here are the steps to whitelist the notification from important sites:
- Open the Sites Notification section in Chrome.
Settings > Privacy and Security > Site Settings > Permissions > Notifications
- Disable the Sites can ask to send notifications toggle.
- Scroll to the bottom of the page and click the button next to Allow.
- Enter the desired URL and click .
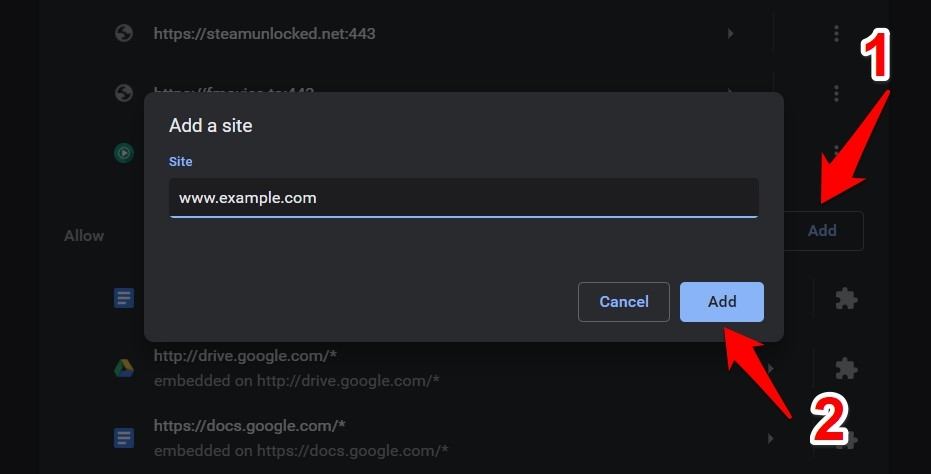

That’s it. That site is now part of the exclusion list. The notification from only the Allowed site will be displayed.
Bottom Line
While the first one blocks the prompts from every site you visit, the other two allow you to customize the rules per your requirement. And as is evident, each has its own perks and a few drawbacks.
As far as my notification settings are concerned, I prefer the allowlist method. This way, I only tend to receive important notifications from sites part of this list, such as Gmail and Google WorkSpace suite apps.
Similarly, you can configure the notifications settings in your Android phone to stop the Show Notification pop-up on any browser.
Lastly, if you've any thoughts or feedback, then feel free to drop in below comment box. You can also report the outdated information.