A proxy server acts as an intermediary for requests from clients seeking resources from other servers. It helps maintain online anonymity, enhance security, and manage network performance and data compression.
To set up a proxy in Chrome browser, access “System” Settings in Chrome and select “Open your computer’s proxy settings”. Input the necessary proxy information, including server address and port, then save to direct your traffic through the proxy.
In this guide, I have shared written instruction about:
What is a Proxy Server?
A proxy server is one of the most reliable and easy ways to prevent sharing your IP address or other sensitive data with random websites. It works as an internet middle-man, adding an extra layer of protection between the web browser and the website.
Generally, when we try to access any website, the web browser needs to communicate with the website’s server. Certain information must be shared, like the IP address, for this communication to occur.
Indeed, by using a Proxy, we can avoid this direct connection. In this case, our request is first passed to the proxy server and then reaches the website server. Similarly, the website’s response is first sent to the proxy and returned to us.

There is a variety of proxies. Some are available for free, while others charge a fair amount. However, we suggest you use a premium and reputable service, as free things come with caveats.
Setup Proxy Server in Chrome browser on Windows
- Open Chrome browser on your Windows PC.
- Click on the More

 menu and select the Settings menu.
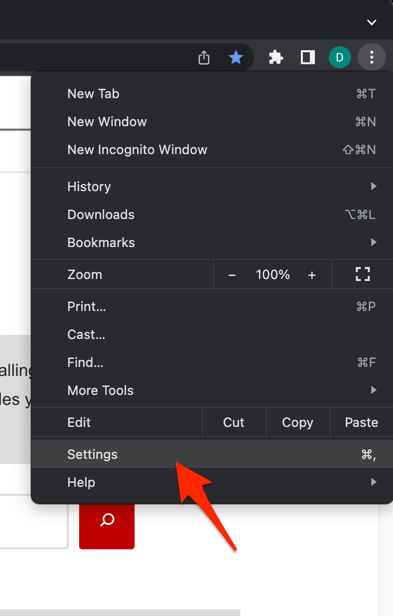
 It will open the Chrome Settings page.
- Select System on the left panel and click on Open your computer’s proxy Settings option.
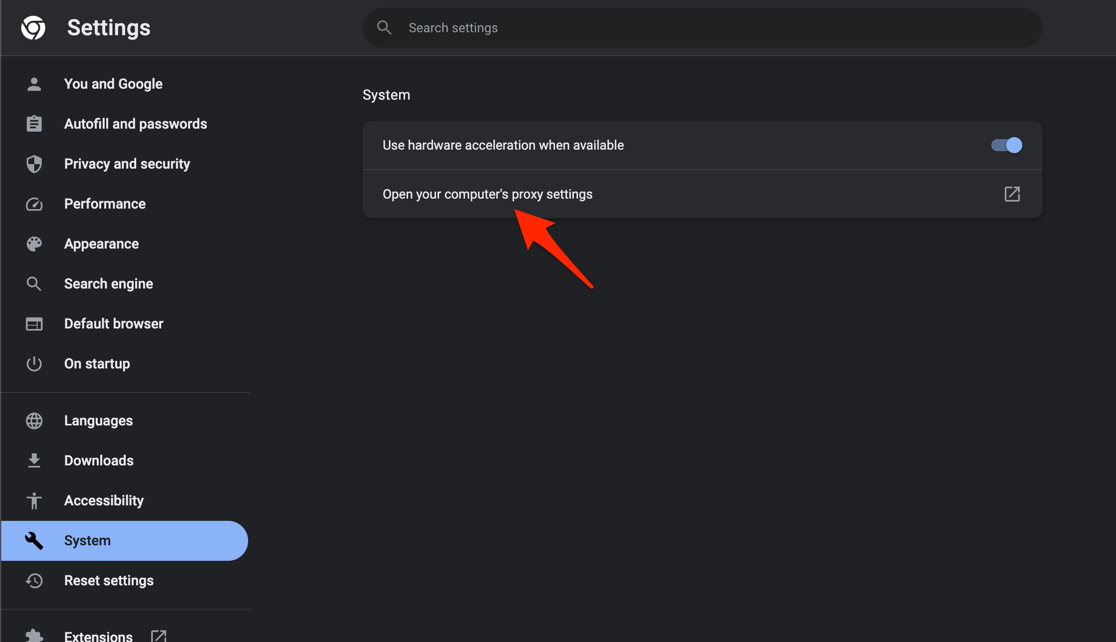
 It will open the Network Proxy settings page in Windows OS.
- Click the button under the Manual proxy setup section.
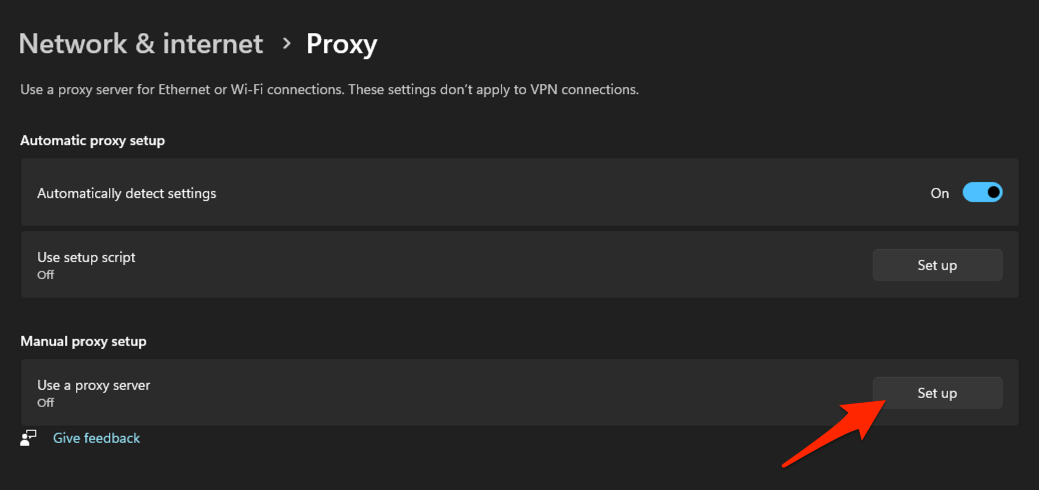

- Enable the toggle button for the Use a proxy server option.
- Enter the Proxy IP address and the Port number of the proxy server.
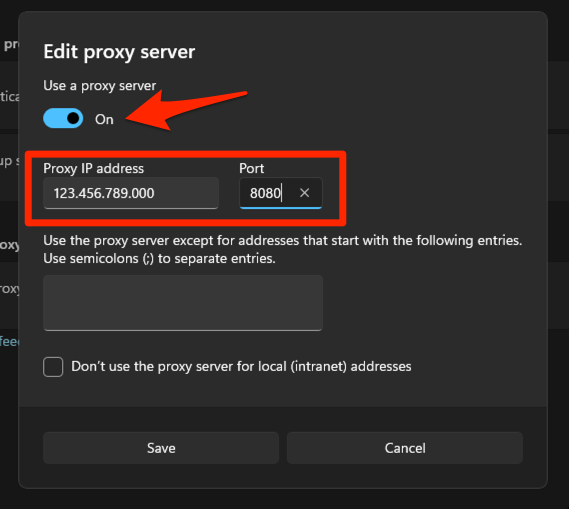

- Hit the button.
It will immediately activate the proxy server and start using it on Windows PC’s Chrome browser.
Additionally, if you wish to bypass any websites while using the proxy server, there is a dedicated option to enter the URL separated with semicolons (;). You can enter the details in the text field on the Edit proxy server window.
There is also an option to enable the checkbox for the Don’t use a proxy server for local (intranet) addresses option. You can disable the toggle button to turn off the Proxy connection on Windows OS completely. Use a proxy server option. It will be disabled even for the Chrome browser.
Setup Proxy in Chrome browser on macOS
- Open Chrome browser on your Windows PC.
- Click on the More menu and select the Settings menu.
- Select System on the left panel and click on Open your computer’s proxy Settings option.
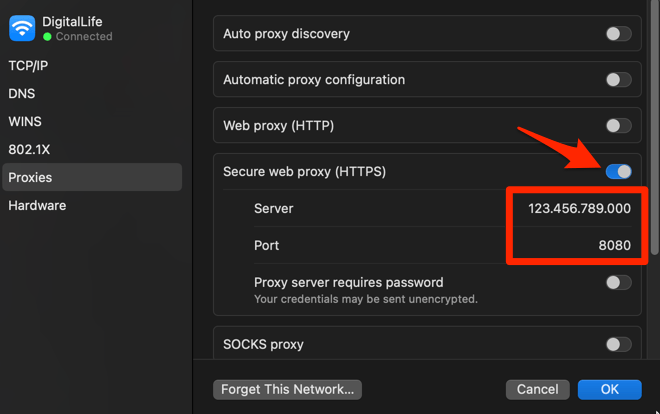
It will open the macOS Proxies page. - Enable the toggle button on the Secure web proxy (HTTPS) option.
- Fill in the Server IP and Port Number in the respective field and hit the button.

It will save the proxy details and use them to connect with the website you’re trying to access.
Note: The proxy setup is only valid for the network connected while setting up. If the network is changed, the web proxy is no longer valid.
You can always Turn Off the proxy setup by disabling the toggle button enabled for the Secure web proxy (HTTPS) tab.
Bottom Line
Adding a proxy server is a great way to enhance your privacy. Your data and activities are safe as it hides your IP address and handles all requests and responses through an extra server in the middle.
Besides, setting it up in Chrome browser is also extremely easy. All you need is the port number of the proxy server and the IP address.
However, the most challenging part is always choosing the exemplary proxy service. You can also use the Chrome VPN extensions to safeguard your browsing data.
Lastly, if you've any thoughts or feedback, then feel free to drop in below comment box. You can also report the outdated information.