
The Brave browser allows you to control and block the push web notification. We can enable or disable the notification for all websites or customize it per site.
The browser notifications are often annoying when they are frequent. The notification customization is available under the Privacy and Security settings.
In this guide, I have shared written instruction about:
Configure the Site Notifications
You can enable notifications from a website on the Brave browser instantly. It is worth noting that you can allow notifications if you have yet to block all sites from sending you notifications.
- Launch the Brave browser on your computer device.
- Open the website from which you wish to customize notifications.
- In the address bar, click on the Padlock

 for info.
 - Select Site Settings from the menu that displays.
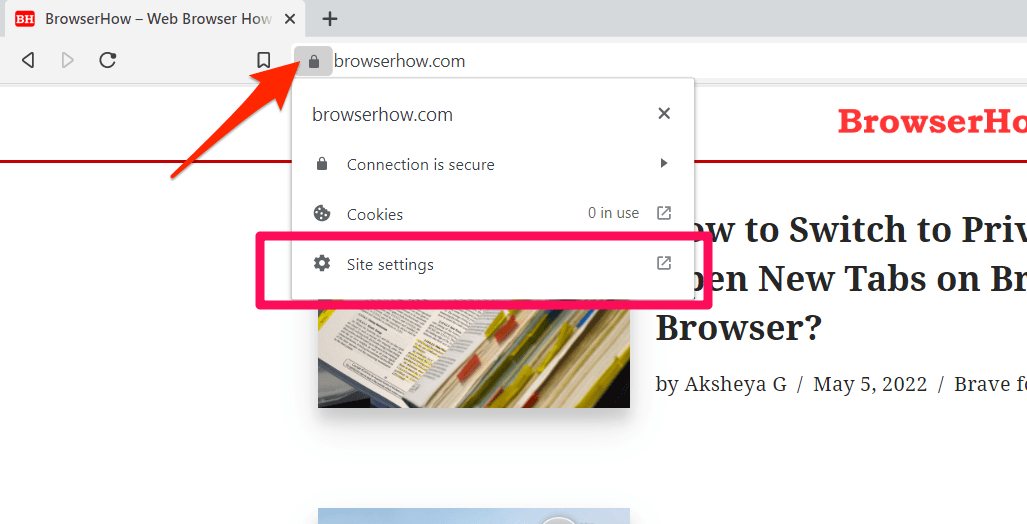
 It will open the Site settings related to the website.
 - Change the value of the Notifications permission to Allow or Block per need.
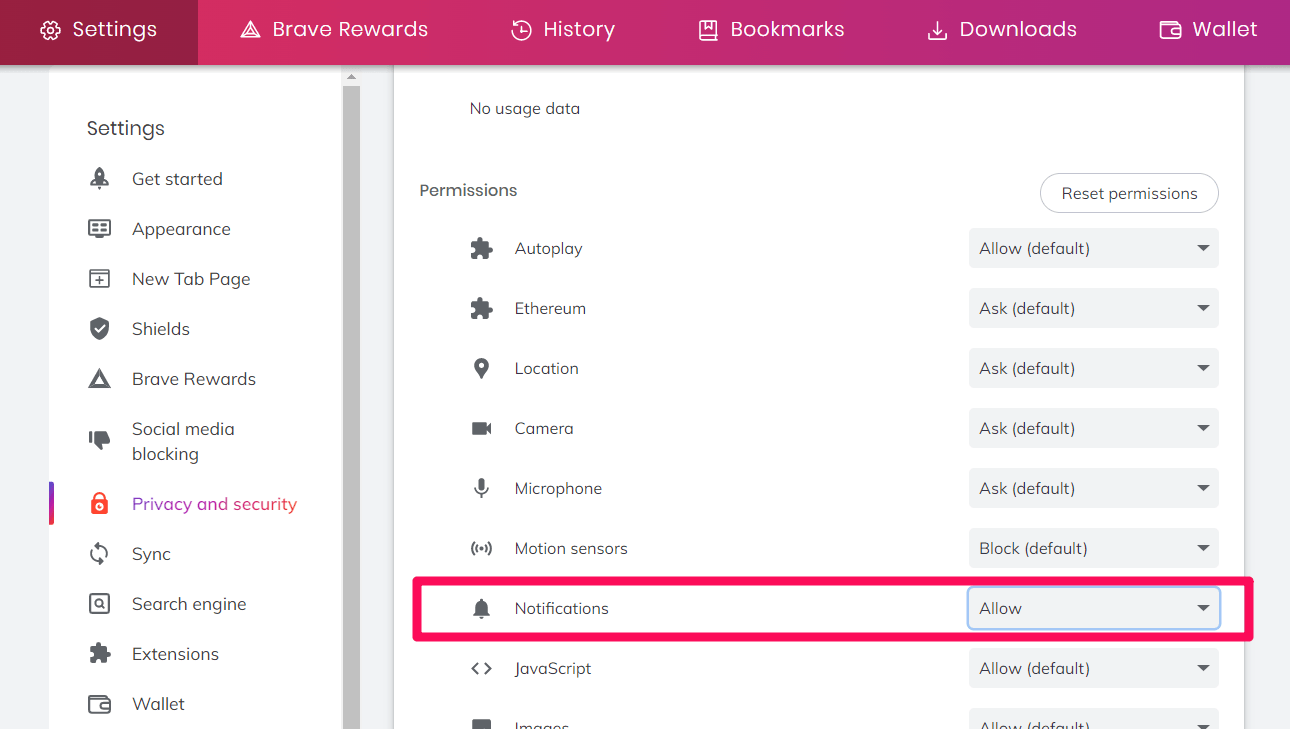

Close the tab, and you will start receiving notifications or be completely blocked as and when the website sends them based on the Site settings configuration.
Alternatively, suppose you are on a website, and the website asks to send notifications. In that case, you can allow or block it from sending notifications by selecting the time frame of your choice and clicking on the respective buttons.
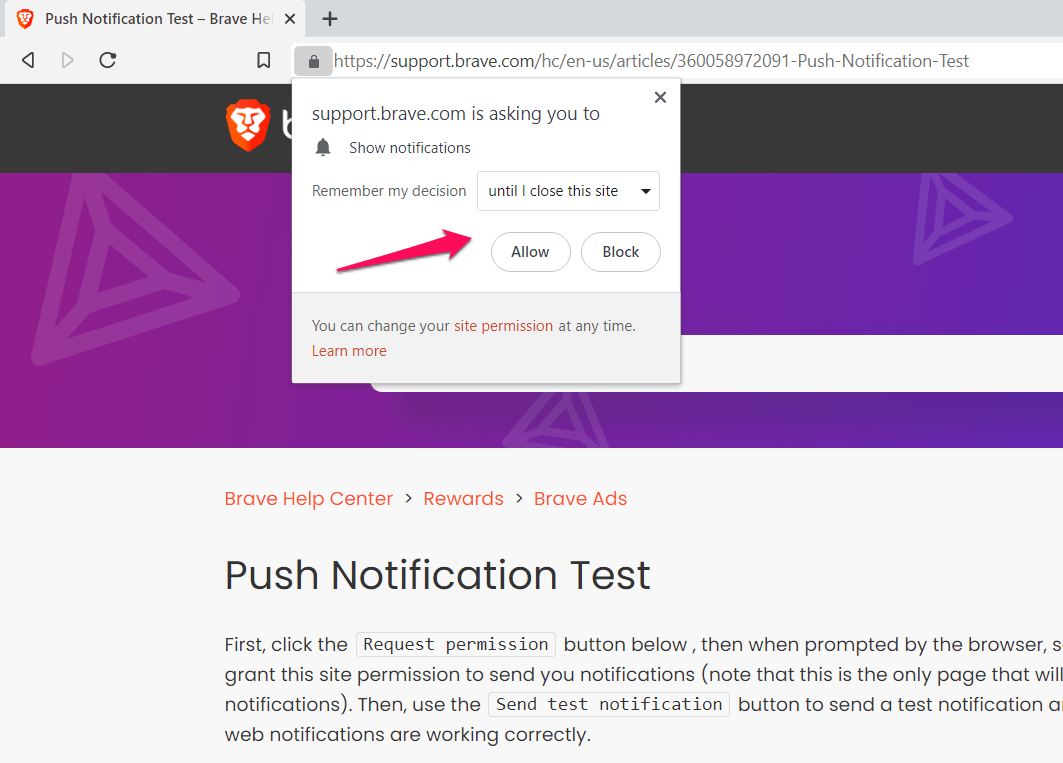
The Brave browser will respect your settings, and you can further customize the notification options from the same Site settings page.
Manage the Notifications Settings
You can manage your notifications by adding and deleting websites from which you wish to receive notifications. You can stop receiving notifications altogether from all websites you visit.
- Launch the Brave browser on the computer.
- Click the More
 menu and select Settings to access the browser’s settings.
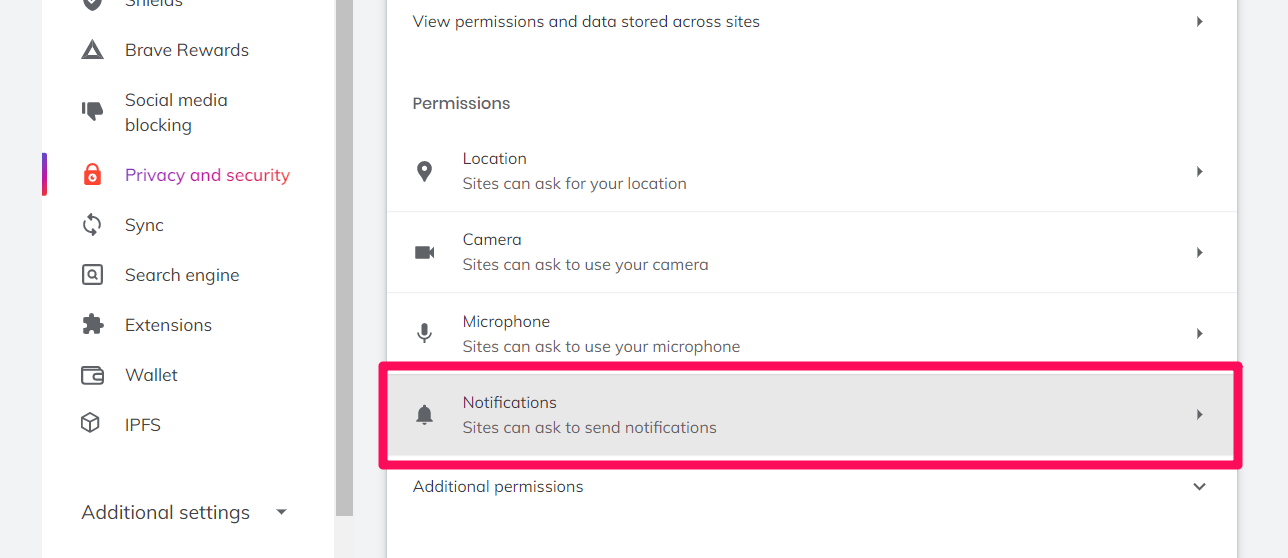
 - Switch to Privacy and Security in the left panel and then go to the Site and Shields Settings tab.
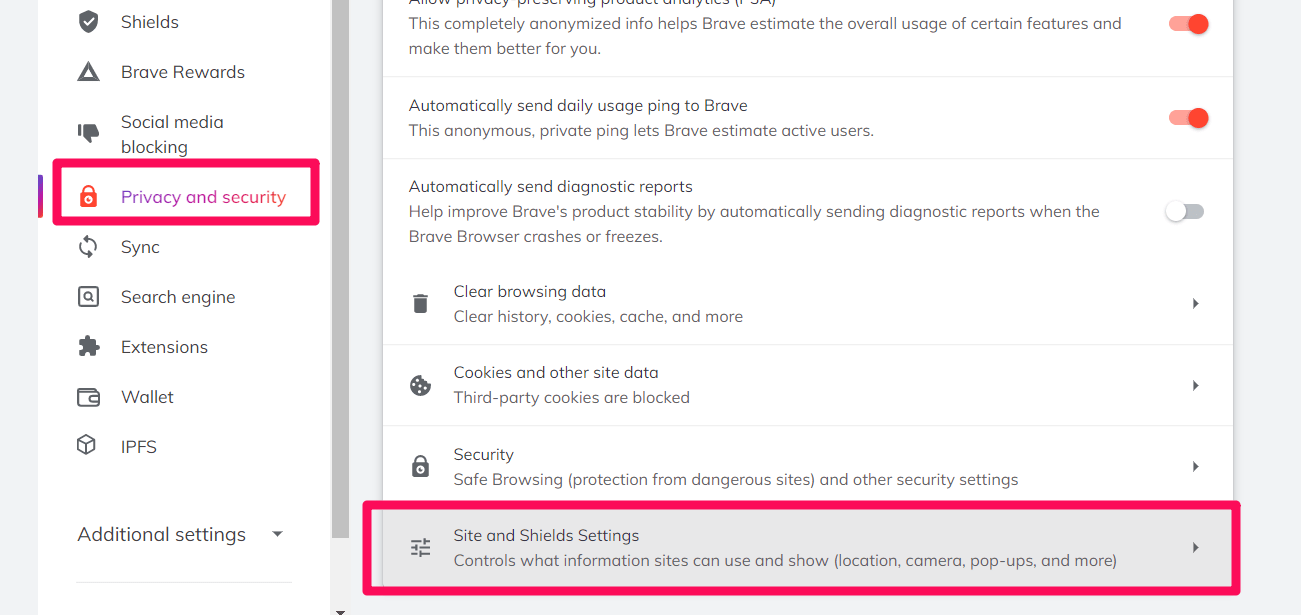

- Click on Notifications to access the notification settings page.

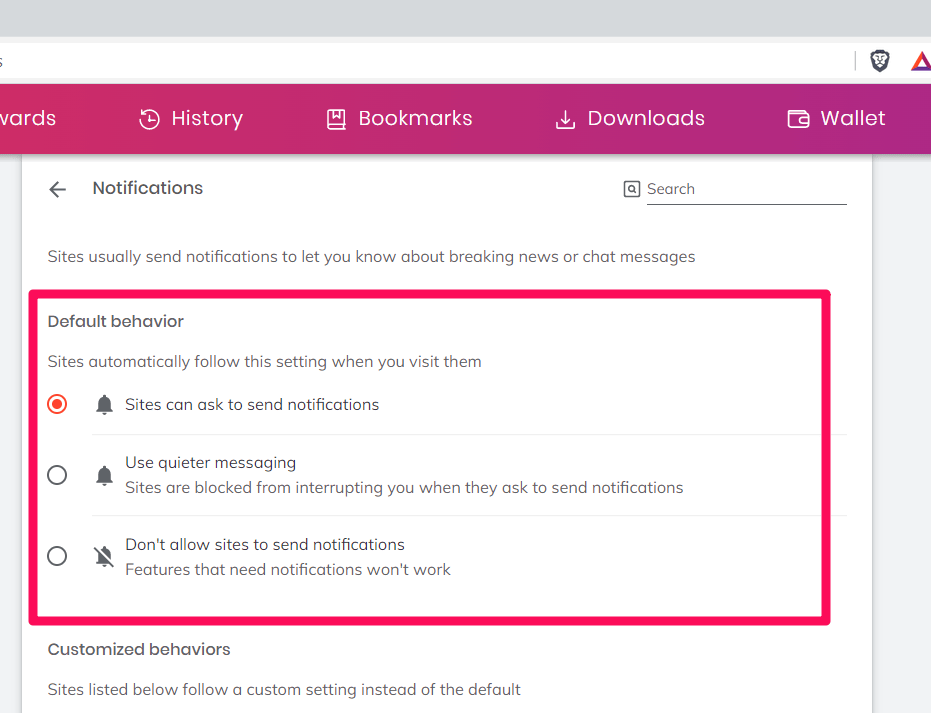
- Customize the Brave browser Notification settings per your need.
First, you can allow sites to ask to send notifications or block all sites from sending notifications by clicking on the options of your choice.
Second, you can block sites from sending notifications by adding their URLs. Similarly, you can allow sites to send notifications by adding their URL.
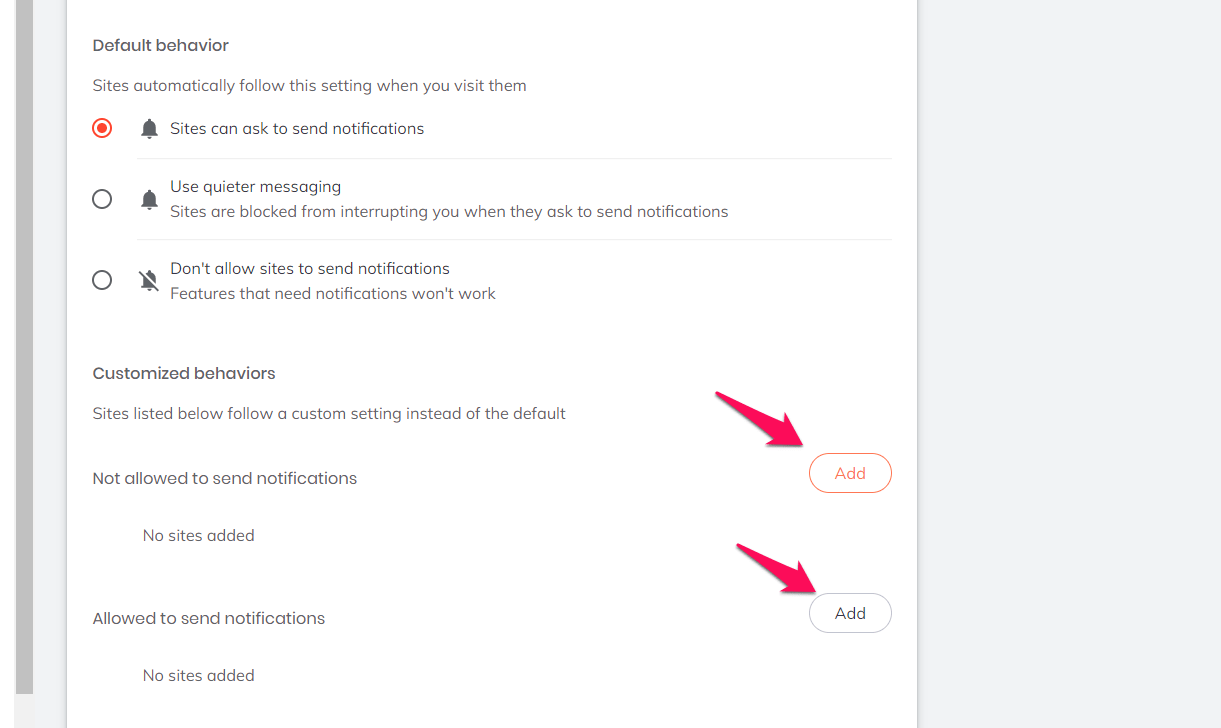
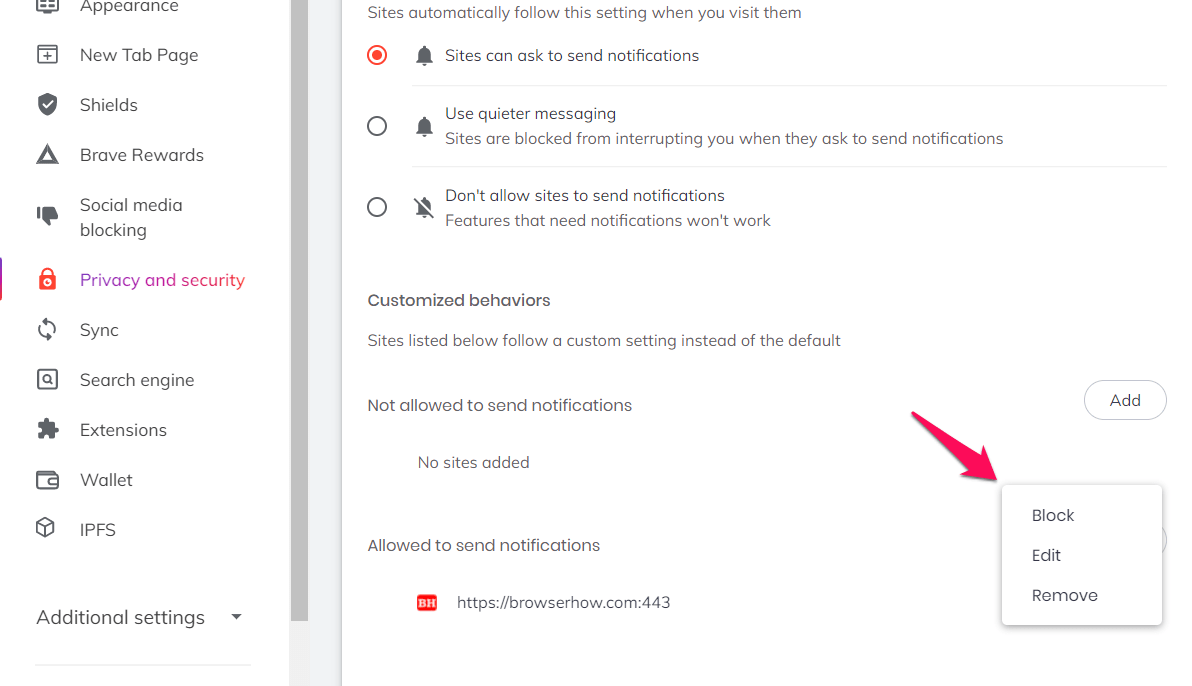
Finally, you can Edit and Remove the added or Block websites to disable notifications.
If you select the Don’t allow sites to Send Notification radio button, The browser will block all the websites, and you will not receive any request to Allow or Block notifications.
The Brave will reflect all your changes once you reopen the tab.
Bottom Line
You can enable notifications from your preferred blog to not miss anything. Similarly, you can block notifications from a disliked website to avoid being bombarded with annoying stuff.
On the Brave browser, you can manage notifications by accessing the site settings. Once you determine which notifications are helpful and which are not, you can enable the useful ones and block the annoying ones.
Lastly, if you've any thoughts or feedback, then feel free to drop in below comment box. You can also report the outdated information.


can i set a timer on notifications? ie they disappear after 10s ?
Unfortunately, there is no such feature. You have to manually close the notification alert.