
The Brave browser has many unique and built-in features unavailable on other browsers. One such feature is Tor Browsing mode.
The browser automatically hides the user’s location and network details and maintains strict privacy. We can easily switch to Tor Private Browsing Mode from the Menu.
In this guide, I have shared written instruction about:
Starting a Private Browsing with Tor
Private browsing with Tor has many benefits. It hides your IP address from others, adding an extra layer of security. Follow these steps:
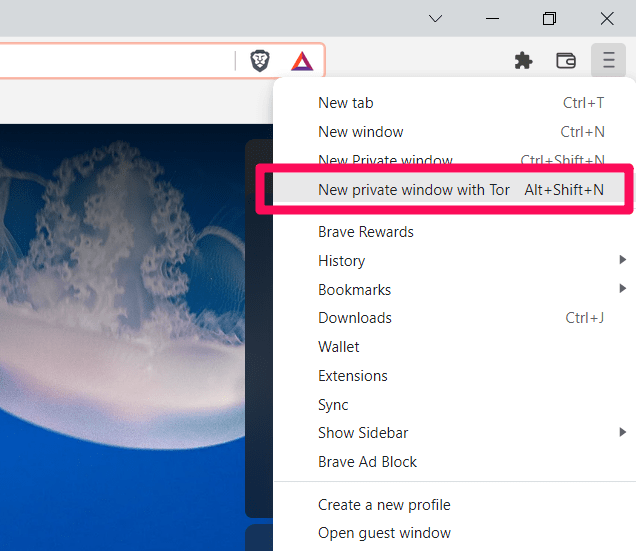
- Launch the Brave browser, and click on the More

 menu.
menu. - Select the New Private window with Tor from the menu.
 It will launch private browsing.
 - Check for connection status to change from Tor is connecting to Tor connected successfully on the new open tab.
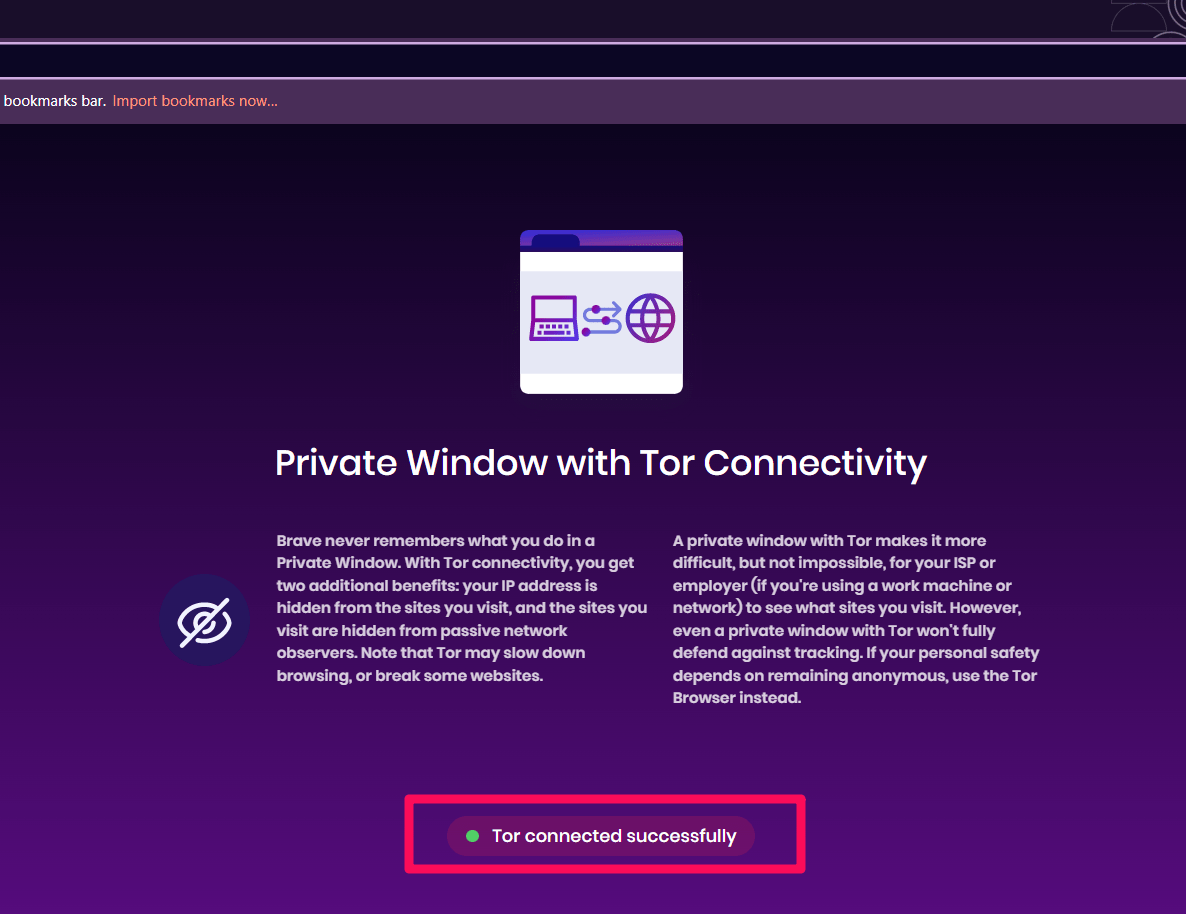
 It may take a few seconds but be patient.
You can now start browsing the internet privately with Tor browsing enabled within the Brave browser.
Alternatively, you can use the Brave keyboard shortcut. Press the + + keys for Windows and + + on Mac simultaneously to access the private window with Tor.
Bottom Line
Brave is a privacy-centric browser that has a unique take on the private or incognito mode. You can use the private window with Tor to browse the internet freely.
Using Tor as a proxy, the user’s IP address is kept under wraps. The user is connected to three computers, one after the other, with only one knowing where the connection is coming from. The other two do not know.
Lastly, if you've any thoughts or feedback, then feel free to drop in below comment box. You can also report the outdated information.


I was hoping to see directions for IOS devices, unfortunately, those weren’t included. Would you please do an instructional guide for iPhones/IPads?
Thank you.
Hello, we are still working on creating the guides for other devices including brave for iPhone or iPad.