
The Chrome browser doesn’t have the option to roll back the installed build to the previous version. We need to uninstall and download the older version to install manually.
Before installing the old version, we need to delete the saved user data files and stop the auto-update service on the computer.
Editor’s Note: This guide uses the Windows computer for downgrade to the previous version. For Mac & Linux, you should download the older setup file from any third-party repository and delete the existing application file.
In this guide, I have shared written instruction about:
Step 1: Uninstall the Chrome app
Since it’s not a system app like Microsoft Edge on Windows or Safari on macOS, we can uninstall the Chrome browser from the Control Panel. Here are the steps to uninstall:
- Bring up the Run dialog box via + shortcut keys.
- Type in appwiz.cpl and hit .
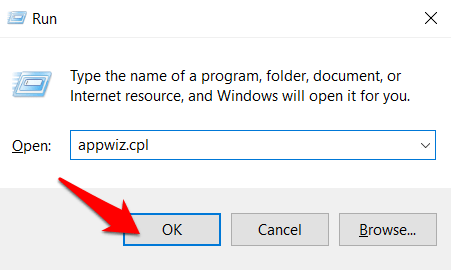
 It shall open the Control Panel with the installed application.
 - Select Google Chrome from the list, and hit on the command.


- Follow the onscreen instructions to uninstall.
It will remove the Chrome installation from the computer.
Step 2: Delete the Saved Chrome Data using File Explorer
While you have successfully uninstalled Chrome, some of its data might still be present. It might conflict when you are installing an older build. Hence, it is recommended that these old data files be deleted. Here are the steps to delete Chrome user data:
- Open File Explorer on your Windows PC.
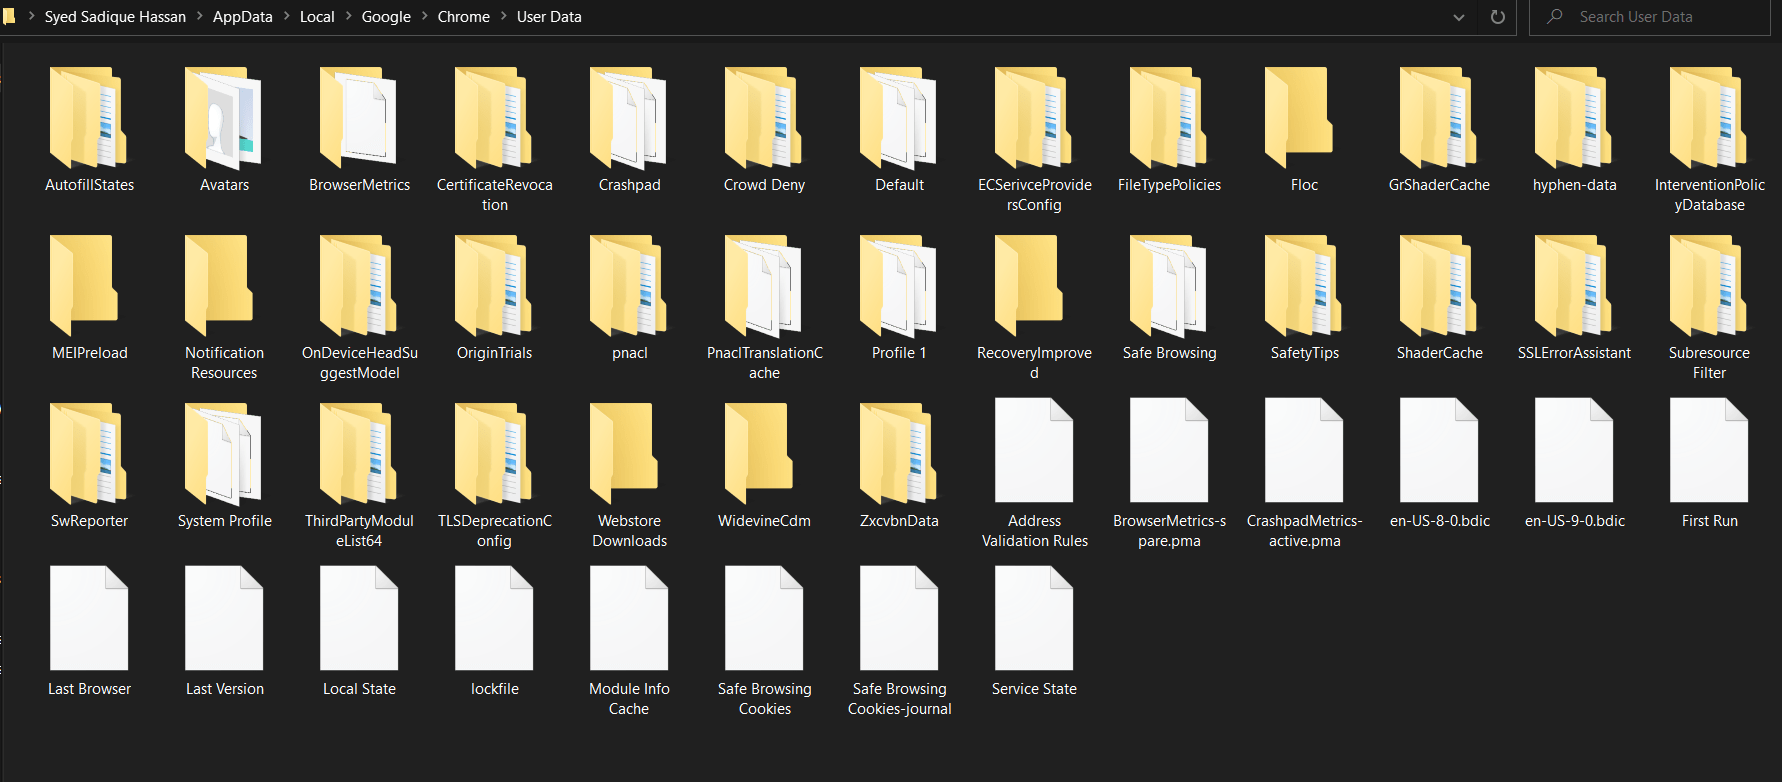
- Head over to the below location:
%LOCALAPPDATA%\Google\Chrome\User Data
You find any remaining files and folders after uninstalling the Chrome browser.
- Select All files/folders and send them to the Recycle Bin.

You can also permanently delete these files if required.
Step 3: Download the Older Version of the Chrome app
There is no official repository from where you could get your hands on an older build of this browser. However, there do exist some handy alternatives that you could refer to. These include the likes of FileHippo, Chromium Cypress, etc.
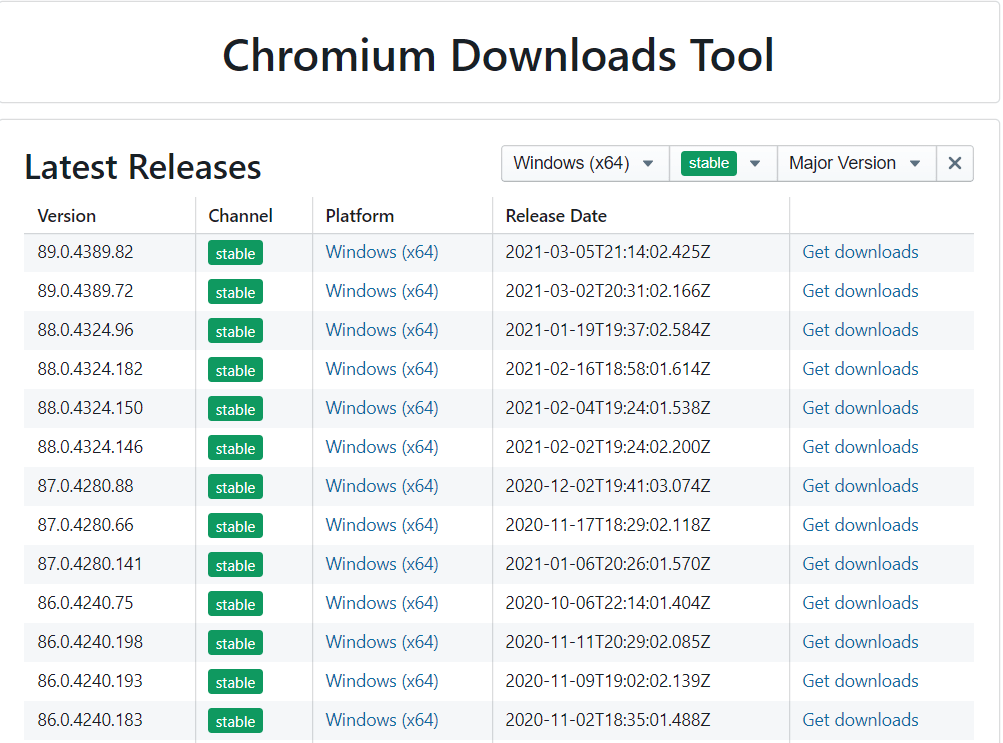
Firstly, check the installed version of Chrome app and ensure to download the preferred previous version from any of third-party sites. You can follow on-screen instructions to install the app.
Step 4: Disable the Chrome Auto-Updates Services
The browser doesn’t have a built-in option to disable the auto-update features. So, you would have to take the help of the Windows Services page and disable the ones responsible for Chrome’s automatic updates. Here are the steps:
- Bring up the Run dialog box via + shortcut keys.
- Type in msconfig command, and hit button.
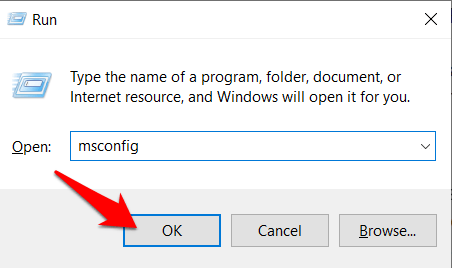
 It will open the Microsoft System Configuration window.
 - Switch the Services tab and uncheck the Hide all Microsoft Services option at the bottom left.
- Next, uncheck the options for Google Update Service (gupdate) and Google Update Service (gupdatem).
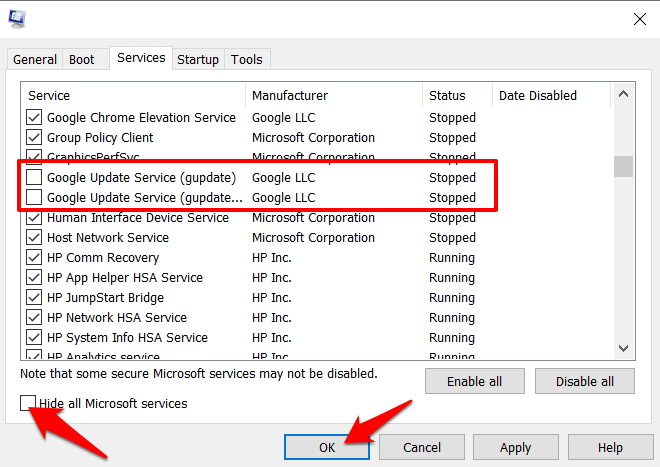

- Hit on > to close the window.
- Restart your PC to make these changes effective.
We have successfully disabled the Google Update Service that will essentially be used for auto-updates. Now, Google won’t be updated to the next or current available. However, we can still manually visit About Chrome to update.
Bottom Line
While downgrading might lead to a few security risks and losing out the latest features, in some instances, if it becomes an absolute necessity then you can consider downgrade as an option.
Make sure to wipe out the old Chrome browser data and auto-update is turned off, else the browser will automatically download and install the latest build.
Lastly, if you've any thoughts or feedback, then feel free to drop in below comment box. You can also report the outdated information.

Are these steps still valid for the latest version , 108? I keep trying to install a previous version, but Chrome updates it always in the background.
The very first step that you need to do before launching the Chrome browser is to disable the Chrome Helper(Updater). In fact, you should uninstall the tiny software from the control panel. This will stop the auto-updates in the background.
mostly these versions are outdated so they might not work correctly but they are fast such as chromium chromium is one of early version of chrome but this version is first version
Remember to export your bookmarks before uninstalling Chrome.
If you have a Google account signed and synced, the Bookmarks are automatically copied into the older Chrome browser when signed with the same Google account.
Okay and the procedure for Ubuntu 🙂