
Google Chrome is not a system app on a computer except for a Chromebook. Hence, we can easily uninstall and remove the application from a computer.
However, even after uninstalling the browser app, a few data files are stored locally. To complete a wipeout, we need to clear this residue data manually, turn off background tasks, and stop updating services.
Editor’s note: The following steps apply to Windows PC users. Mac users can trash the Google Chrome App from the Applications folder to uninstall and wipe out data.
In this guide, I have shared written instruction about:
Step 1: Stop the Chrome Background Processes
We will have to kill all Chrome’s background processes. This will be a prerequisite for the rest of the steps to uninstall and delete the browser’s data files.
If you don’t stop these processes, you won’t be able to delete the associated Chrome files. Instead, it will throw the following error message: “The action can’t be completed because the folder or a file is open in another program.”
Here are the steps to kill the background process:
- Keypress + + shortcut keys to open Windows Task Manager.
- Under the Process tab, expand the Background Process.
- Select Chrome processes (if any), and hit the command button.
- Switch to the Details tab.
- Select the chrome.exe process and hit the button again.
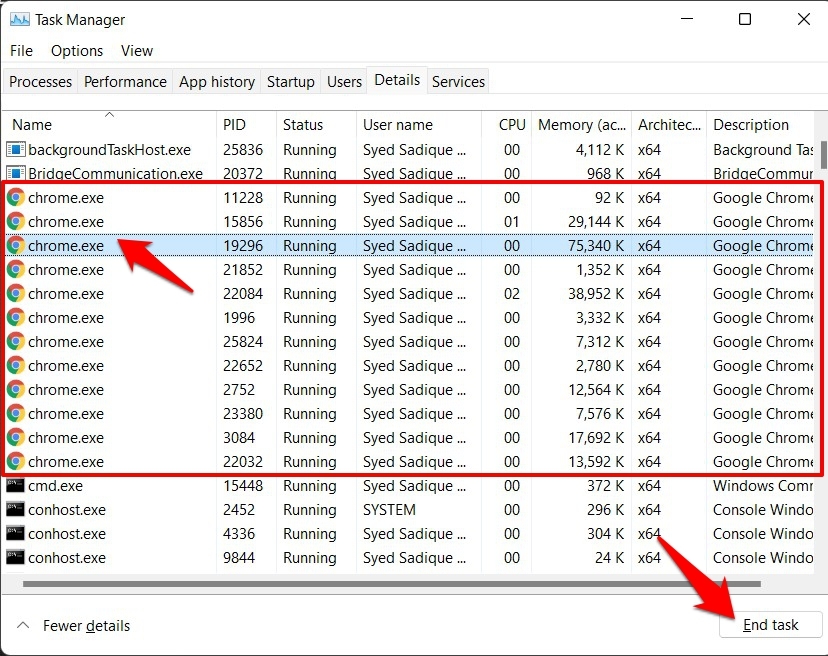
 Kill all the existing chrome.exe processes using the End Task command.
All Chrome’s background processes have been stopped. You may now proceed with uninstalling the Chrome browser.
Step 2: Uninstall Chrome app on a Computer
All the installed applications are available on the Apps page within Windows Settings. We can look up the Chrome app and then uninstall the same. Here are the steps to follow:
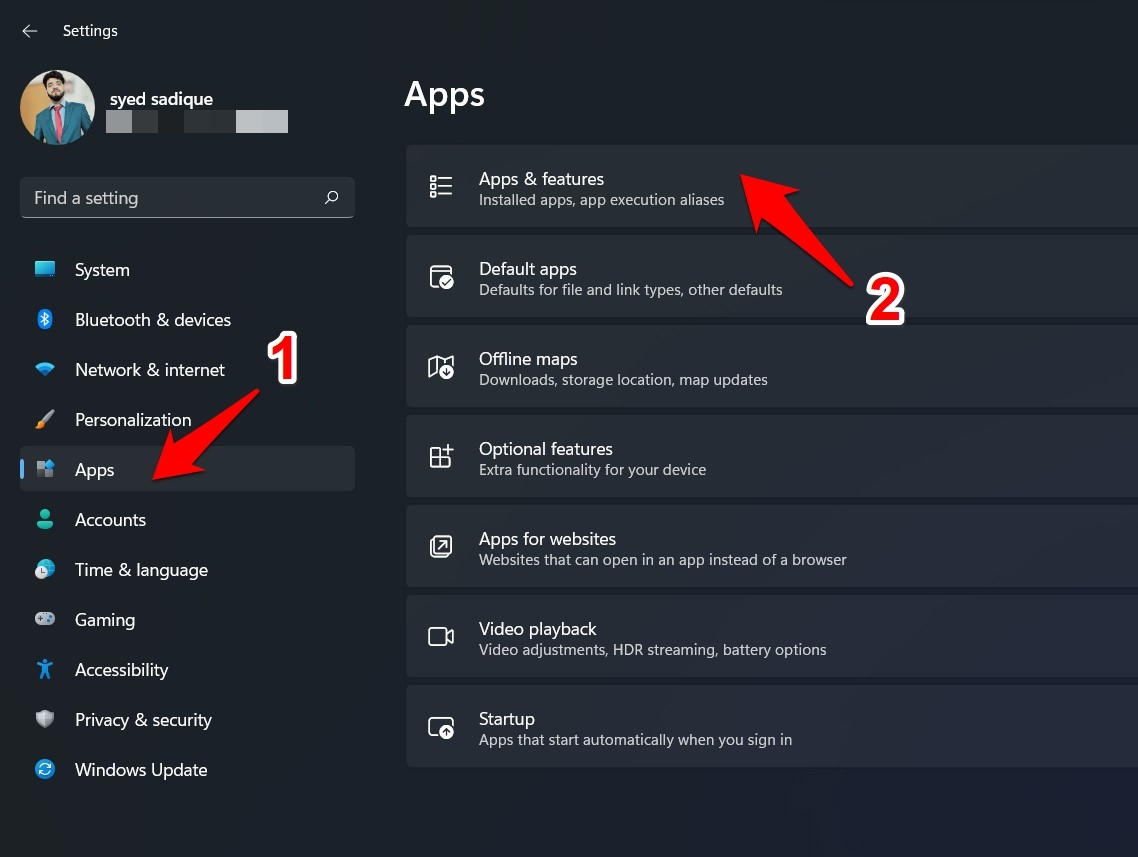
- Keypress + shortcut keys to open the Windows Settings menu.
- Select Apps from the left menu bar and select Apps & Features.

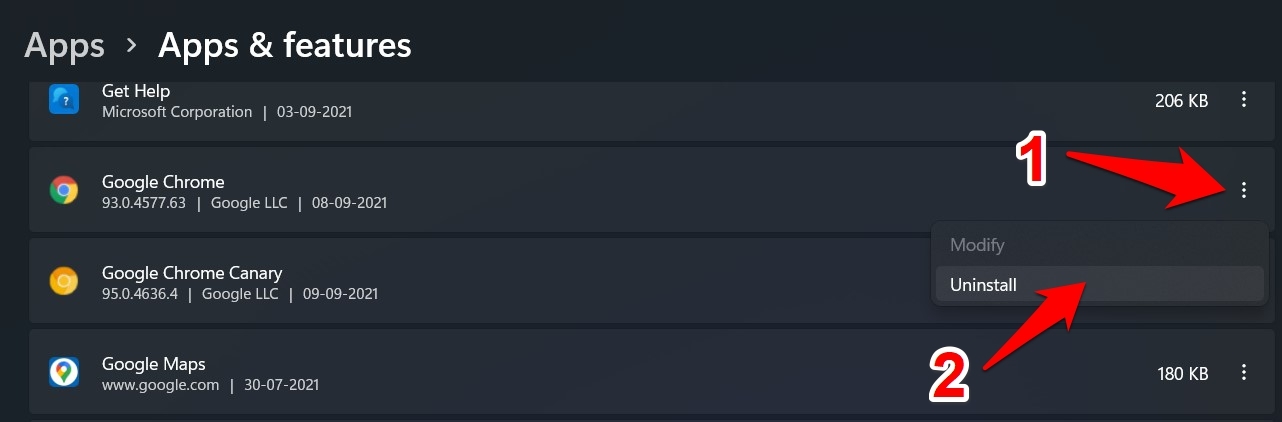
- Scroll to Google Chrome within Apps & Features, and click on More

 for the options list.
 - Select the Uninstall command from the options list.

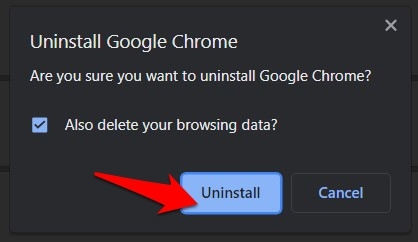
- Enable the checkbox for Also delete your browsing data, and hit the command button.

The process will take a few seconds, and once done, it will remove the Chrome app from your browser. However, the residue data files remain intact. Hence, proceed ahead and delete its remaining files as well.
Apart from the Apps settings, you can also use the Windows Control Panel to uninstall the Chrome app.
Step 3: Delete the Chrome Profile Folder and Files
Chrome’s profile folder holds all the browser data. These include likes, cookies, saved passwords, bookmarks, etc. Here are the steps to delete the profile data:
- Launch Windows File Explorer ( + ).
- Head over to Google’s Local App Data folder (make sure to replace UserName accordingly).
C:\Users\UserName\AppData\Local\Google
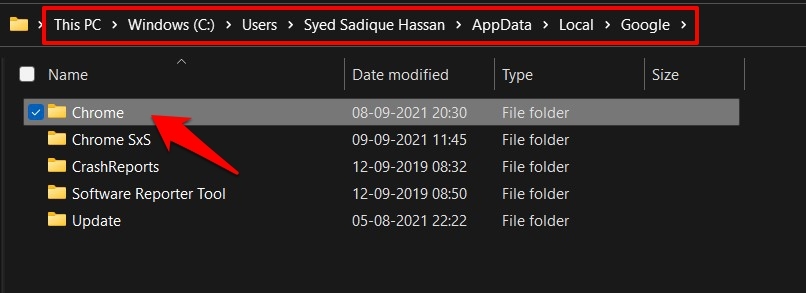

- Select the Chrome folder and right-click for the context menu.
- Hit the command menu.
It will remove all the data related to your Chrome profile. The saved local data like cookies, cache, and browsing history will also be wiped out.
Step 4: Delete the Chrome Installation Folder
You must also manually delete the remaining Chrome installation files and folder stored under the Program Files directory. Here are the steps to remove the residual installation files:
- Launch the File Explorer from the Taskbar.
- Access the Google Chrome Folder from the File Explorer window under Program Files.
C:\Program Files (x86)\Google
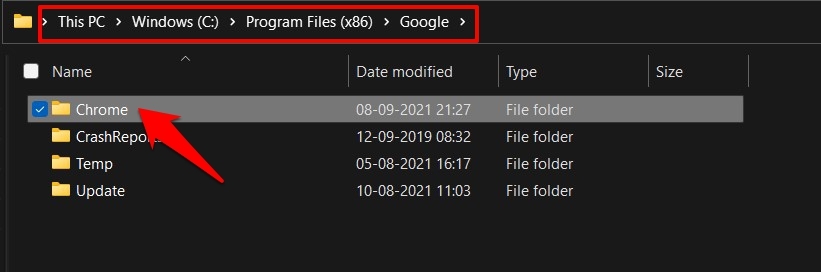

- Select the Chrome folder and right-click for the context menu.
- Hit the command menu.
It will clear the Chrome installation files and folder from Windows.
Step 4: Stop Google Update Services
If a few files related to the Update service are left behind, it might reinstall the browser on your PC and update it to the latest build. Therefore, it is recommended that those files be deleted as well.
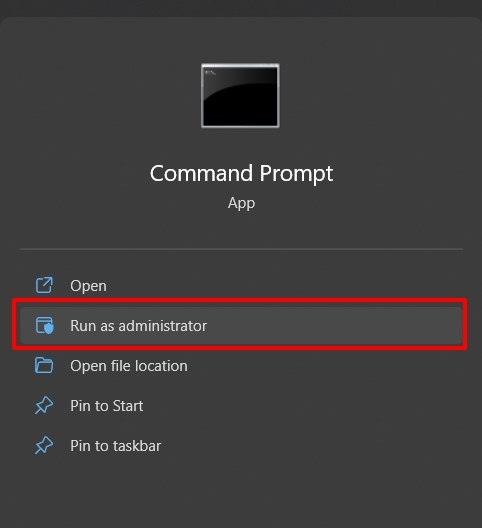
- Head to the Start menu and search CMD for the Command Prompt app.
- Launch the Command Prompt as an Administrator.

- Execute the following four commands to delete the Google Update service.
sc stop gupdate
sc delete gupdate
sc stop gupdatem
sc delete gupdatem
- Exit the Command Prompt window.
Once done, all the update services related to Google and Chrome stand deleted.
Step 6: Disable Google Update Task Service
Task Scheduler reminds the Google Updater to update Chrome after a specific interval. Hence, disabling the scheduler will kill the remainder of the service. Here are the steps to follow:
- Launch the Task Scheduler via the Start Menu.
- Double-click on the Task Scheduler Library from the left menu bar.
- Select the task whose name starts with GoogleChromeUpdateTask.
- Right-click on the context menu and select the Disable option.
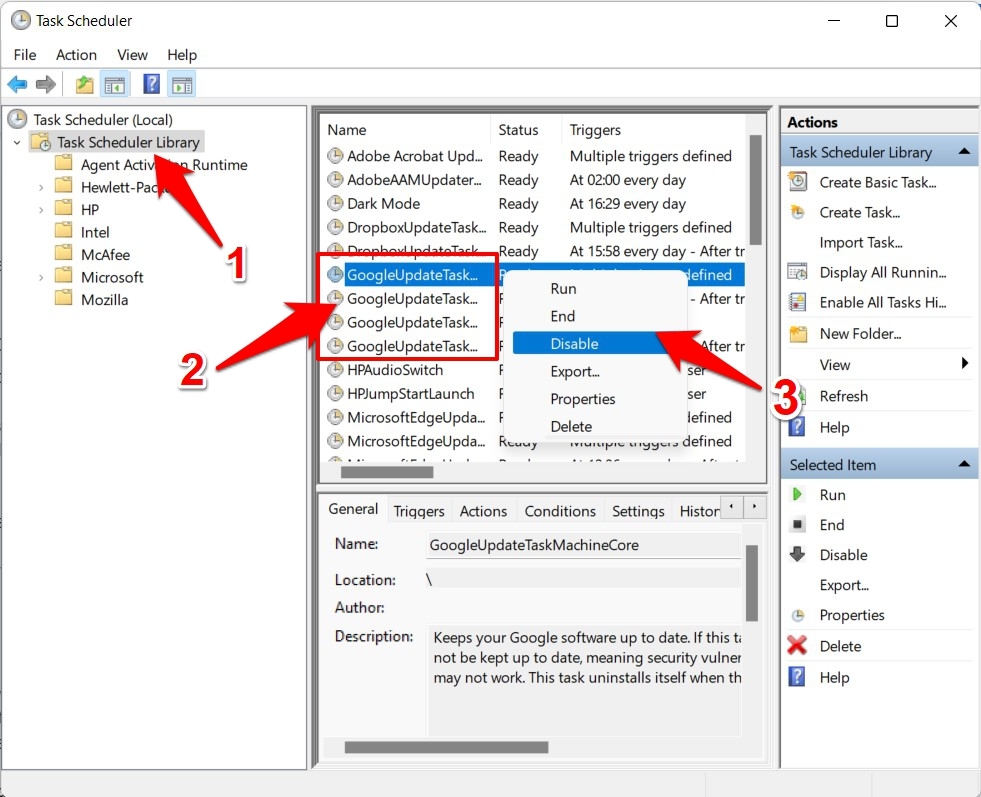

Multiple tasks might start with that name; make sure you deactivate all of them.
Bottom Line
If you uninstall the app from the Windows settings menu, its data files are likely left behind. Therefore, verifying that those files are deleted immediately is always recommended.
If you’ve followed the steps mentioned, the browser app and its traces are entirely removed from the PC. You can consider installing a fresh Google Chrome if required.
A macOS user can trash the Chrome app from the Applications folder, essentially deleting the files and folders with the Chrome app.
Lastly, if you've any thoughts or feedback, then feel free to drop in below comment box. You can also report the outdated information.


Instead of worrying about the login name to find the profile folder, just type %LOCALAPPDATA%\Google
into the address bar.
Thanks for the tip, Cameron! 🙂
Thank you. I did find that the files to stop in cmd weren’t there as well as on the task scheduler but it was step by step very helpful and I only stumbled a few times but got it done. Thanks again.
Thank you, well written guide