We can use the Google account to sign in to the Chrome browser and sync the data from one device to another. Each different account sign-in will be created as a Chrome Profile, which we can switch on the computer browser.
We can also customize the data set that needs to be synced and shouldn’t be from the sync settings page on each signed-in device.
In this guide, I have shared written instructions + video tutorial about:
Sign in & Sync Data from Chrome on the Computer
First, we must sign in with a Google account to create a Chrome Profile, which will help store our data. After sign-in, we can customize the sync settings to choose the data type that needs to be synced.
Watch Video Tutorial
Or you can skip to continue reading the written instructions.
Find the video guide helpful? Please consider subscribing to our YouTube channel for more such videos.
Step 1: Signing into a Google Account
You can use your existing Gmail address or create a new Google account for free to sign in the Chrome browser. Here are the steps to follow:
- Launch the Chrome browser on your computer.
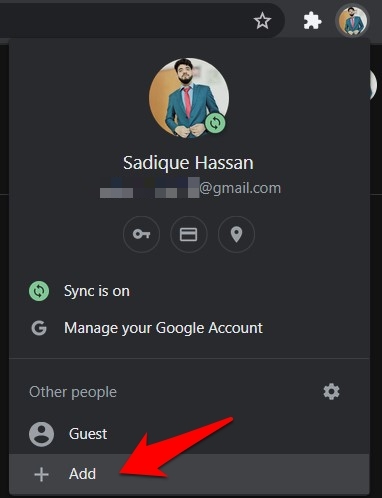
- Click on the User Profile icon situated at the top right.


- Click on the command in the dialog.
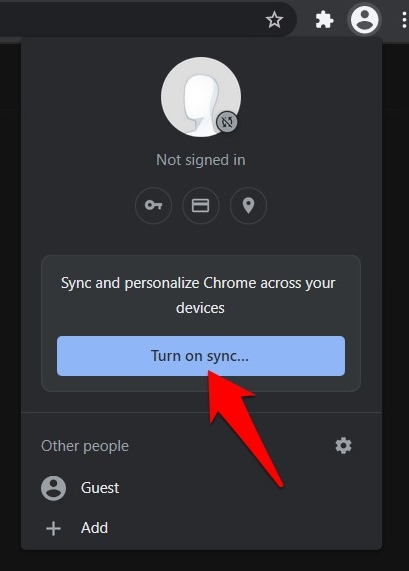
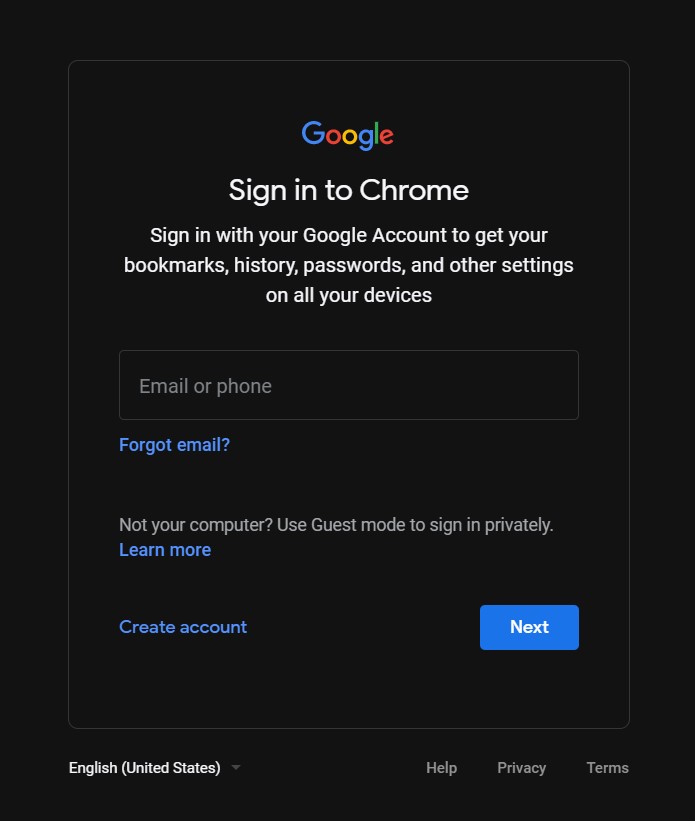
 You will be taken to the Sign-in page.
 - Enter your Google account credentials to sign in.
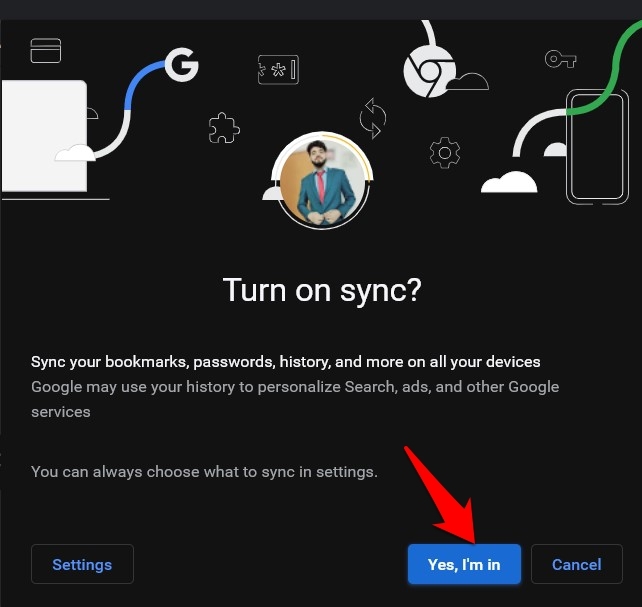
 After sign-in, the Turn on sync popup will appear.
 - Click command button.

- Click on the Profile icon to re-verify the account sign-in.
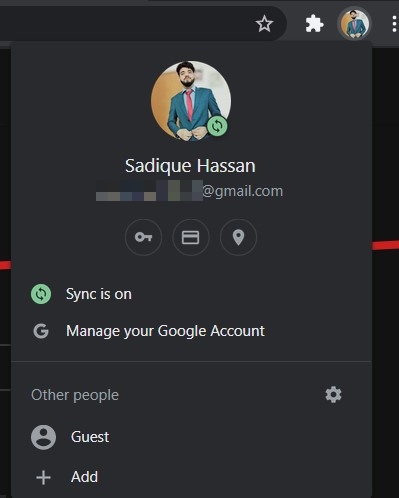

We have added our Google Account to the Chrome browser.
Step 2: Customizing the Data Sync Settings
Once you add an account to Chrome, it automatically syncs all your data. However, you can control this setting and choose which data to sync with other devices. Here are the steps to follow:
- Launch the Chrome browser on the computer.
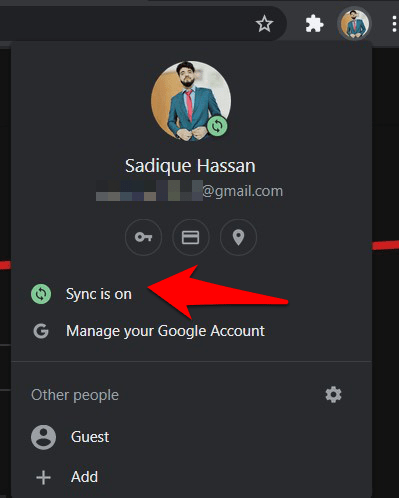
- Click on your Profile icon situated at the top right.
- Select Sync on the menu from the list.
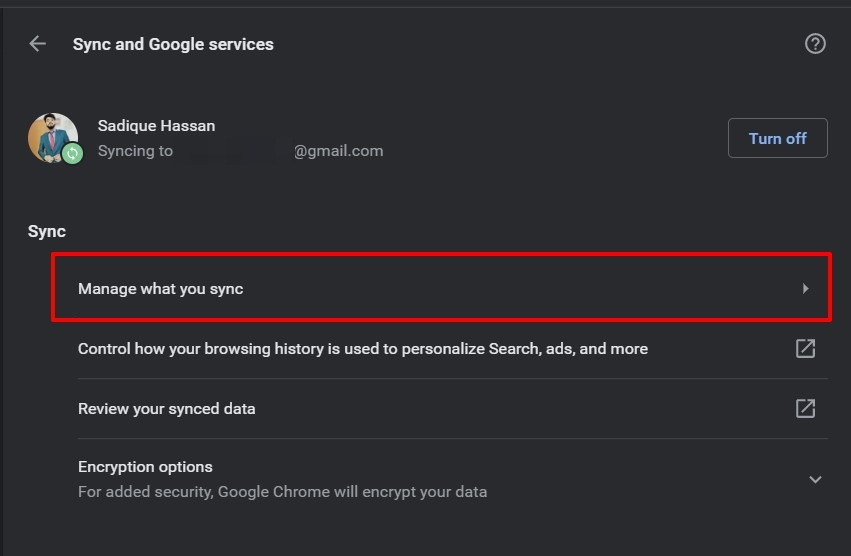
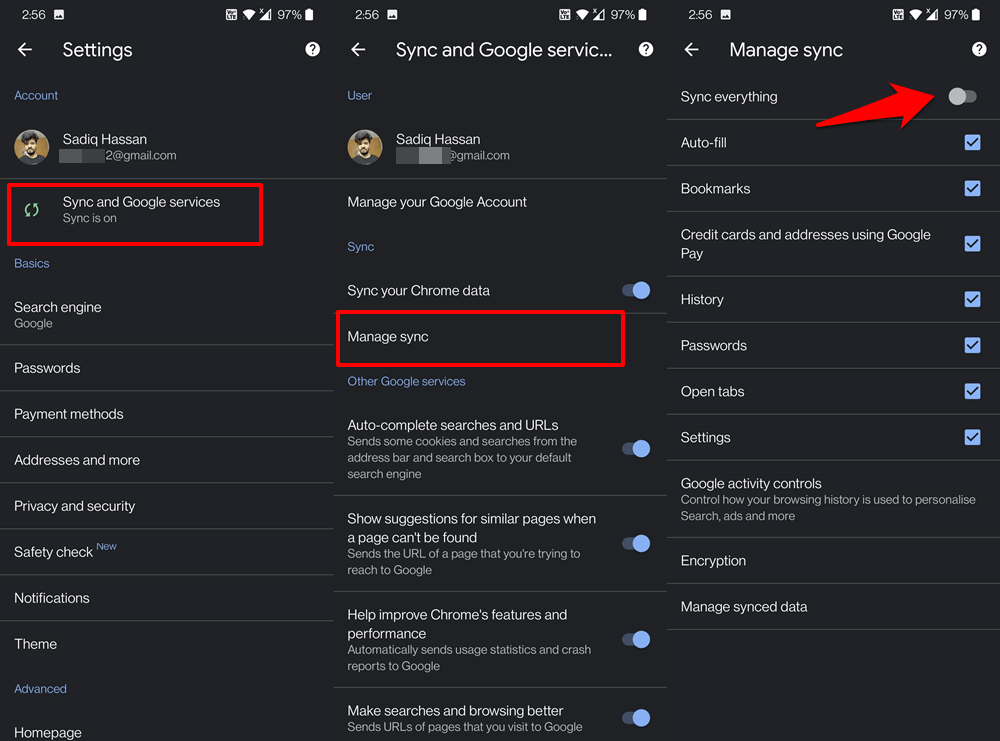
 It will open the Sync and Google Services screen.
 - Click on the Manage what you sync tab menu.

- Switch the radio button from Sync everything to Customize sync option.
- Use the Toggle switch to allow or stop data sync with the Google account.
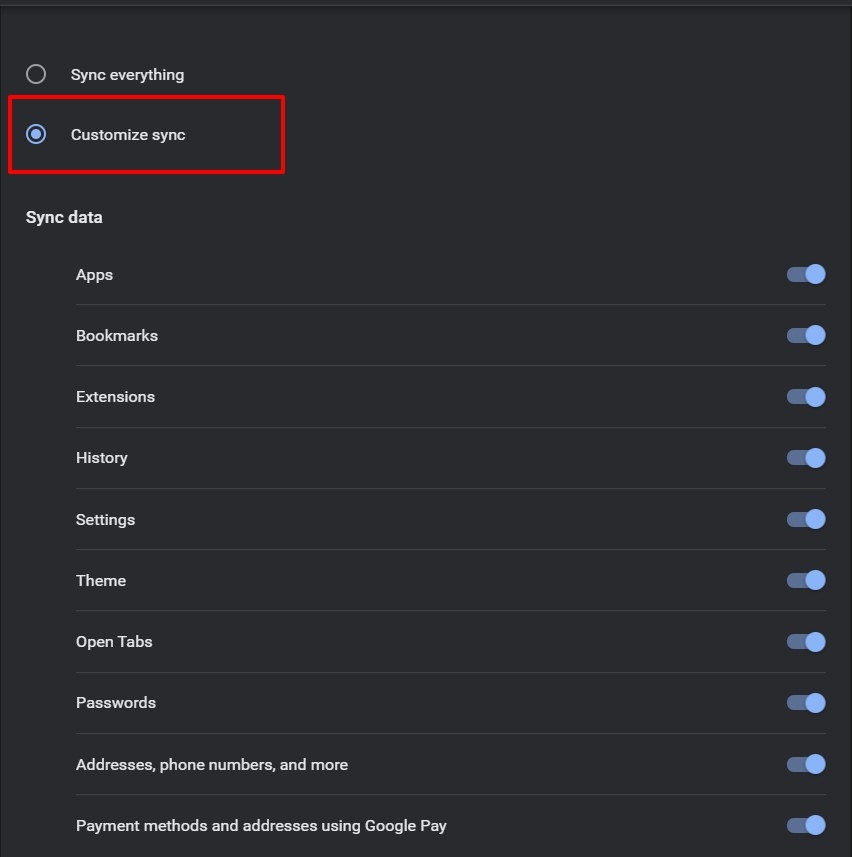

It will turn off the data sync between your browser and Google account for the one in which you’ve turned off the sync data toggle.
Note: Sync is turned on automatically once you sign in, so customize it as soon as you sign in to Google Chrome. Otherwise, you can select the button on the Turn on Sync window to customize before enabling synchronization.
Step 3: Adding Multiple Google Accounts
You can sign in more than one Google account in the Chrome browser. Each account will be added as a separate Chrome Profile independent of each other, which you can switch between using the Profile Picker window.
For example, you could create a work profile and a second for personal use. Here are the steps to follow:
- Launch Google Chrome on the computer.
- Click on your Profile avatar in the toolbar.
- Hit on from the dialog box.

- Sign in with your different Google account and proceed with the on-screen instructions.
You will see the Second account in Chrome’s profile section and select to switch that profile.
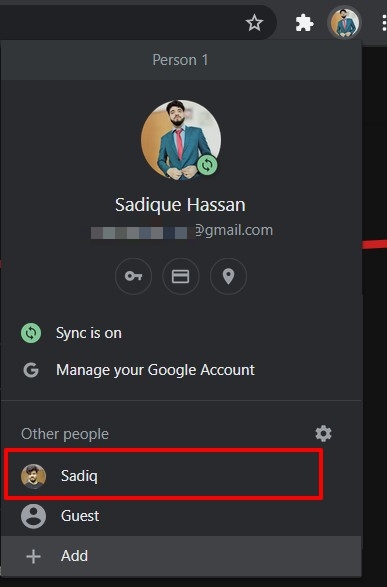
You can also access the profile without adding the Google account to create a separate profile.
Sign in & Sync Data in Chrome on Android
Like computers, we can sign in and sync the data from Chrome on Android. We should use the same Google account to make sure the data available on the computer is in sync with data on Android or other devices. We can also customize the data that needs to sync using the sync settings.
Watch the Video Tutorial
Find the video guide helpful? Please consider subscribing to our YouTube channel for more such videos.
Step 1: Signing with Same Google account
First, we need to sign in with our Google account. Here are the steps to follow:
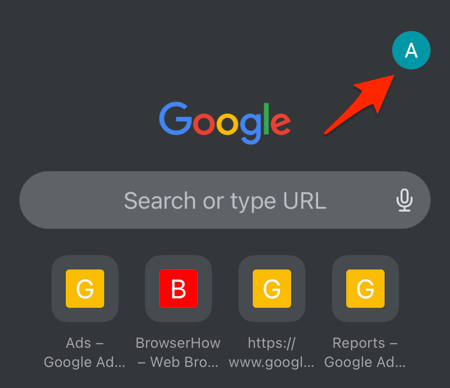
- Launch the Chrome browser app on your device.
- Tap on the More

 at the top right for a menu list.
 - Select the Settings menu from the list.
- Tap on the Turn on sync option.
- Tap on the button.
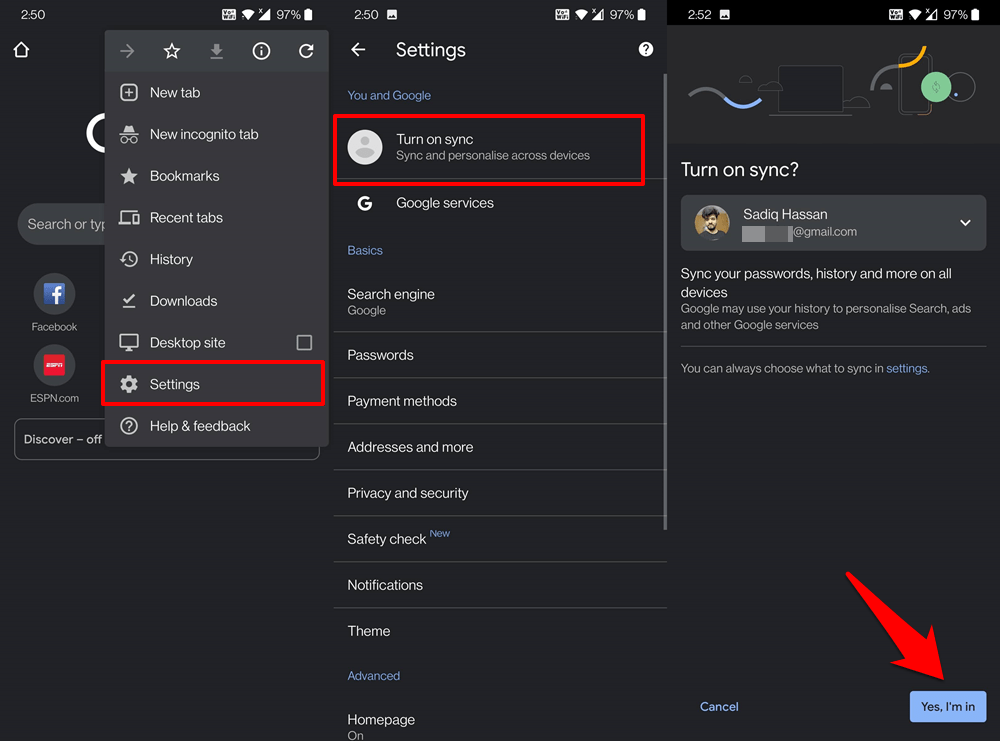

- Tap on your account name, select Add account to the device, and proceed with the on-screen instructions to add a new account.
It will sign you into Google Chrome and sync data between all Google signed-in devices.
Step 2: Managing Sync Settings
After account sign-in, Chrome will sync everything by default. However, you can tweak the sync settings, as mentioned below:
- Launch the Chrome app on your device.
- Tap on More for a menu list and select the Settings menu.
- Choose Sync and Google Services section.
- Tap on Manage Sync and disable the Sync Everything toggle.
- Customize the checkboxes for the desired settings you need to sync.
It will customize the sync data between devices based on your customization.
Selecting the Manage synced data option will take you to the Google account page and display the list of data synced with your account.
Sign-in & Sync Data in Chrome on iPhone
Like Android, Chrome on iPhone or iPad also offers the sign-in and data sync feature. You need to use the same Google account to sync the data and make it available.
Watch the video tutorial
Find the video guide helpful? Please consider subscribing to our YouTube channel for more such videos.
Alternatively, read the written instructions to follow:
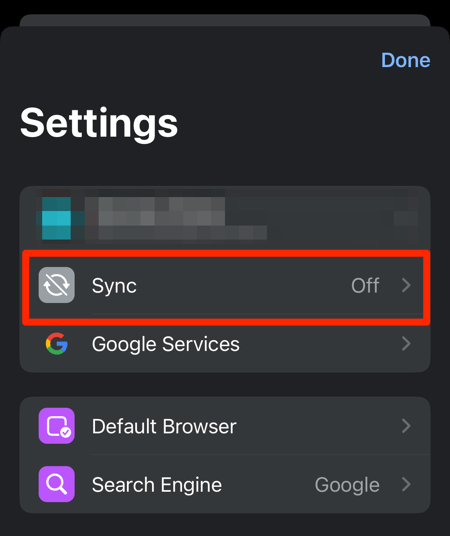
- Open the Chrome app on your iPhone/iPad.
- Tap on the Profile icon on the start page.

- Sign in with a Google account to create a profile.
- Select the Sync option from the Profile settings page.

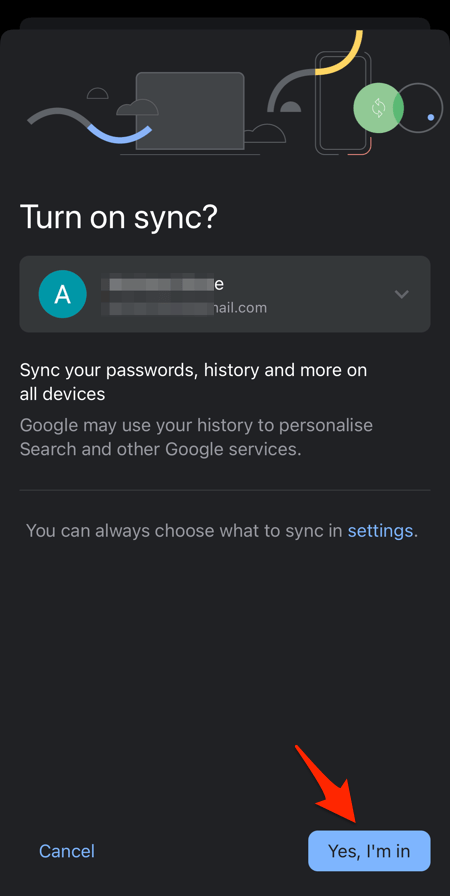
- Tap on button to turn on sync.

- Enable the toggle button to Sync Everything from Chrome on iPhone.
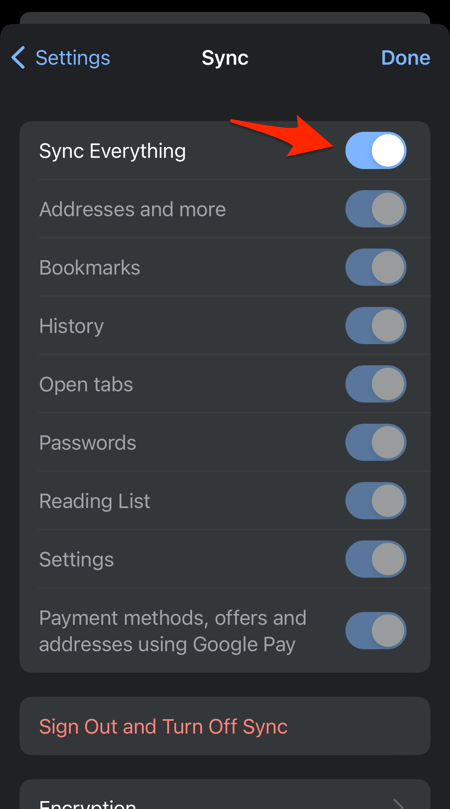

You can customize the toggle button to allow or disallow specific data to be synced. Turn off the Sync Everything toggle option and customize other data types according to your needs.
Bottom Line
We need a Google account to sign in and sync the data across the devices. With the sync option turned on, we do not need to save the details or data on every device manually; the data available in the sync cloud is automatically saved on the browser app.
We can create and manage multiple accounts with Chrome Profiles and switch between them.
When connected with the same Google account, all the saved data, like bookmarks, passwords, addresses, etc., are synced, and any changes made on one device will automatically reflect on other devices.
Lastly, if you've any thoughts or feedback, then feel free to drop in below comment box. You can also report the outdated information.