
Edge Browser helps the users save the addresses in the browser so that they do not have to enter them repeatedly.
You need to navigate to the Profile through the settings and open the Personal info section. Select the Add Basic Info section, enter the address, and save it for future use.
In this guide, I have shared written instruction about:
Add an Address with an Autofill option
If you need the browser to remember the address, you need to add address details that can be reused manually. You need to enable the save and autofill option on the settings page. Here are the steps to follow:
- Launch Microsoft Edge on a computer.
- Click on the More

 menu for options and select the Settings menu.
 - Choose the Profiles tab within the sidebar pane of Edge Settings.
- Select the Personal Info menu options.
- Enable the toggle switch for Save and fill the address option.
- Click the Add Address command button, and a dialog box will appear.
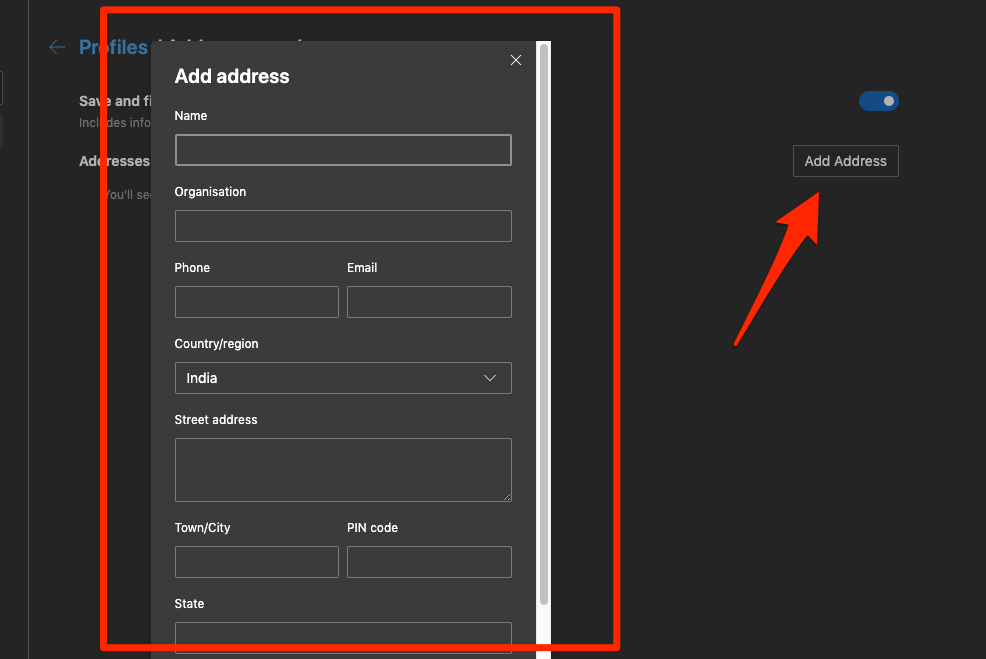

- Enter the Address details and hit on the Save button.
It will create a record of the address automatically populated when filling out a form or registering on a new website. The address is auto-sync into your Microsoft account and is available across all your managed devices.
Edit the Saved Address Information
Once you save your address, it is possible to edit them just in case of an error in the previous one or simply because you have changed your residence. Here are the steps to follow:
- Open the Microsoft Edge app on your computer.
- Click on the More menu and select the Settings from the list of options.
- Choose the Profiles tab within the sidebar pane of Edge Settings.
- Select the Personal Info menu options.
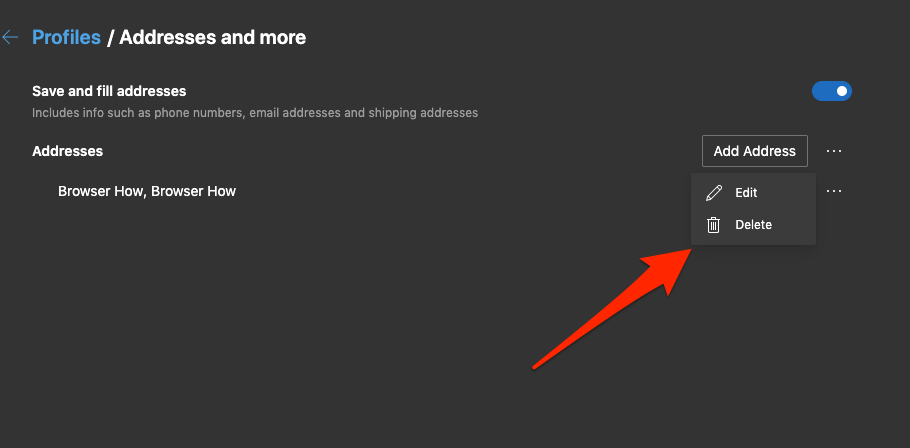
- Hit on the More menu on the saved address for more options.
- Select the Edit option makes the desired changes to the address in the pop-up dialog box.
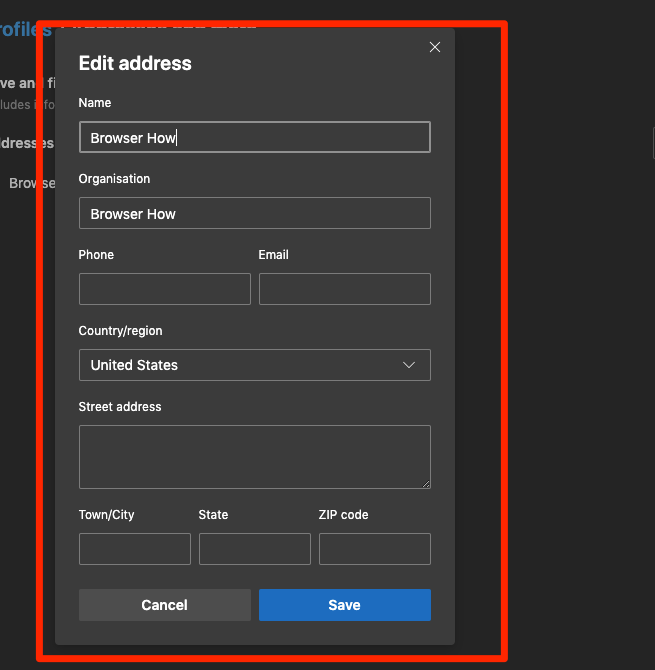

- Hit on the Save button to commit the changes.
It will edit and save the modified details.
The changes are automatically synced on all the devices managed by the same Microsoft account.
Delete Saved Addresses
If you have an address that is no longer in use, it is recommended to delete it to avoid confusion in the future. The autofill edge has a feature for that as well. Here are the steps to follow:
- Launch the Edge app on your computer.
- Click on the More menu and select the Settings menu.
- Choose the Profiles tab within the sidebar pane of Edge Settings.
- Select the Personal Info menu options.
- Hit on the More menu on the saved address for more options.
- Select the Delete option and deletes the saved address.

It will erase the address details and remove them from the browser storage. If there is any other record of address, Microsoft Edge will automatically start to populate the alternate address instead.
Any address field or deletion changes will be automatically synced across the devices managed with the same Microsoft account.
Bottom Line
There are many websites and forms wherein we must enter our address every time we log in. The process becomes quite tiring and irritating.
The Edge browser’s address autofill feature helps in filling out the forms that need you enter the address details. You can choose from the option of addresses saved in your browser.
Similarly, you can save and manage the addresses in Edge on Android for autofill. You can add multiple addresses to the list and select one while registering.
Lastly, if you've any thoughts or feedback, then feel free to drop in below comment box. You can also report the outdated information.


I enter addresses into an online database and this feature capture every one of the addresses making it a bit annoying as incorrect addresses keep populating.
There is also not a way to mass delete addresses. It is a good feature for those addresses and boxes you are required to fill in every time, but you should be able to define the ones you keep.
Hi David, that’s absolutely right. Even I felt the need of mass deleting the addresses. Just like passwords, the Edge browser should have had the option to choose the address to save and discard.