The Brave browser allows adding contact and address details to auto-complete the forms. We can add multiple addresses, such as Home, Work, etc., and use them according to need.
The Address auto-fill avoids the hassle of entering the details on every new form. We can also edit or delete the addresses no longer in use.
In this guide, I have shared written instruction about:
Add an Address Information
You can add several addresses to the browser to use them when needed. Adding an address is not troublesome; filling in the details per field and ready to use for autofill. Here are the steps to add and save the address:
- Launch the Brave browser on the computer.
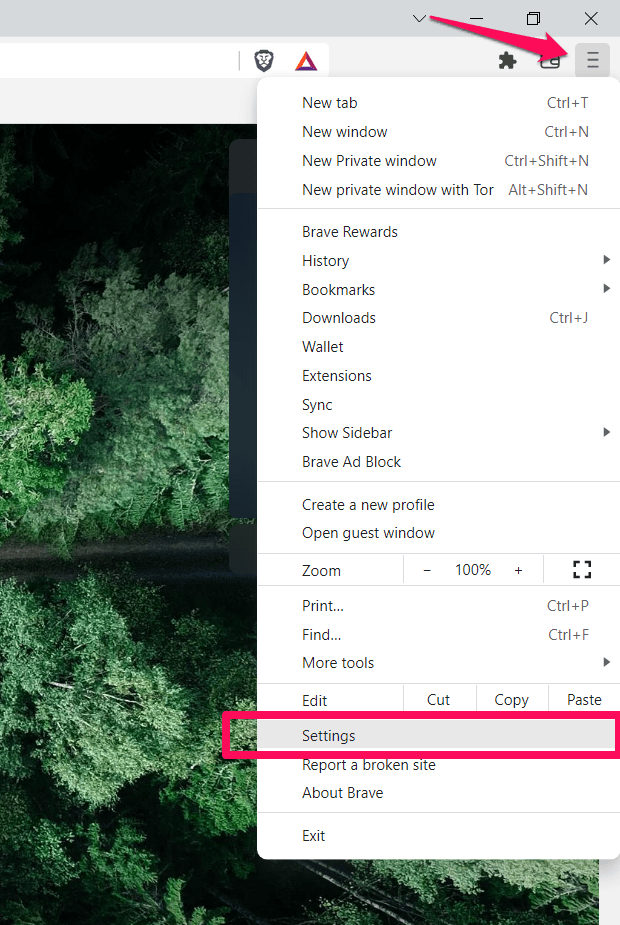
- Click on the More

 menu and select the Settings option.
 - Switch to the Additional Settings from the left panel.
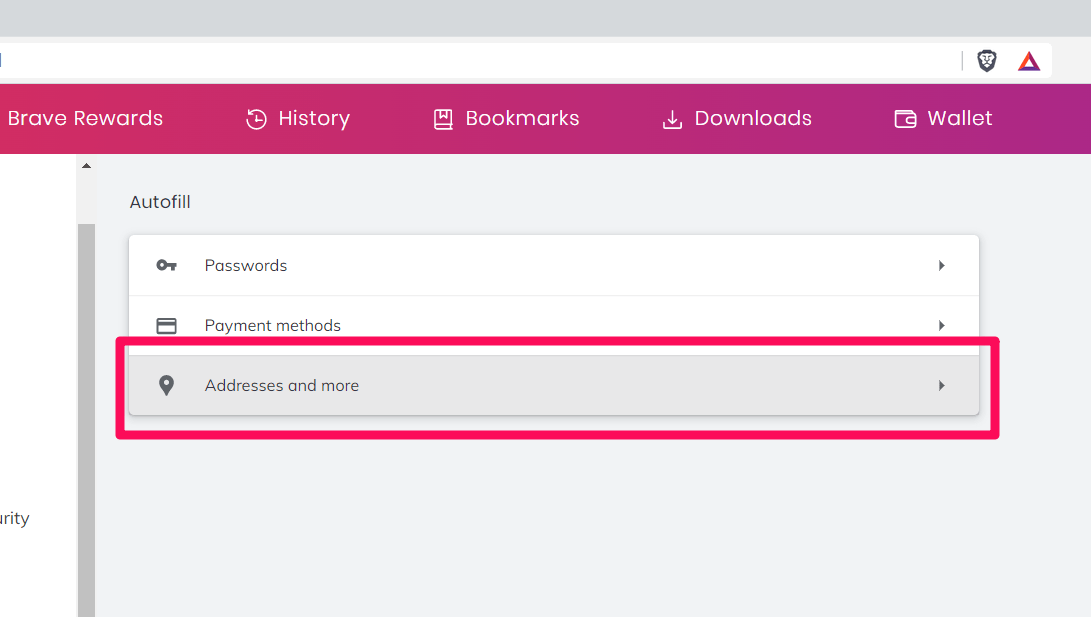
- Choose Autofill and click on the Addresses and More tabs next.

- Click on the button.
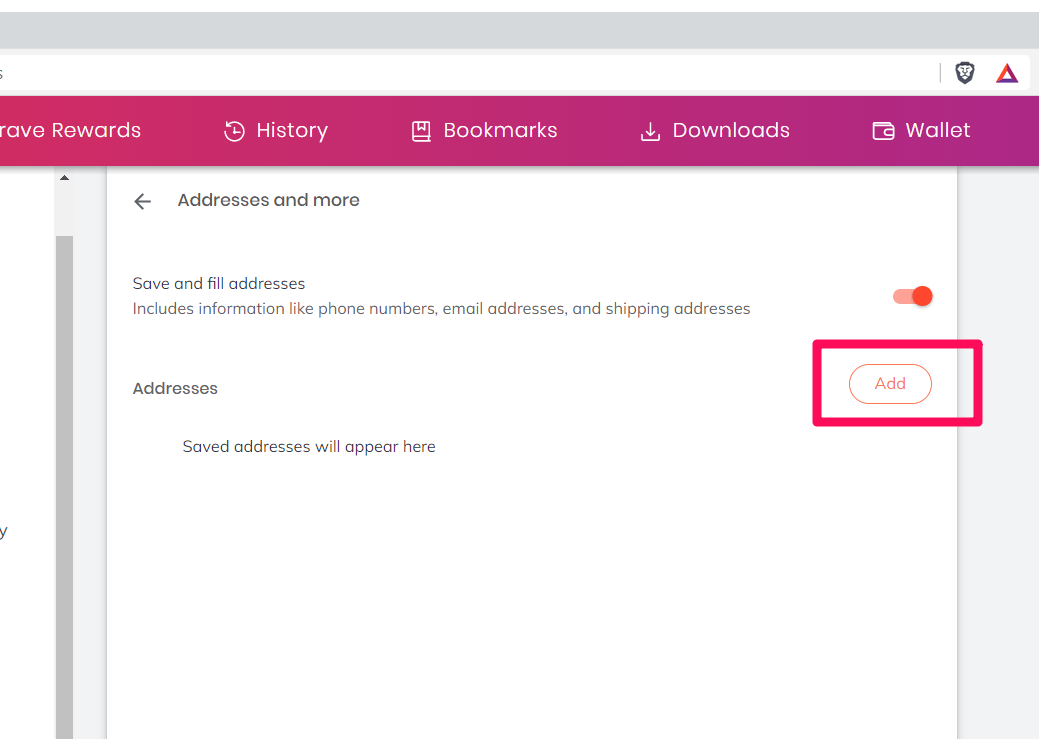
 It will pop up a window to fill in the details.
 - Enter the Address details and hit the button.
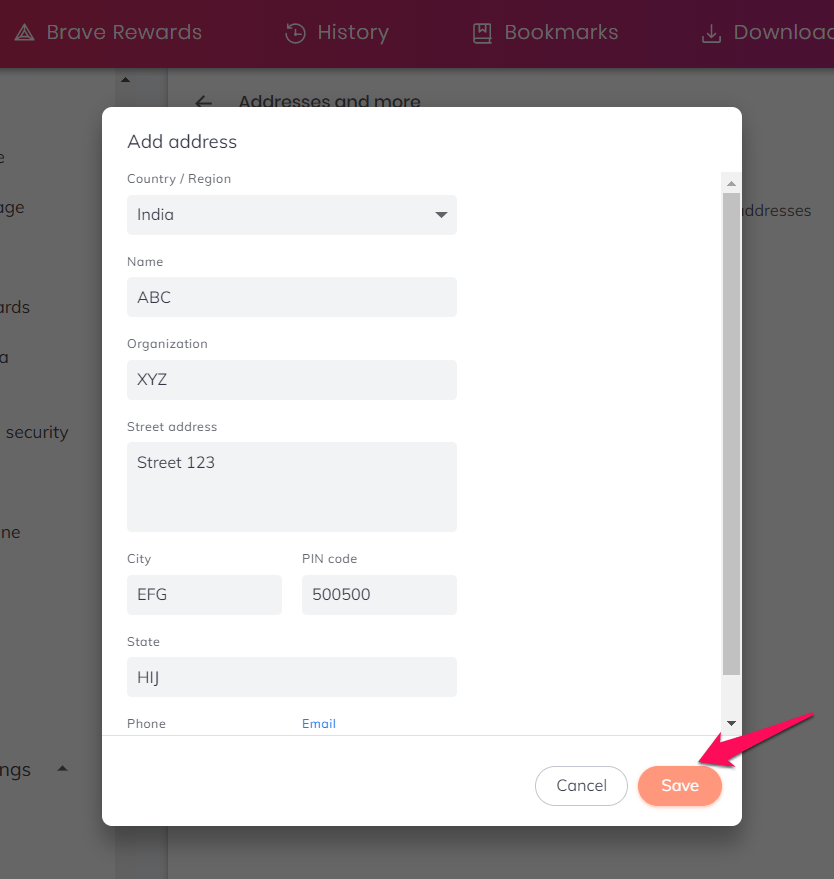

Select your country from the drop-down list and enter your name, organization, street address, city, pin code, state, phone number, and email address. The address will be saved in the browser once you hit the save button.
Manage Saved Addresses for Autofill
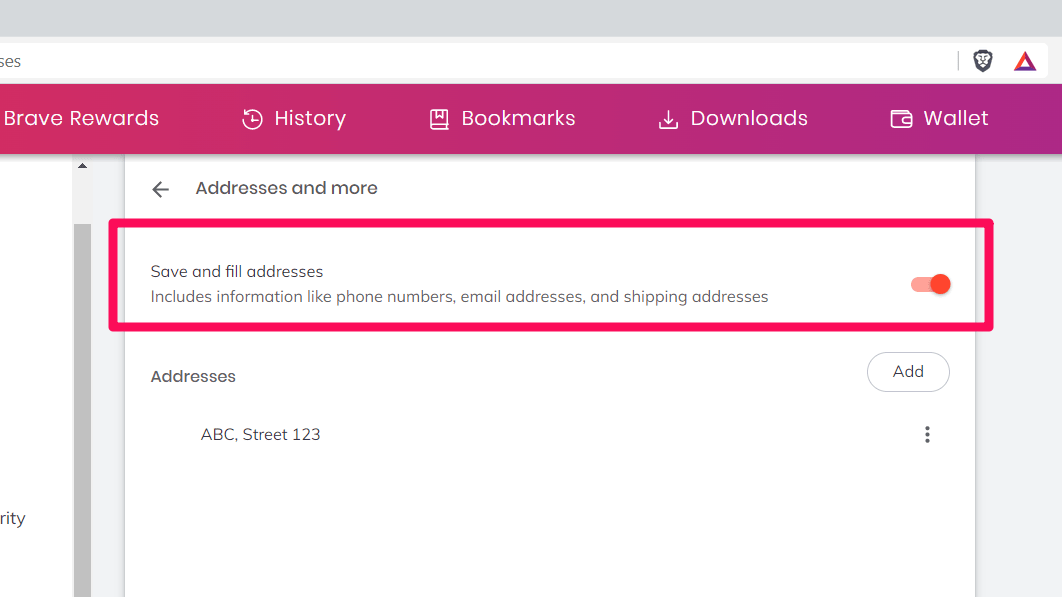
You can enable or disable the auto-filling of addresses if you do not want to use that feature. You can also manage saved addresses in the browser if you wish to add, change, or delete the addresses.
- Launch the Brave browser on the computer.
- Click on the More menu and select the Settings option.

- Switch to the Additional Settings from the left panel.
- Choose Autofill and click on the Addresses and More tabs next.
- Customize the toggle button for Save and Fill addresses for autofill as required.

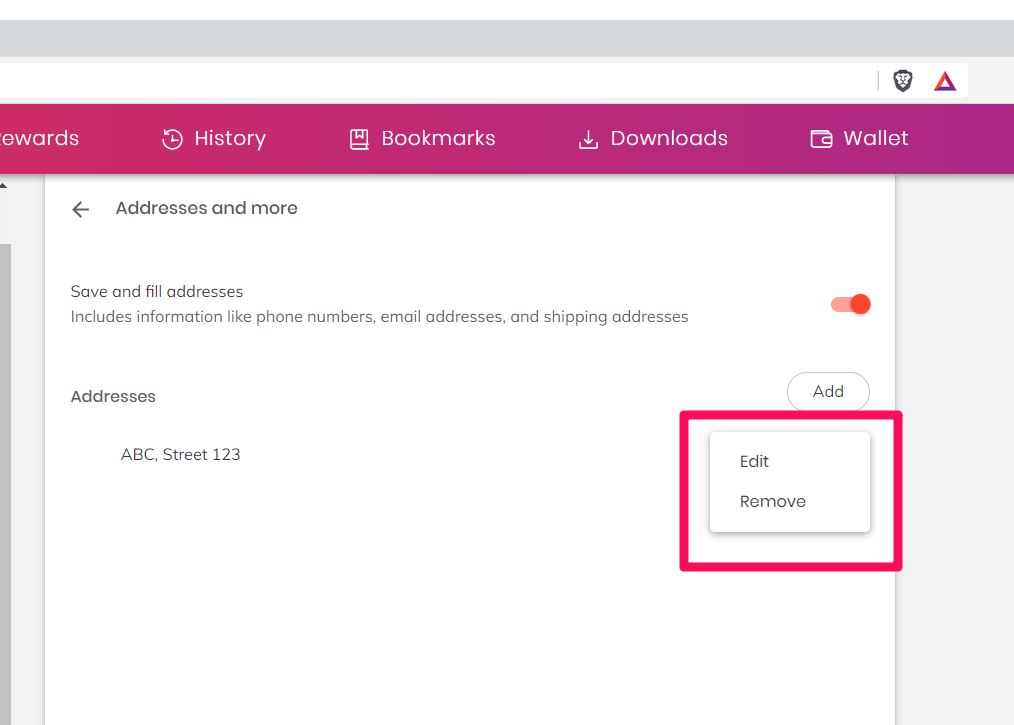
To manage the existing addresses, click the More ![]()
![]() option beside the Saved Addresses to Edit or Remove them.
option beside the Saved Addresses to Edit or Remove them.
The browser will reflect the changes once you close the tab.
Bottom Line
The Brave browser can autofill the addresses stored in the browser and reuse them when required. The saved address can be modified or deleted per our needs.
The address autofill feature is useful when we need to fill out the online forms and registration without entering the details manually.
Besides the address, Brave also offers autofill for saved passwords and payment card details to process tedious tasks.
Lastly, if you've any thoughts or feedback, then feel free to drop in below comment box. You can also report the outdated information.