Dashlane is a password management software that allows you to manage your passwords and data easily. We can create strong passwords, sync passwords between devices, and create new passwords for new and existing accounts.
It has a dedicated extension that allows configuration and use within the browser’s interface.
In this guide, I have shared written instruction about:
Step 1: Install the Dashlane Extension
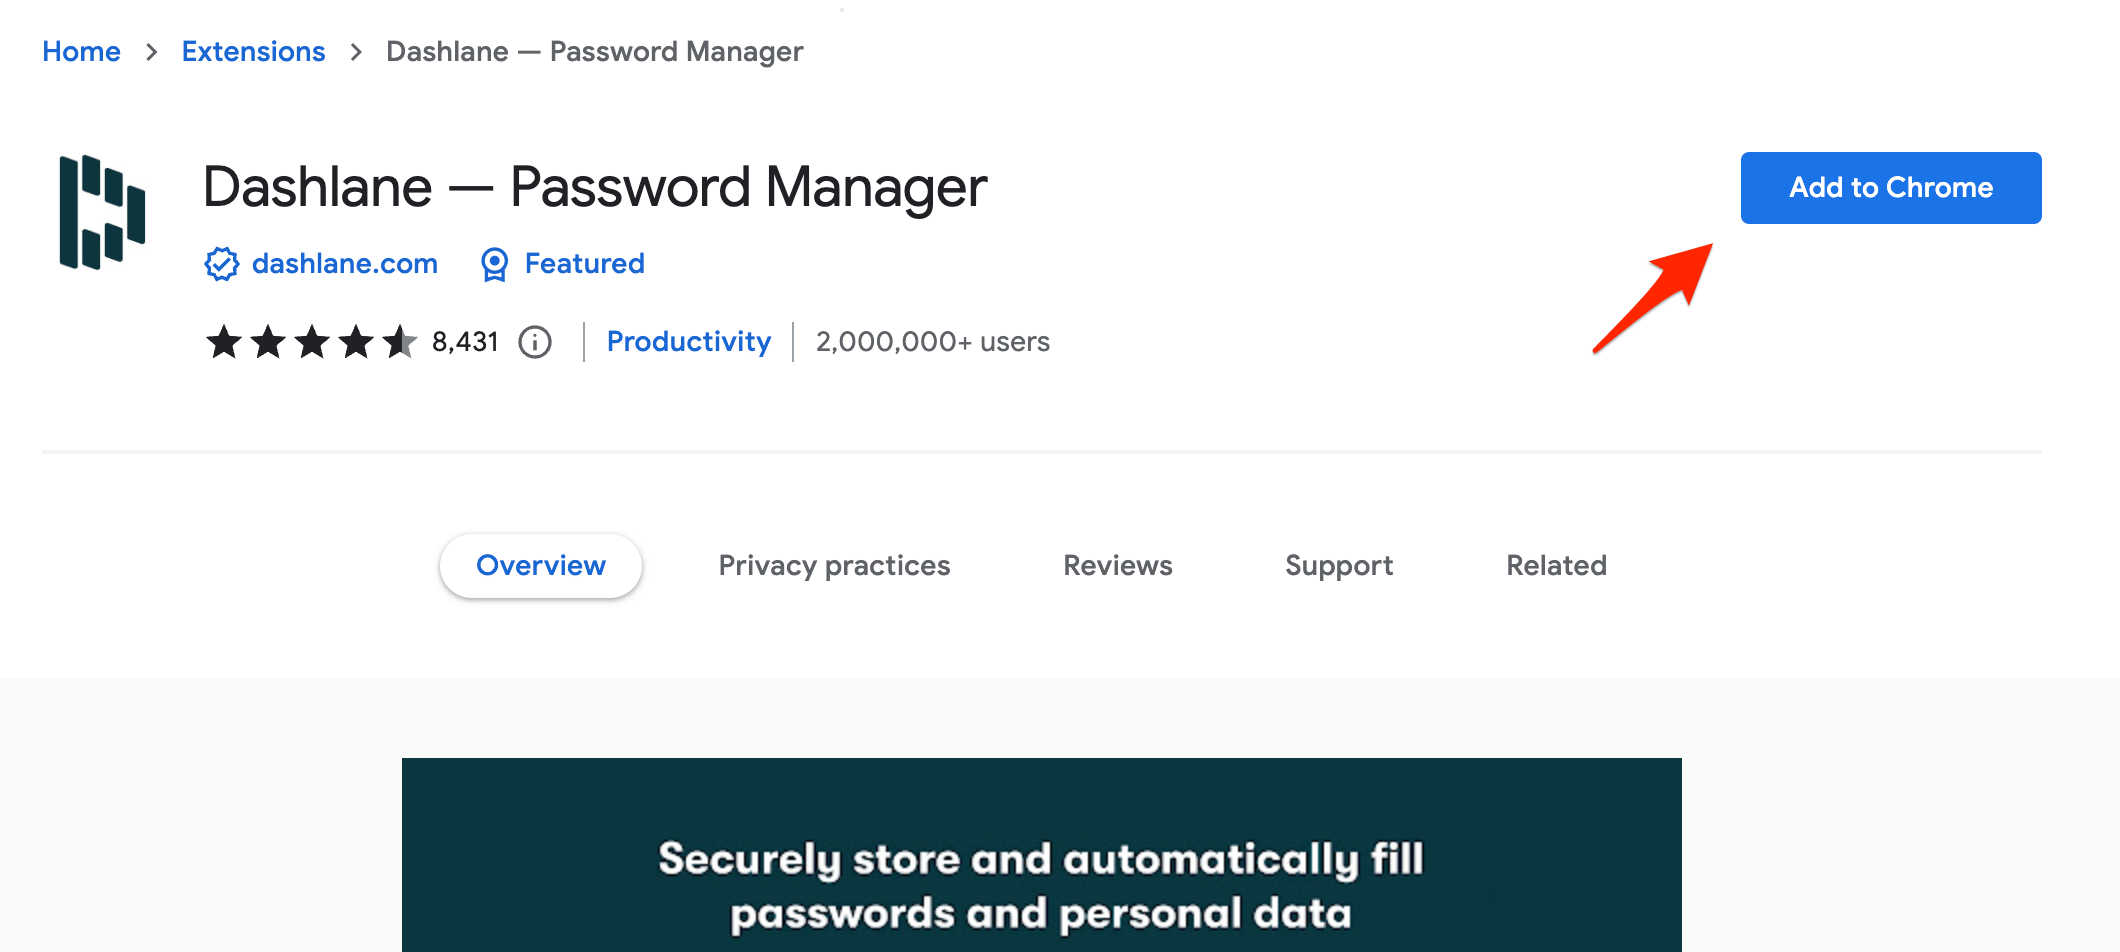
You must ensure your Chrome browser is up-to-date, then navigate to the Chrome web store and search for the officially supported Dashlane browser extension. Here are the steps to follow:
- Launch Google Chrome on the computer.
- Open the Chrome web store and search for Dashlane in the search box.
- Click to open the Dashlane details page.
Make sure you are installing the right extension. - Hit on the button on the Dashlane extension page.
 A pop-up will appear, asking for permission to install the extension.
 - Click button.
You can see a new Dashlane icon added under the Extensions menu.
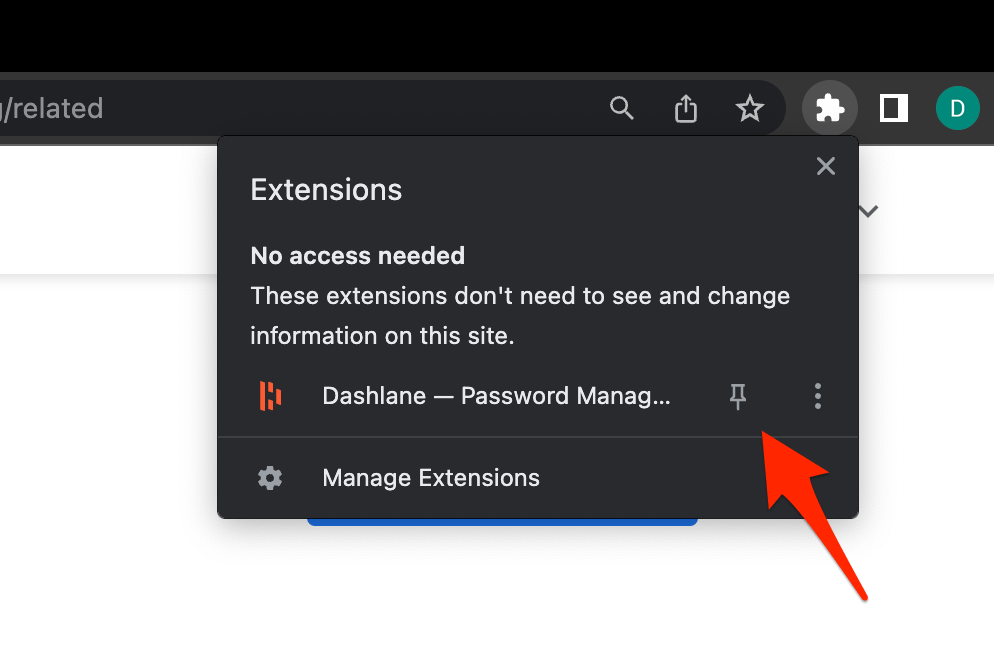
TIP: Click the Pin icon next to the extension to make it sticky and visible on the Chrome toolbar.
Step 2: Create a Dashlane account
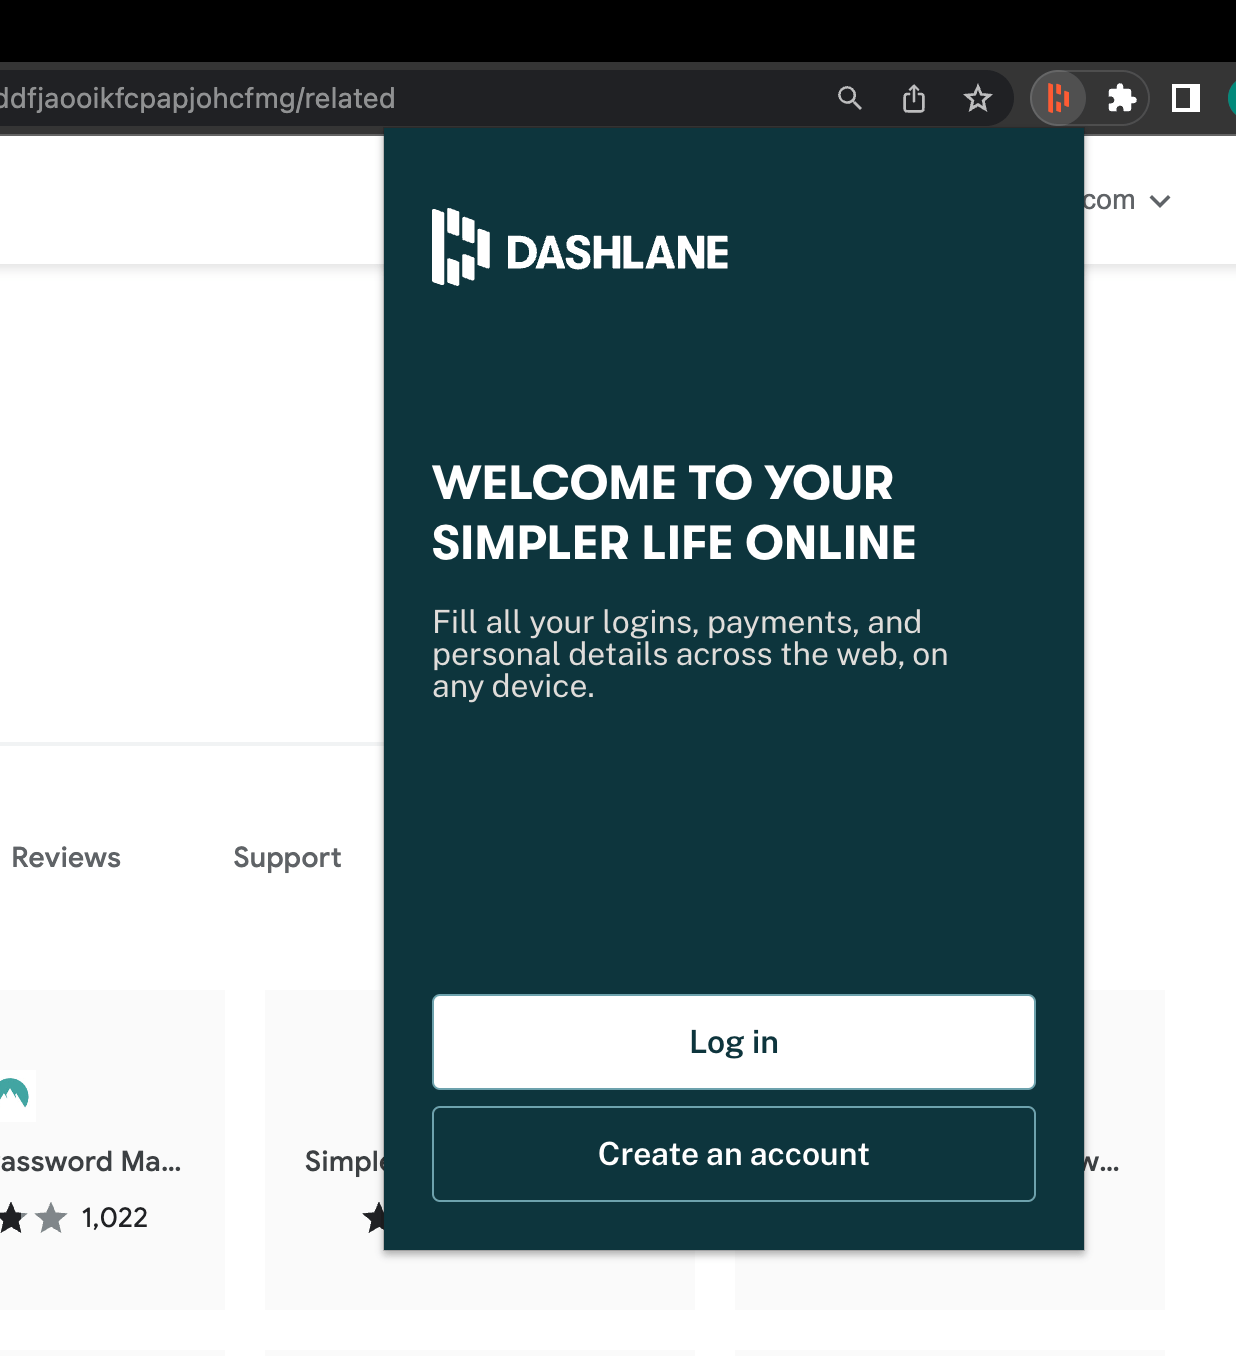
Click on the Dashlane extension from the Extensions icon menu will ask for Login or Create an account. If you do not have an account, you need to create one. Here are the steps to follow:
- Click the Dashlane icon in the Chrome toolbar under the Extension icon.
- Click on the button when the welcome screen loads.

- Fill out the registration form opened in a separate window with your email address and a strong password.
- Re-enter your password to confirm, and click on the button.
The account will be created, and you will be automatically signed in to the account and extensions.
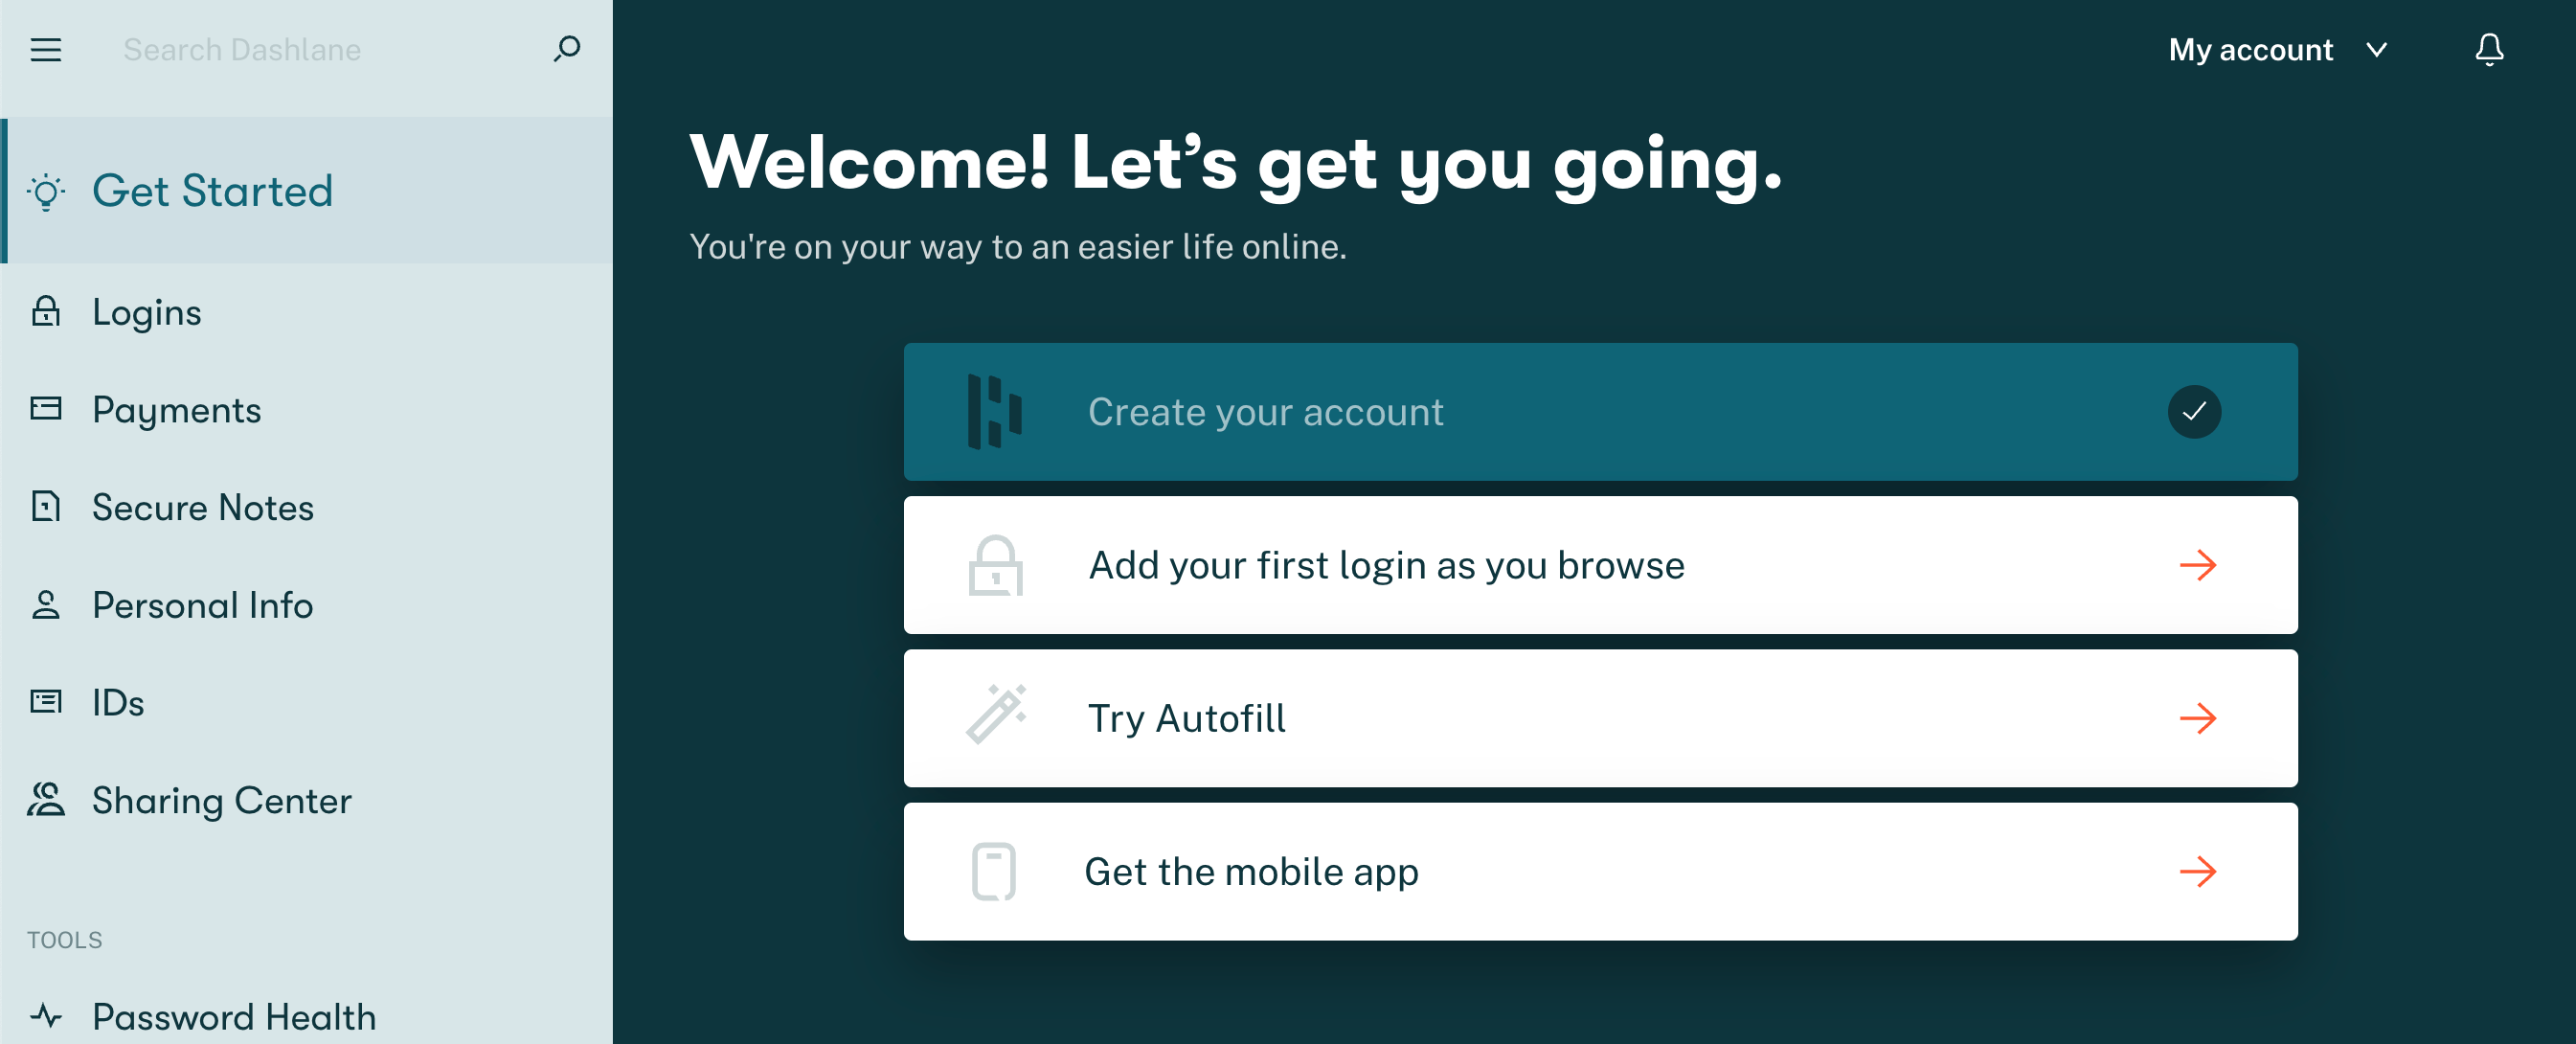
Note: We can create a master password to add a second layer of security and avoid misuse of passwords without authentication.
Step 3: Save and Sync passwords in Dashlane Account
Once you’ve created a Dashlane account, you can add notes, credit card details, and, most importantly, your existing passwords.
You can manually fill in the account username and password or automatically fill in using the built-in import feature. Here are the steps to follow:
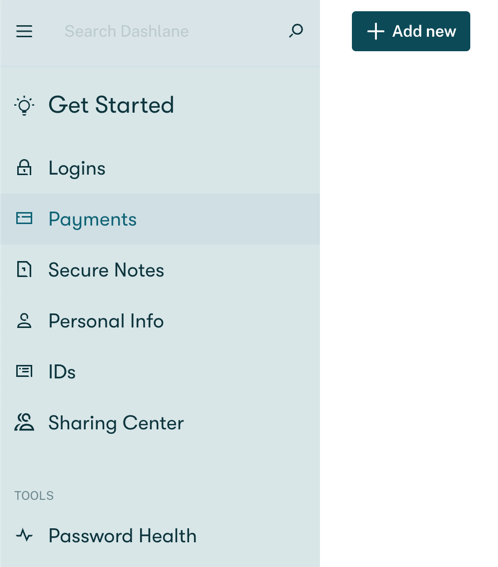
- Login to your Dashlane account and switch to the Logins tab.
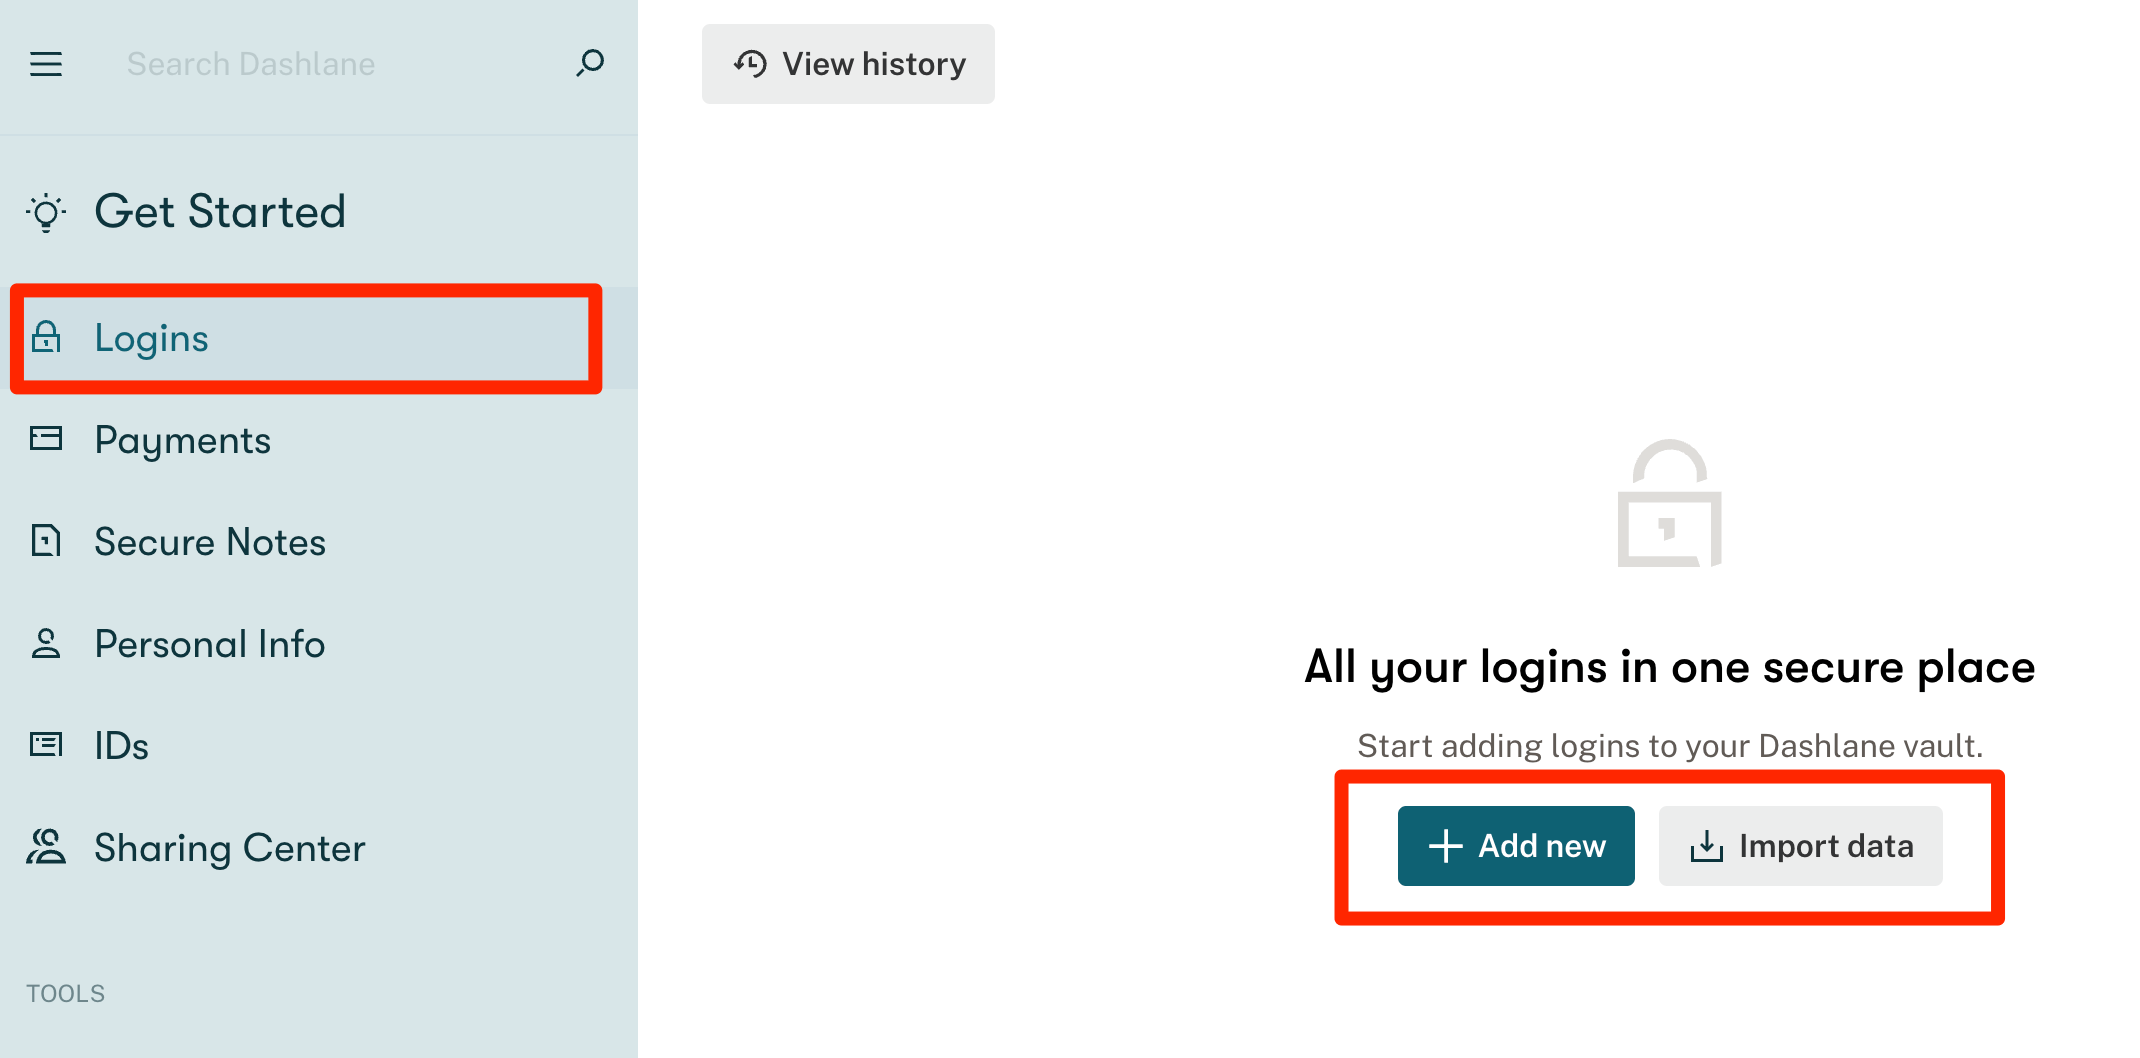
 You will see two options, Add new and Import data.
 - Click on button.
- Enter the Account Details like Website URL, Username, Password, Name, and other information.
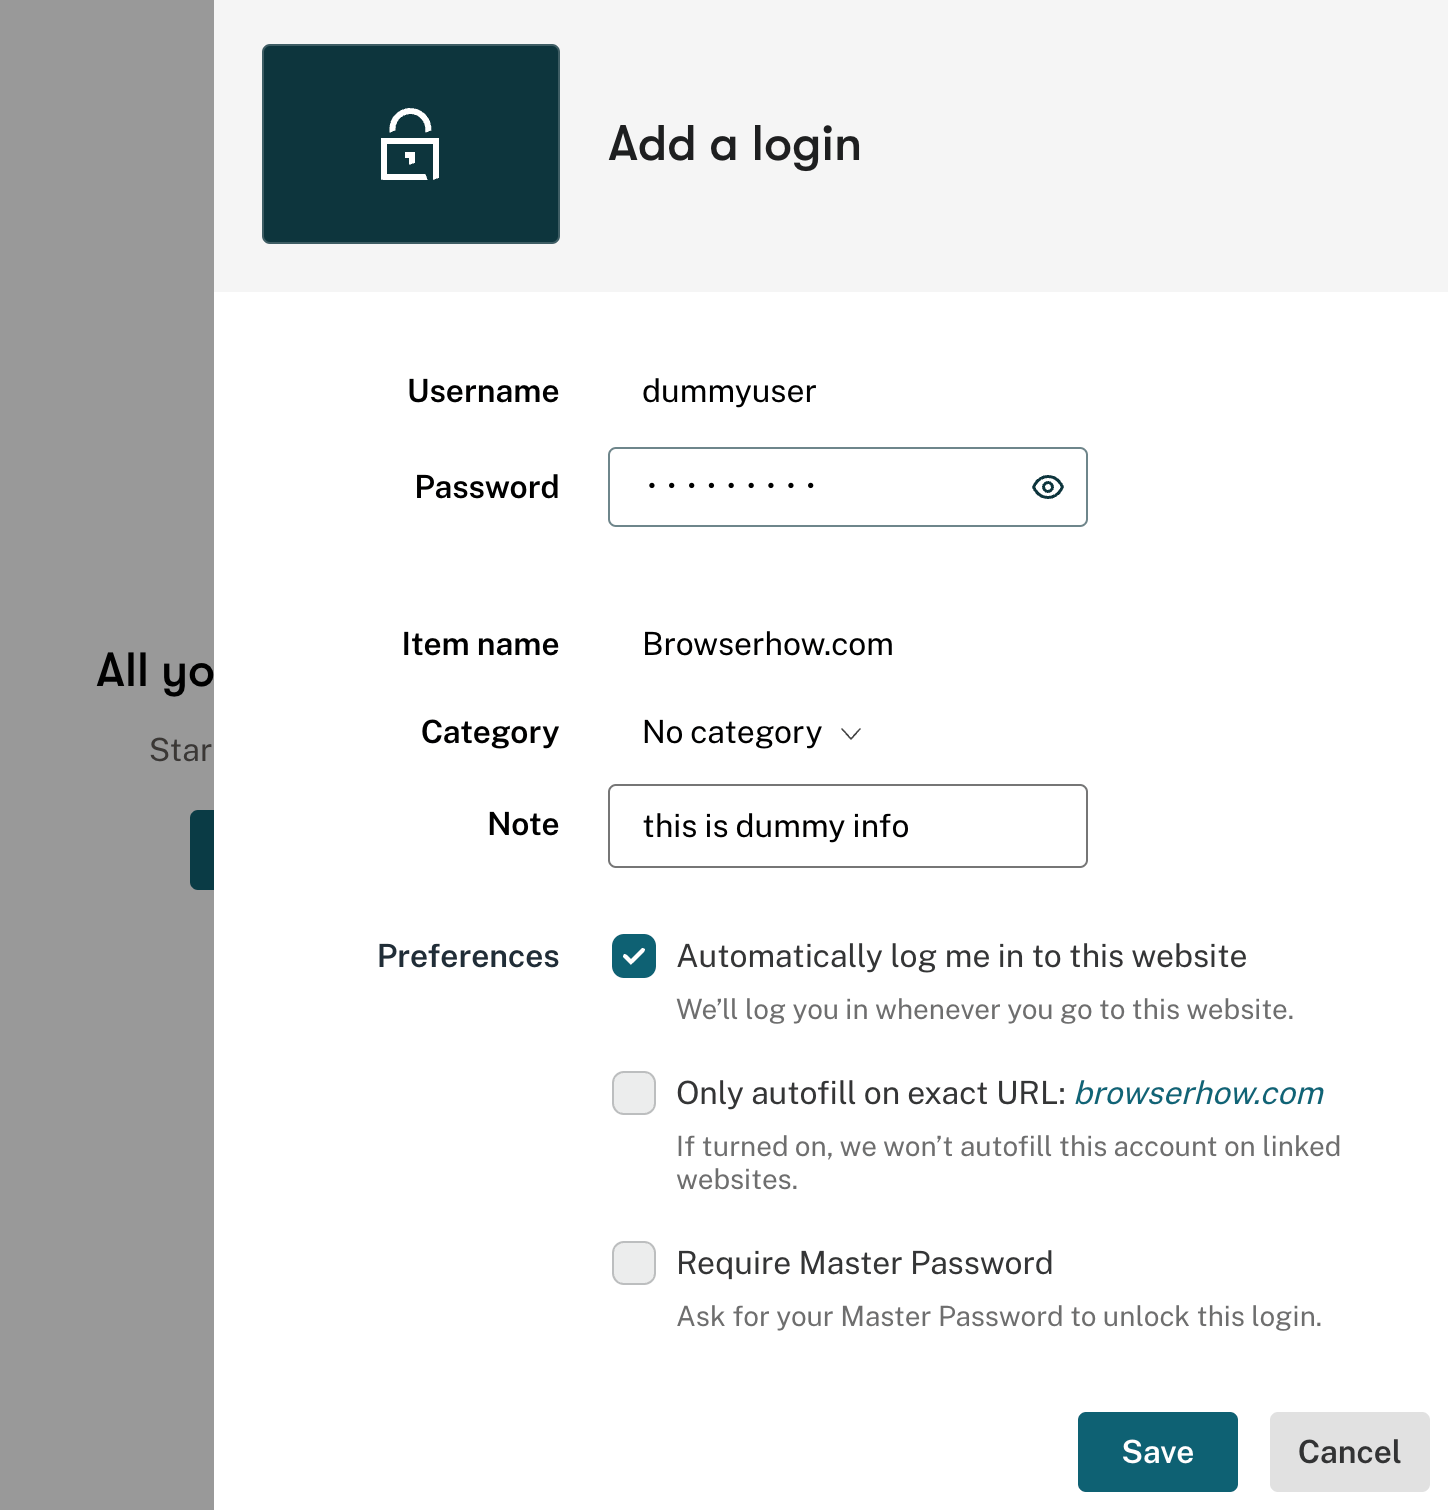

- You can optionally enable the checkbox for – Automatically log me into this website for autofilling the saved passwords.
- Hit on the button to store the password safely in Dashlane.
Similarly, you can keep adding other username and password info into the Dashlane.
Step 4: Import Saved Password for other Sources
If you have stored passwords in other services, you directly import the saved password into Dashlane Password Manager.

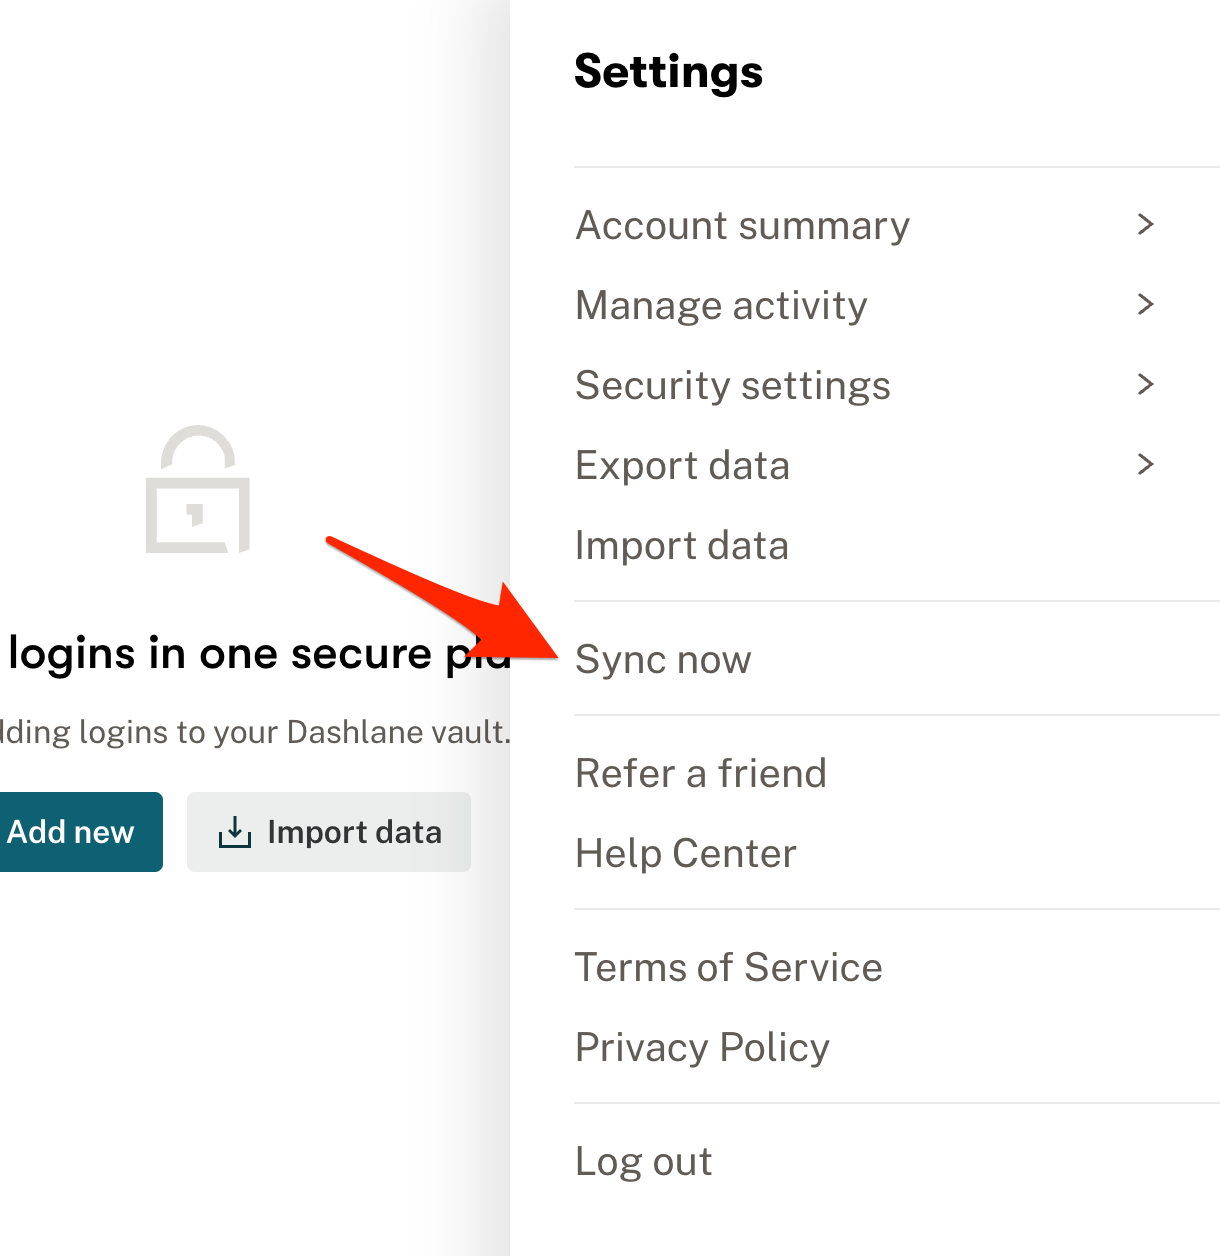
After storing all the passwords and information, you can enable sync options across all installed devices for easy accessibility. Ensure syncing is enabled to sync your passwords on other devices. To do this, click the My Account link and select Settings in the top right corner.

It will open the Settings pane, and finally, click the Sync now option.
Note: For the sync to work, you must sign in to the Dashlane on different devices, but the multidevice sign-in is only available for premium plans.
Bottom Line
You‘re now ready to start using the Dashlane Extension in Google Chrome. You can also add the payments card, secured notes, personal info, and identification document to save securely and use for autofill.
It offers both premium and free plans for users. You can also use the Dashlane for your business or organization to save and share passwords securely.
You can check out each plan and service offering on the Dashlane Pricing page. Features like Dark Web Monitoring and VPN service is a premium offerings.
Online password managers like Dashlane, Google Password Manager, LastPass, etc., are great ways to store and sync sensitive information.
Lastly, if you've any thoughts or feedback, then feel free to drop in below comment box. You can also report the outdated information.