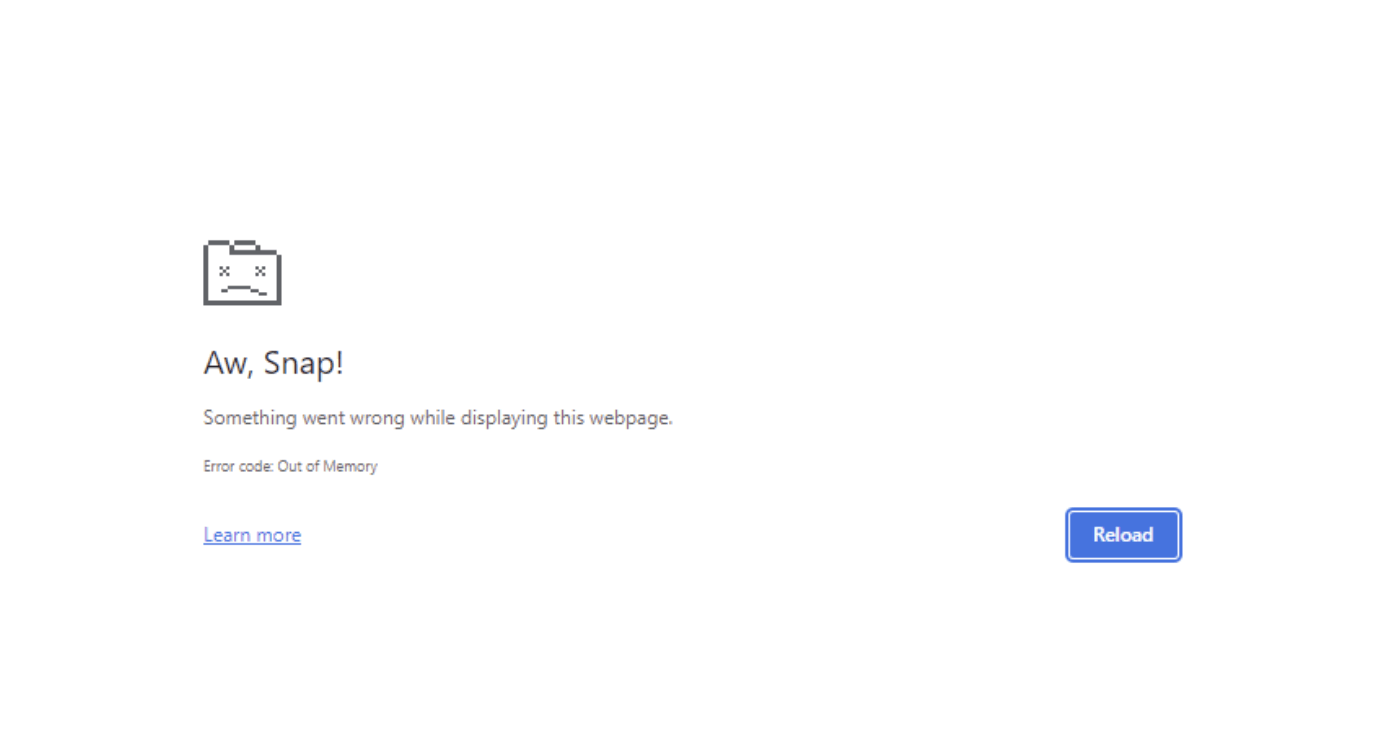
Google Chrome browser renders web pages using system memory or RAM. However, the website’s resources can sometimes be too heavy and require high-processing memory so that it may encounter memory issues.
In such cases, enable memory saver, turn off extensions, clear the cache and cookies data, and if nothing works, consider resetting the browser to fix the problem.
In this guide, I have shared written instruction about:
Method 1: Enable Memory Saver Settings
Memory saver is a feature under Chrome’s Performance settings that disables all background activity, inactive tabs, and animations that consume memory. Hence, the saved memory is utilized to power the active tab to resolve the out-of-memory problem.
- Launch the Google Chrome browser.
- Click on the More
 options menu.
 - Hover on the More Tools option and select the Performance menu.
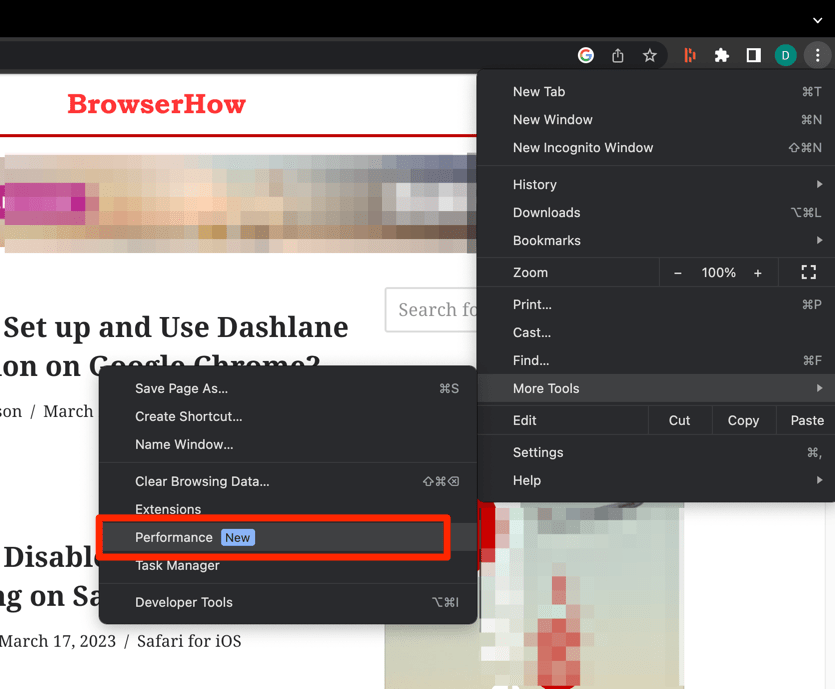 It will launch the Performance tab under the Chrome Settings page.
 - Enable the Toggle button for the Memory Saver option.
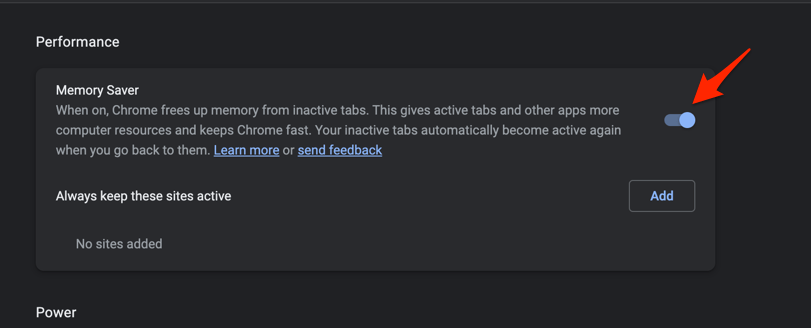
Once the memory saver is turned on, you can recheck the web page and try to load the resources that were having the problem.
Method 2: Restart the Computer System
Restarting the computer system is one of the most influential and traditional ways to resolve intermittent issues. If Chrome displays the ‘Out of Memory’ error, restarting will help kill all the active processes running in the background.
- Click the button in the taskbar on your Windows PC.
- Click on the button and select the option to option.
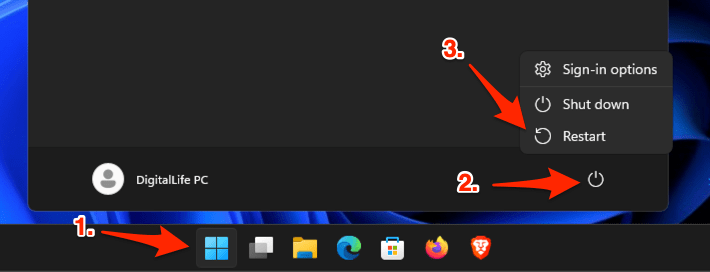
After restarting, open the browser and access the page where you had the problem to see if the issue persists.
Method 3: Disable Chrome Browser Extensions
Extensions help enhance the browser’s capability at the cost of memory resources. If you have many extensions, it’s probably using the memory, even in the background.
Hence, turning off the installed extensions is safer for freeing up the memory used.
- Open Google Chrome on your computer.
- Click on More
 for the options menu.
 - Hover on More Tools and select the Extensions option.
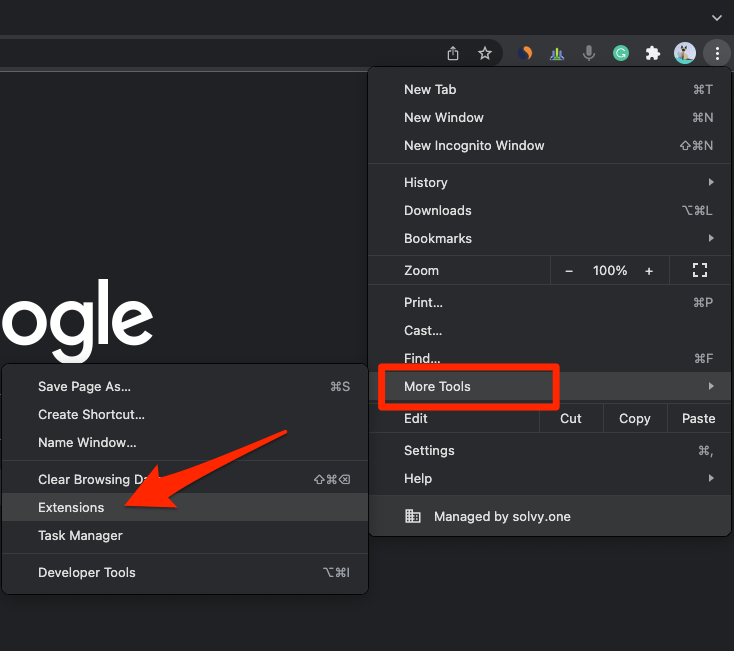 It will open the Chrome Extensions Manager page with install extensions.
 - Disable the toggle option against each extension.
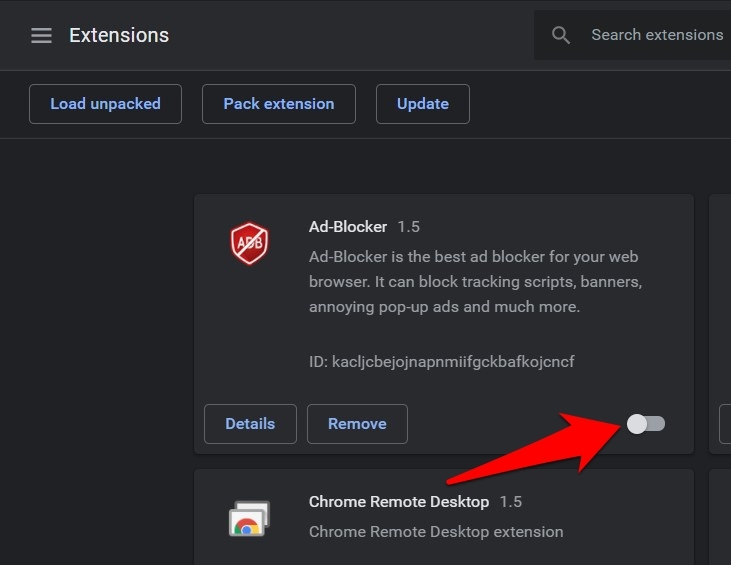
Once you’ve disabled all the extensions, you can consider turning on one after to identify the extension utilizing the maximum resources that are creating the problem. Post that, you can either keep it disabled or find an alternative.
Method 4: Clear Temporary Browsing Data
The browser has a caching mechanism that most website use to store temporary files in the memory and storage. These files are frequently accessed and used to load the site faster.
If you haven’t cleared the data for a long time, it might be overloaded with files and cache, which causes a memory leak. Hence, it would be best to consider clearing the browsing data.
- Open the Chrome browser on your computer.
- Click on the More
 for menu options and hover on the More Tools menu.
 - Select the Clear Browsing Data menu from the list.
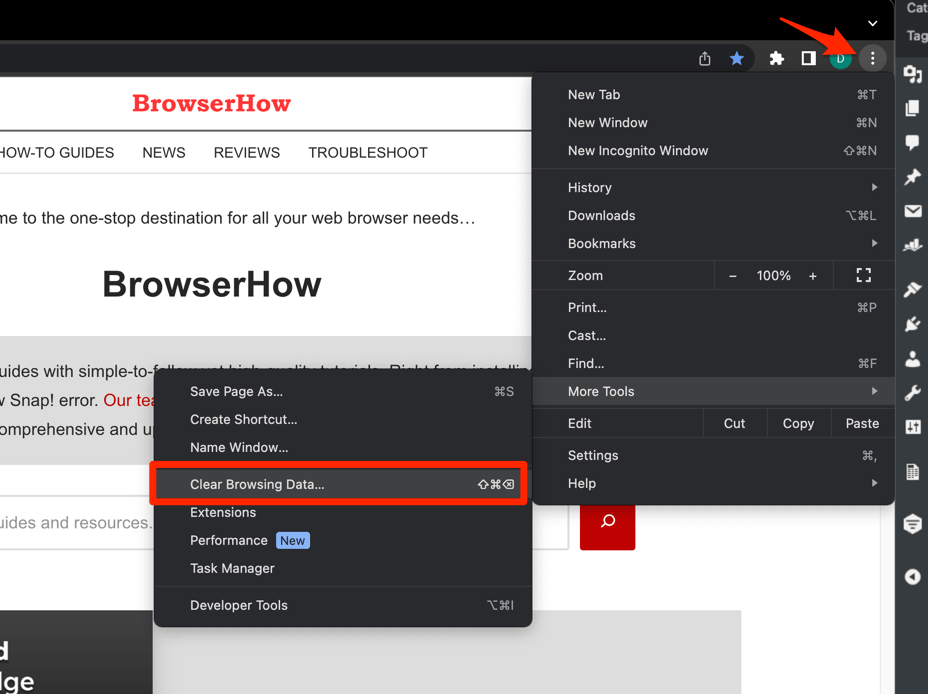 It will open the Clear browsing data settings window.
 - Choose the Time Range from the drop-down and select the checkboxes for the ‘Cookies and other site data‘ and ‘Cached images and files options.
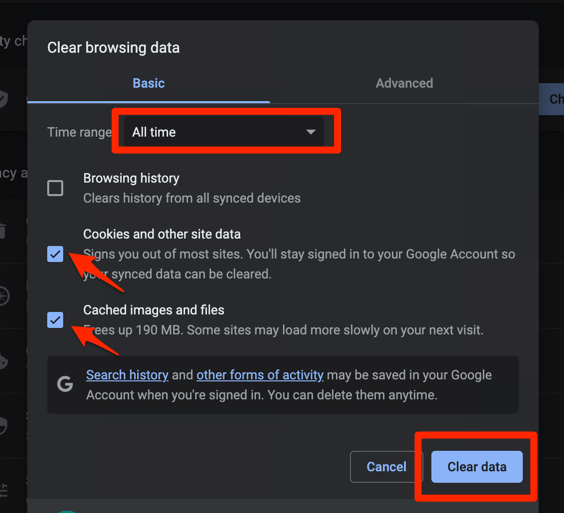
- Finally, hit the command button.
You can read this guide on clearing cookies and caches in the Chrome browser for more details. After removing the browsing data, check if the memory error is gone from the website.
Method 5: Reset Chrome Settings to Default
Alert!: The reset will clear the browsing data and all the changes made on Chrome’s Settings page. Hence, you need to proceed with the option cautiously.
If none of the in-browser troubleshoots are working, it might be a problem with some settings we misconfigured that are causing the issue. Hence, we can reset the browser settings and data, which can help resolve the issue.
- Launch the Chrome browser on the computer.
- Click on the More
 menu for options, and select the Settings menu from the list.
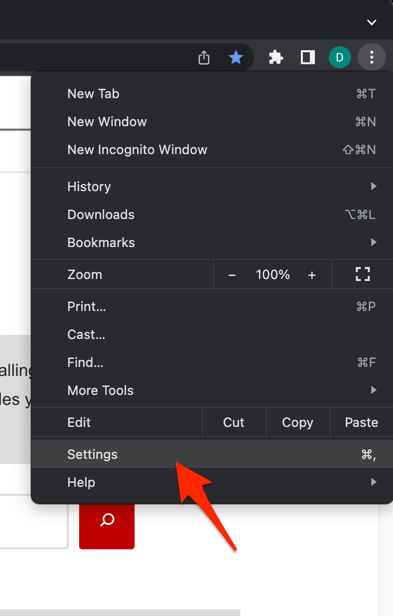 It will open the Chrome browser’s settings page.
 - Switch to the Reset settings tab in the sidebar and select Restore settings to their original defaults option.
- Hit the command button to continue the browser reset.
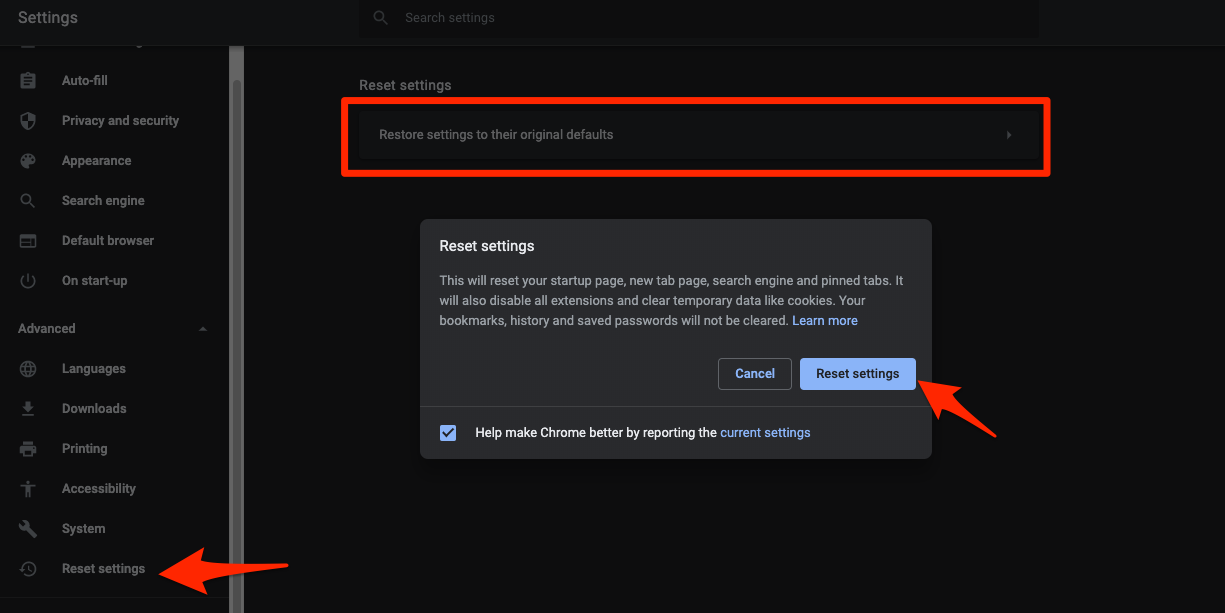
After you perform the browser reset, check if the issue persists on the factory reset Chrome app.
Method 6: Update or Downgrade the Chrome browser
If you do not remember updating the browser, you should consider upgrading it to the latest version. A recent upgrade might fix the out-of-memory problem, which will automatically be resolved upon upgrade.
- Launch the Chrome browser on your computer.
- Hit on More
 for options and select Settings from the list.
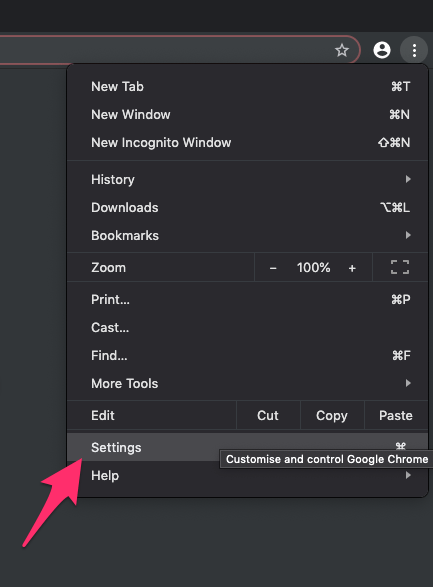
- Switch to the About Chrome tab on the Settings page.
- Google Chrome should automatically start looking for the latest updates.
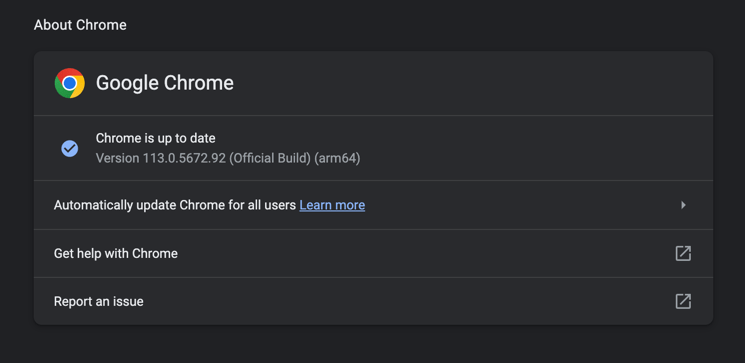
If no upgrades are available, and you’ve recently updated your browser, perhaps the issue started after the upgrade. In such cases, you can consider temporarily downgrading or rolling back to the previous version of the installation.
There have been a few reports where users complained about memory issues after the latest browser update when trying to print a webpage. Hence, you might also be facing a similar problem.
Bottom Line
The Chrome browser’s out-of-memory issue has become standard due to heavy and interactive websites. One major problem is that scripts are parsed on the browser rather than on web servers.
Suppose you cannot fix the issue and have faced problems with a particular scenario, like printing or loading certain pages or elements. In that case, you should report to the Chrome developers for investigation.
Lastly, if you've any thoughts or feedback, then feel free to drop in below comment box. You can also report the outdated information.


