
If running on low memory or conflicting with the browser extension, Google Chrome might display a ‘Page Unresponsive’ error.
In such cases, you can clear browsing data, turn off hardware acceleration from the settings page, turn off heavy extensions, recreate Chrome User Profile, and run the browser without a sandbox to fix the page loading issue.
In this guide, I have shared written instruction about:
Method 1: Clear Browsing and Website Data
Browsing data comprises your browsing history, cache, images, and more. This data, in large quantities, can load on your CPU hardware, which may cause errors. Clearing the site and browser data can help fix the issue.
- Launch the Chrome browser and navigate to History from the More

 menu options.


- Click on Clear browsing data from the left sidebar.
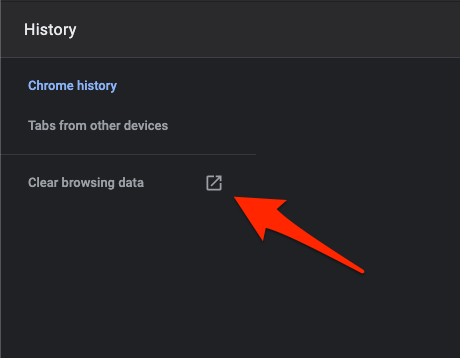
 It will open a clear browsing data window in a new tab.
 - Switch to the Advanced tab and select the preferred Time range from the drop-down.
- Select the checkbox against – Cache and image data.
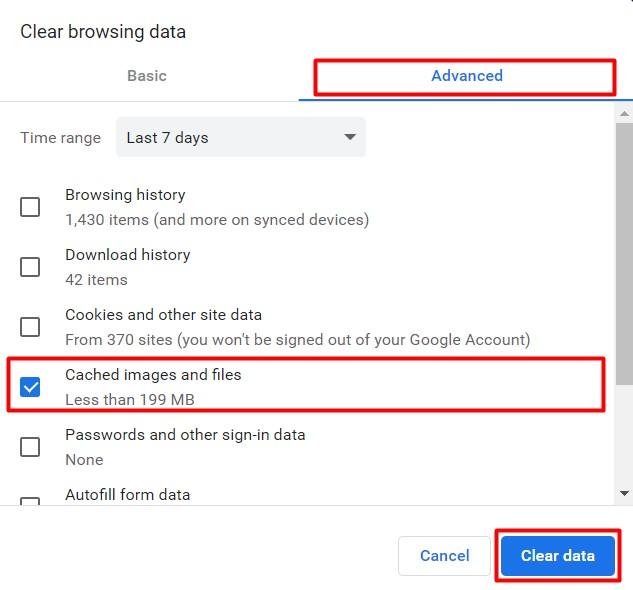

- Hit on the button.
It will remove outdated files and memory cache, causing the page to load slowly. Revisit the web page to check if the page is responsive.
Method 2: Disable Hardware Acceleration
Hardware acceleration is a smart way of distributing webpage functions between CPU and GPU to maximize performance.
But this is an experimental feature and may not work in some scenarios, resulting in multiple error messages, including unresponsive page errors. You should disable the hardware acceleration feature to check if the resolve the problem.
- Open the Chrome app and navigate to Settings in the More menu.
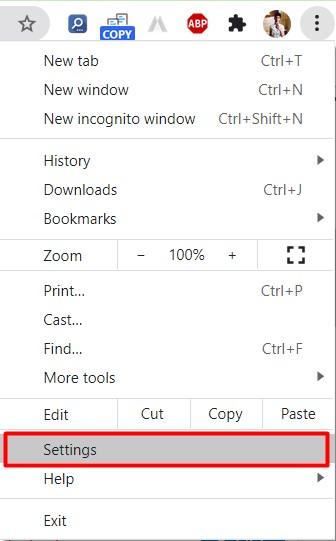
 A new window with all settings & configuration pages will open.
 - Search for hardware in the search panel, and you will see the option to configure – Use hardware acceleration when available.
- Toggle the button to turn off and disable the Hardware acceleration.
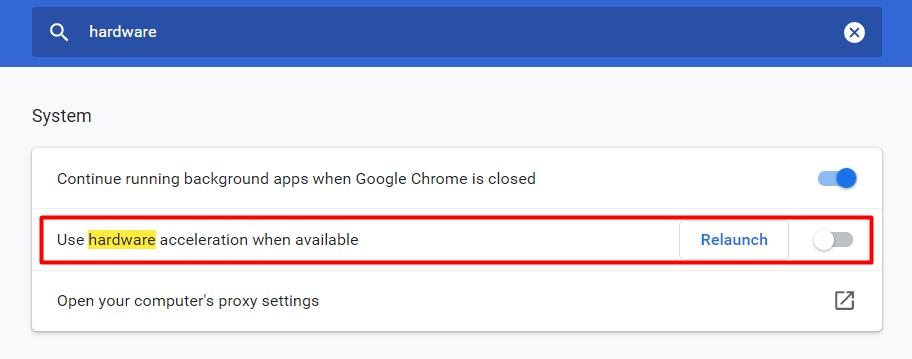

- Hit on after disabling the Hardware acceleration.
After disabling the option, restart the Chrome browser for favorable outcomes. Check the web page to see if the page unresponsive is still appearing.
Method 3: Disable Chrome Browser Extensions
Chrome extensions can help boost productivity and facilitate readily unavailable features to the browser. However, excessive extensions lead to excessive CPU and RAM usage, which in turn causes multiple error pages in Chrome.
I’m not asking you to disable all extensions you might have but to disable the ones you don’t use frequently.
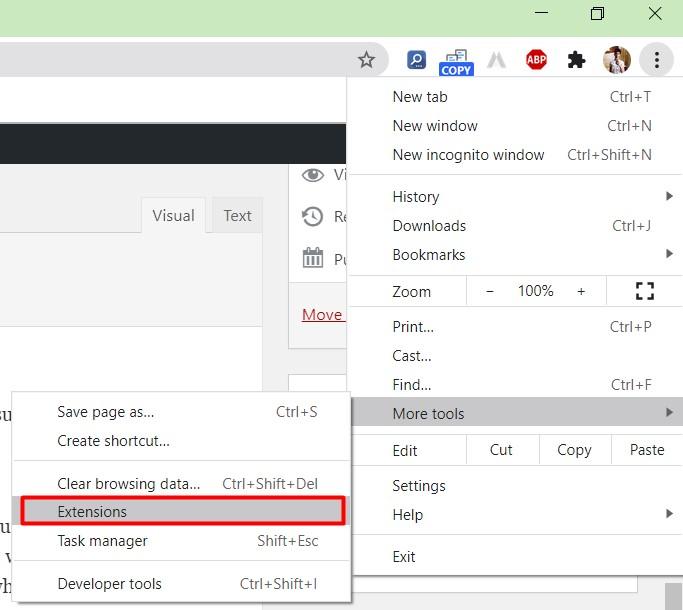
- Launch the Chrome browser and go to the More menu.
- Here navigate to the More Tools > Extensions option.
 It will open a separate window with all the installed extensions.
 - Disable the extension, which you don’t need regularly.
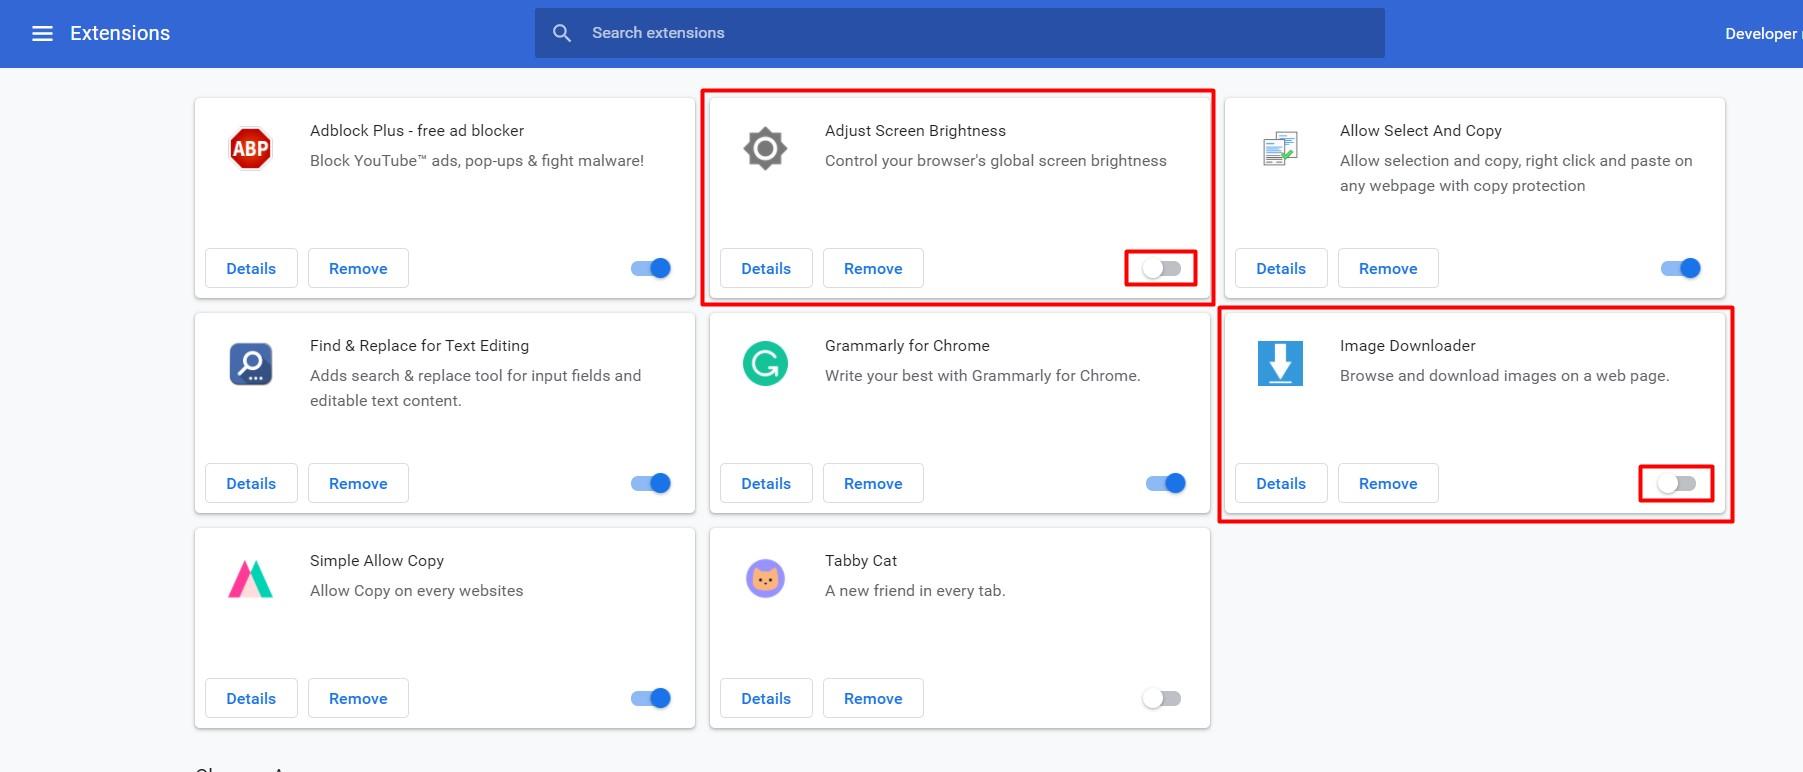

It will help in releasing the memory occupied by the browser extensions. Since Chrome is a RAM-hungry browser, disabling the extensions will help utilize the gained memory for processing the web page.
Method 4: Recreate New Chrome Profile (Windows OS)
Chrome creates a personal profile for every user signed on to the service. If you’re the only user, all your details and configuration will be saved to the default folder. You must delete the default folder to recreate a new Chrome profile. Here are the steps to do:
- Open the Run dialogue box (press + key).
- Enter %localappdata% query within the Run command.


- Within Local App Data, navigate to Google > Chrome > User Data.
Here is the final path: \AppData\Local\Google\Chrome\User Data - Delete the Default folder from User Data.
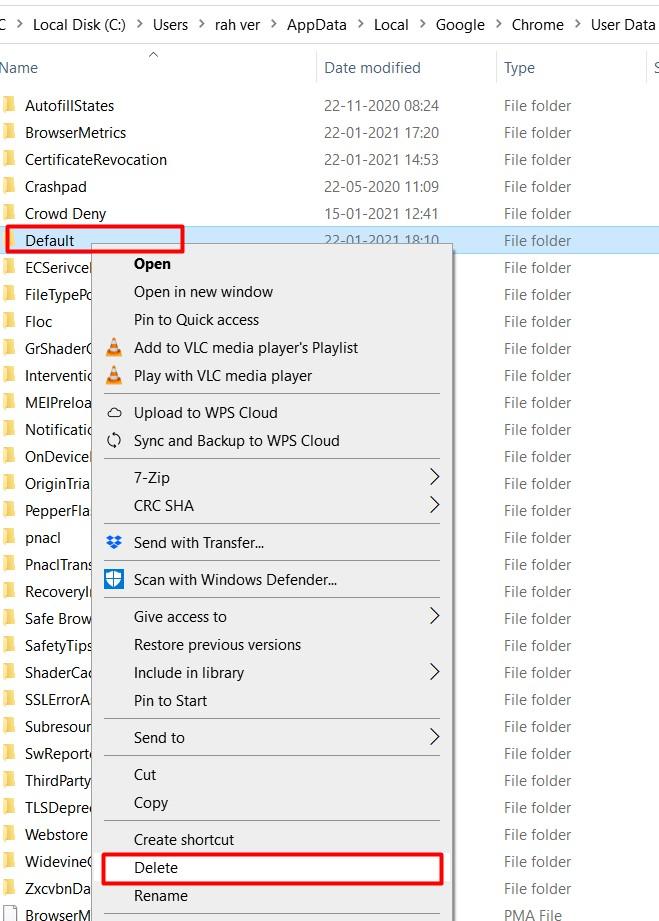

The folder contains your configuration details. When you restart the Chrome browser, this folder will be automatically created with a fresh set of configurations, thus fixing the problem.
Method 5: Run without Sandbox (Windows OS)
In the newer version of Windows, all software and programs run in their secure environment called a “Sandbox”. This sandbox assigns CPU resources, RAM, and other essential aspects accordingly. This creates a secure digital area where an app can perform its functions without potentially harming other system programs.
But sometimes, a few apps must be run without Sandbox to consume and show better results.
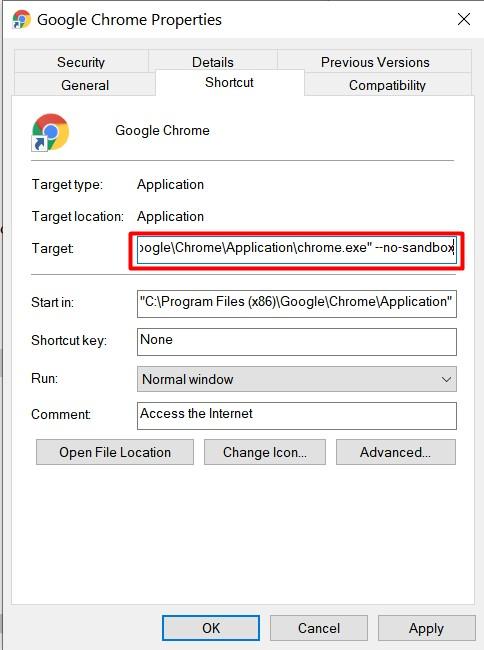
- Find the Chrome browser desktop shortcuts and open its Properties.
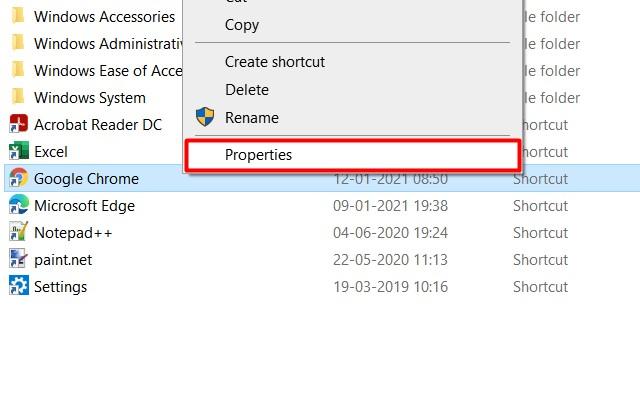

- Under the Target, add -no-sandbox at the end of the path string.
- The string should look something like this: "C:\Program Files (x86)\Google\Chrome\Application\chrome.exe" -no-sandbox

- Now restart your Chrome browser to check the unresponsive page error.
The sandbox will allocate extra memory and space for the Chrome browser to perform its task efficiently. This should potentially eliminate the Page Unresponsive error in the future as well.
Bottom Line
Chrome errors are inevitable, and you are right to get a few of them even after trying all the fixes above. But the bright side is that Page Unresponsive Error in Chrome is not fatal as it can be fixed easily.
If the issue appears repetitively, I recommend upgrading the RAM or a hard disk to SSD. This will significantly improve overall performance.
Lastly, if you've any thoughts or feedback, then feel free to drop in below comment box. You can also report the outdated information.


Is anyone else experiencing rapidly rising rates of Unresponsive Chrome pages over the last 2 weeks, and could that be due to the new Chrome 100 update? And if it is the reason, are there any recommended hints for solutions or work-arounds?
Thanks –
None of the above fixes explain why Chrome on a five year old quadcore at 1300 MHz goes to ‘page unresponsive’ when asked to load a minimal test webpage of < 0.2 MB. Even the banner image in it is highly compressed to take less than a tenth of a second to go through a 10Mb/s old download connection, yet a minute later the browser is still hanging around with 'page unresponsive'.
I suspect that the request from the browser to the DNS (domain name server) got 'lost in the post' because mousing to the right end of the typed webpage address bar in the browser window and hitting enter gets instant page load.
One might expect that a 'suspected lost DNS query' detected as 'page unresponsive' should be built into the browser to try resending the web page request once before annoying the user with a stupid timewaster notice.
The Chrome browser is heavy on the system resources and if we use the extensions, then totally burnout the machine. Perhaps the 1300MHz is not able to give the required juice to render even the lightest of light pages.
Even I have an old Dell PC running with Core i3 at 1700MHz, the results were the same as yours until I upgraded from HDD to SSD. It’s better now but still stuck at times.