
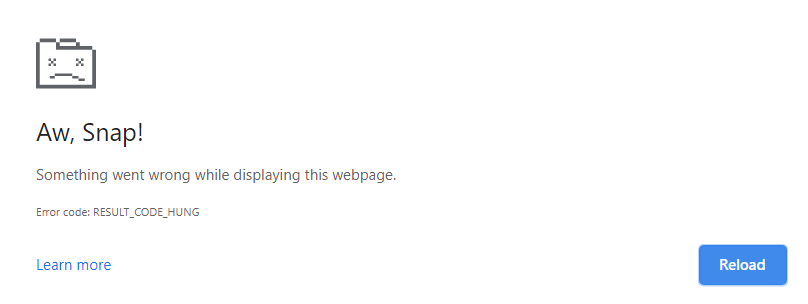
RESULT_CODE_HUNG typically refers to a situation where the renderer process becomes unresponsive or “hung” in the Chrome app. It can happen due to corrupt JavaScript code, excessive resource consumption, or other issues within the webpage or browser.
In order to fix this, you can hard refresh the web page, check in incognito mode, and switch to different networks. delete cache and data, disable heavy extensions, and switch to different DNS settings.
In this guide, I have shared written instruction about:
Method 1: Basic Browser Troubleshooting
Before moving on to the slightly advanced fixes, let’s start with some basic troubleshooting techniques, which are often considered the best Kickstarter.
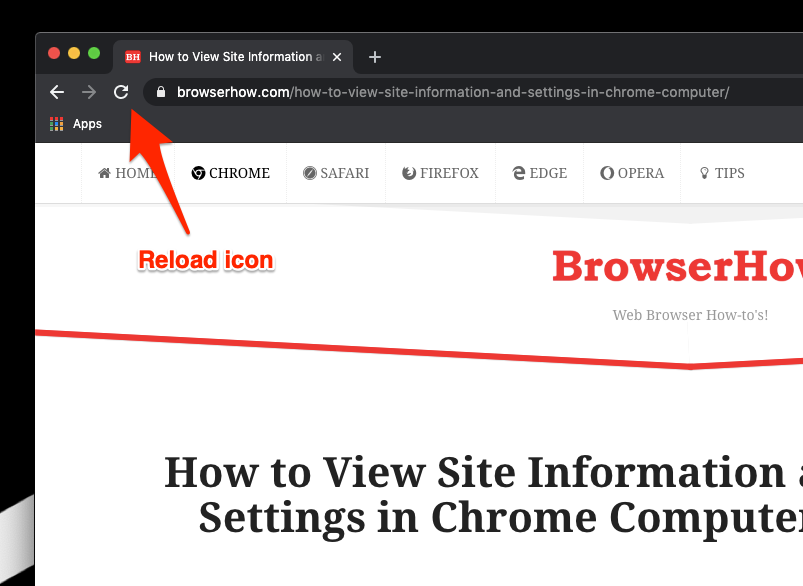
- First off, hard reload the page using the + keyboard shortcut, OR you could hold the or key and click on the Reload

 icon situated left of the address bar.

- If that doesn’t work out, try accessing that website in incognito mode. To do so, use the + + shortcut key combinations to open a new Incognito window. Then type in the URL in the address bar and see if the page can load correctly.


- Likewise, you could also switch the connection mode from wireless (WiFi) to wired (ethernet cable). Or try switching to a different network by sharing your device’s carrier data via the Hotspot.
Verify if any of these three methods rectified the error. If your answer is in a negative tone, then here are a few other methods that you should try.
Method 2: Delete Browser Cache and Website Data
If a lot of temporary data accrues over time, it could conflict with the proper functioning of the browser. As a result, you should frequently delete these data after regular intervals.
If you haven’t done so in quite a while, it seems to be a perfect time, as it might also fix the underlying issue.
- Launch the Chrome browser and type in the below URL in its address bar:
chrome://settings/clearBrowserData
- Now enable the tick-mark for Cookies other site data, and Cached images and files.
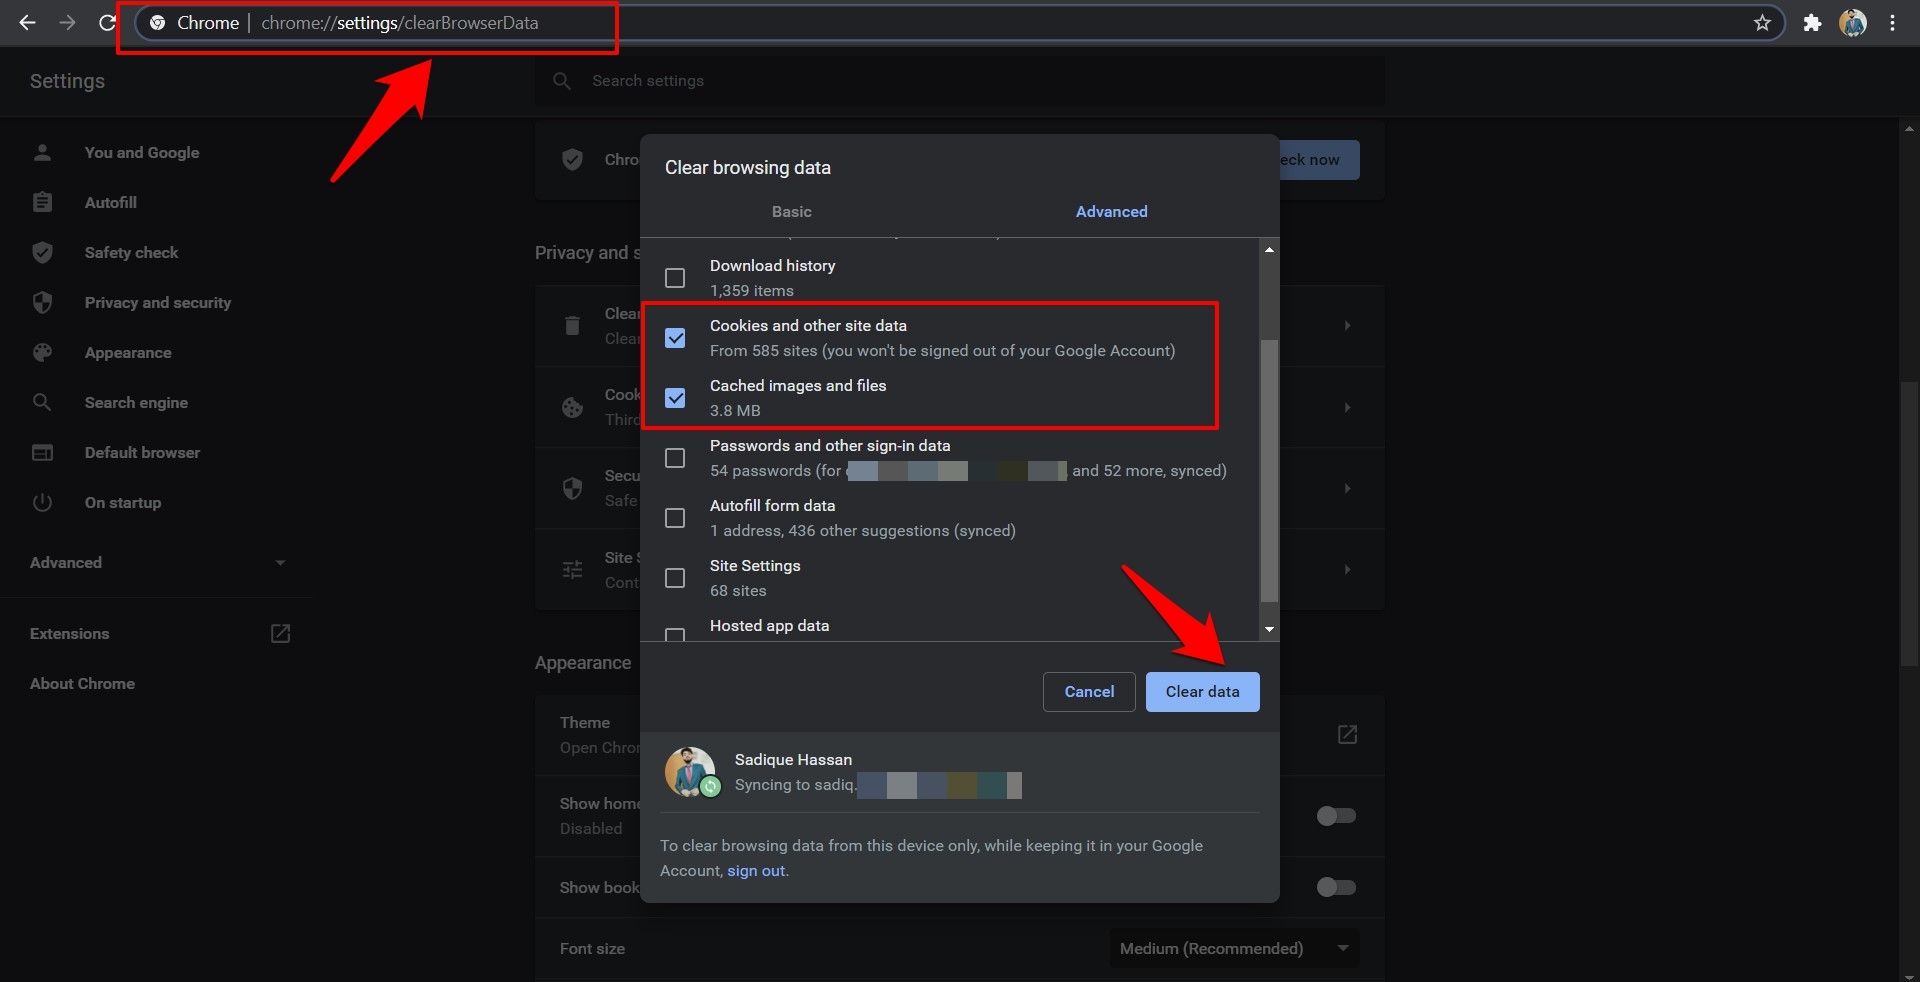

- Hit the button and wait for the process to complete.
Once done, relaunch Chrome and see if the browser error has been fixed.
Method 3: Disable Browser Extensions
In some instances, a third-party extension could cause a few issues with the loading of the websites. However, identifying the culprit could be effort-taking, especially if several extensions are installed.
The only way out is to disable all the extensions and re-enable them one at a time until you can recreate the issue. Once you have identified the extension that resulted in this error, you should consider removing it from your PC.
- Open Chrome on your PC and copy-paste the below location into the Omnibox:
chrome://extensions
- This should take you to the list of installed extensions.
- Disable all the extensions by turning off their toggle button.
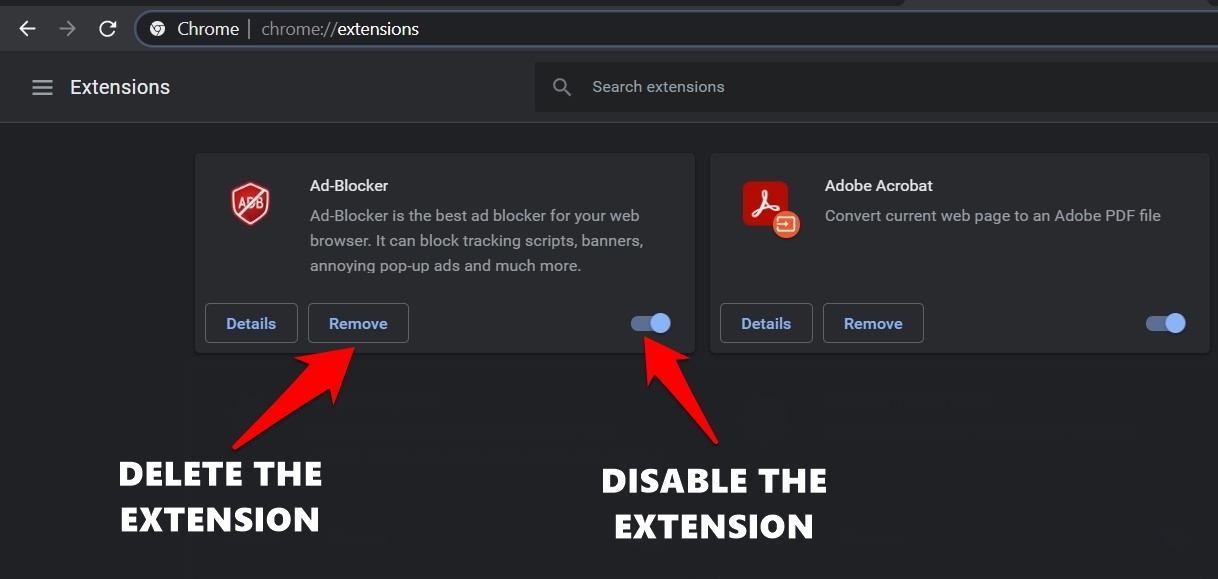

- Now try reloading the concerned page, and if the issue has been rectified, re-enable all the extensions one at a time.
As and when you can recreate the issue, remove the last enabled extension. However, if the extensions weren’t the root cause error, then turn your attention to other fixes shared below.
Method 4: Switch to Google DNS
If there are any issues with your Internet Service Provider’s DNS server, you could try switching to an alternate one. By default, the DHCP (Dynamic Host Configuration Protocol) instructs the browser to pick up your ISP’s DNS address. However, you could manually instruct the DHCP to pick up one of the public DNS servers, such as Cloudflare or Google.
In this regard, Chrome has in-built profiles for these public DNS servers. You only need to select the desired profile and complete the task.
- Launch Google Chrome and head to its Settings page under the More
 menu.
menu. - Switch to the Privacy and Security section, and click the Security tab.
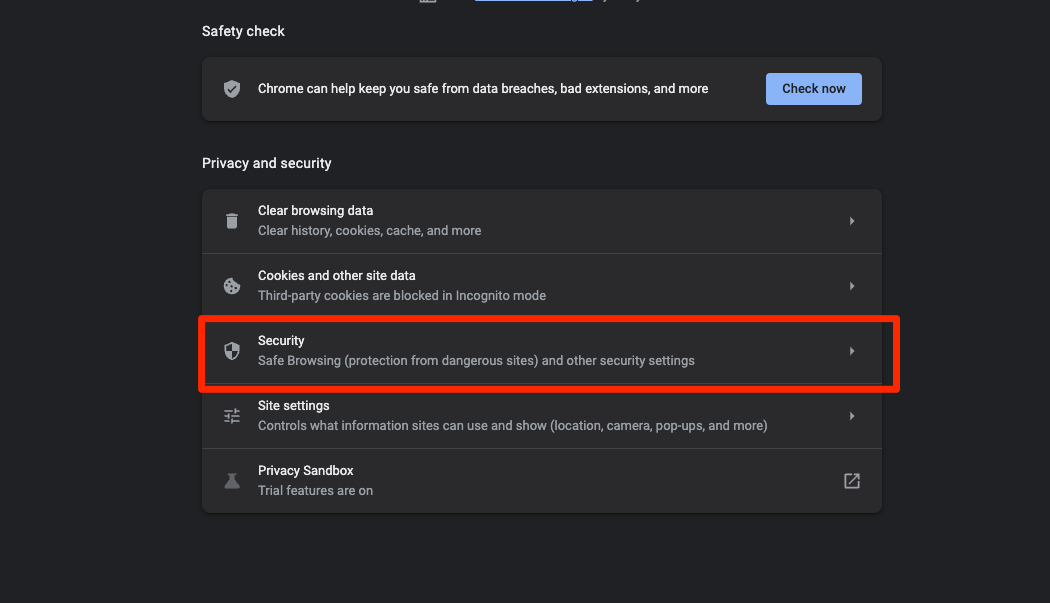

- Enable the Use Secure DNS toggle (if that isn’t enabled by default).
- Next up, switch to the With Custom radio button.
- Select Google (Public DNS) from the drop-down.
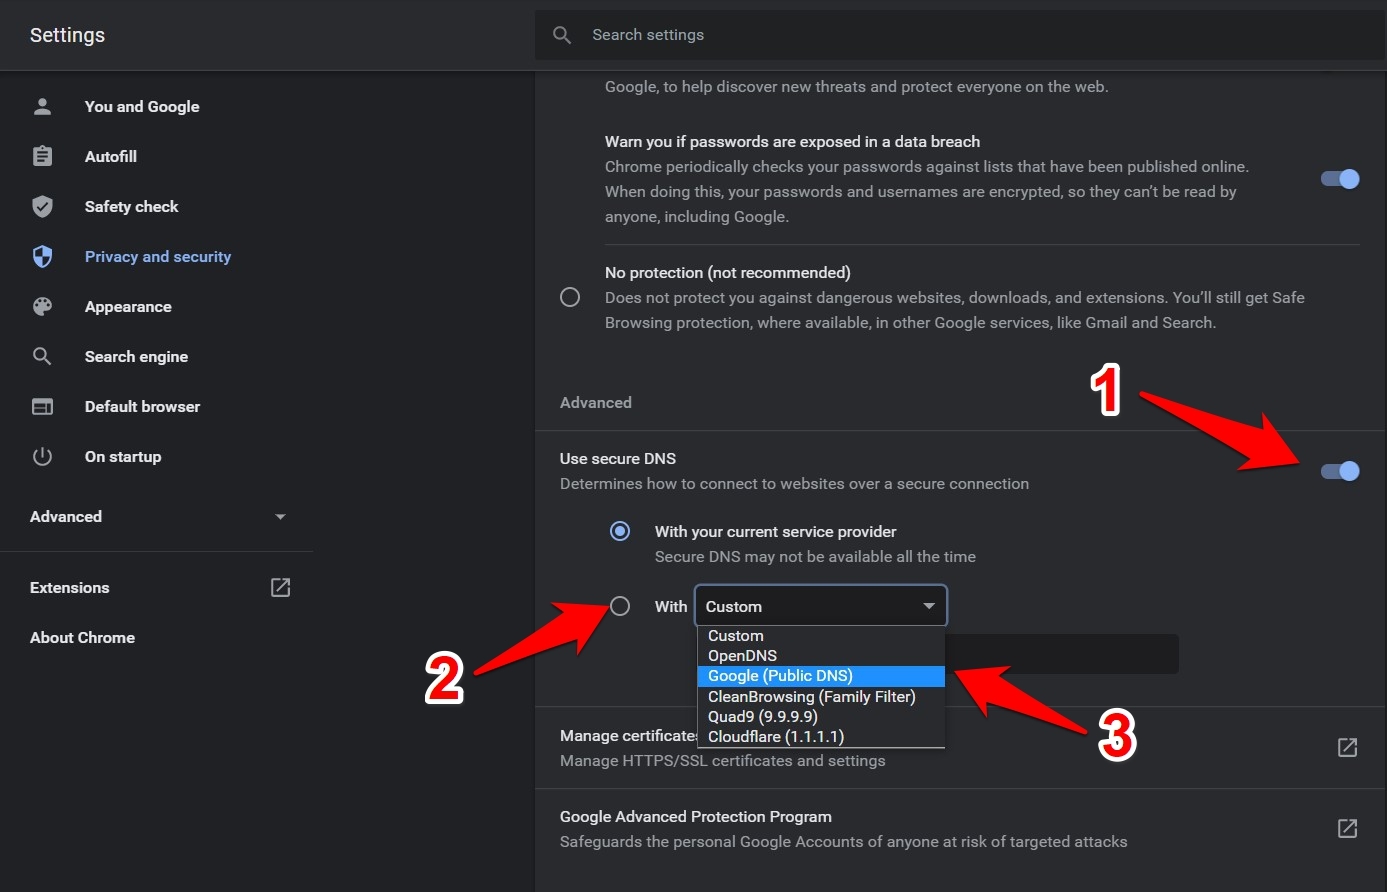

Doing so will set 8.8.8.8 as the primary DNS and 8.8.4.4 as the secondary one. Now try opening the site that was earlier displaying the error; it should now be accessible.
Bottom Line
In my case, the ad blocker extension repeatedly caused the browser issue. After I removed the extensions, I no longer encountered the error message on any sites.
Lastly, if you've any thoughts or feedback, then feel free to drop in below comment box. You can also report the outdated information.


I’m afraid to speak to soon but changing to Google public dns seems to have fixed my issue.
Got this error upon streaming my cable TV on my laptop, via cable’s website for laptop streaming, specifically MeWe TV channel. I’ve checked for all updates for the computer and all browsers, cleared all caches and cookies, and done pretty much everything suggested above. Still won’t work. Checked some other channels and they seem to be okay. I’m at a loss.
A Youtube extension is affecting “some specific files” on Ancestry. I “know” it’s Youtube extensions because I accidently found and deleted the Youtube extensions once before. Now, I cannot find where the Youtube extensions are located. Can you help me find and delete?
I can’t even load my setting menu…….I need help is there any other fixes?
I vostri consigli sono ottimi li ho provati tutti a parte l’ultimo avanzato.Speravo di riuscire a togliere questo errore che è veramente una seccatura.Grazie
——- translate ——-
Your tips are excellent. I have tried them all apart from the last advanced one. I was hoping to be able to remove this error which is really a nuisance. Thanks
Nostante i vostri ottimi consigli non sono riuscita da giorni a togliere il problema della pagina interrotta della mia banca.Ho telefonato alla assistenza numero verde che mi ha suggerito soluzioni tipo cambiare codice cliente o usare altro programma : Windows Edge che su Windows 7 non so se si può usare. Il problema secondo me risale alla banca qualcosa che è stato modificato se no non avrei problemi di vedere la pagina integra.
——– translate ——-
Despite your excellent advice I have not been able for days to remove the problem of the interrupted page of my bank.I phoned the toll-free number assistance who suggested solutions such as changing the customer code or using another program: Windows Edge which on Windows 7 I don’t know if you can use. In my opinion, the problem goes back to the bank, something that has been changed otherwise I would have no problem seeing the page intact.
Only YouTube is constantly showing “Code_Hung”. I cleaned up the cache settings and all that stuff, other websites works very well but YouTube on my pc can’t but in my cellphone it can. I updated my browser and still the same problem only on YouTube. I wait ten minutes and YouTube works but so slow. Maybe it’s an issue of the platform but if you can give an advice it will be welcomed.
Nope it’s Facebook for me